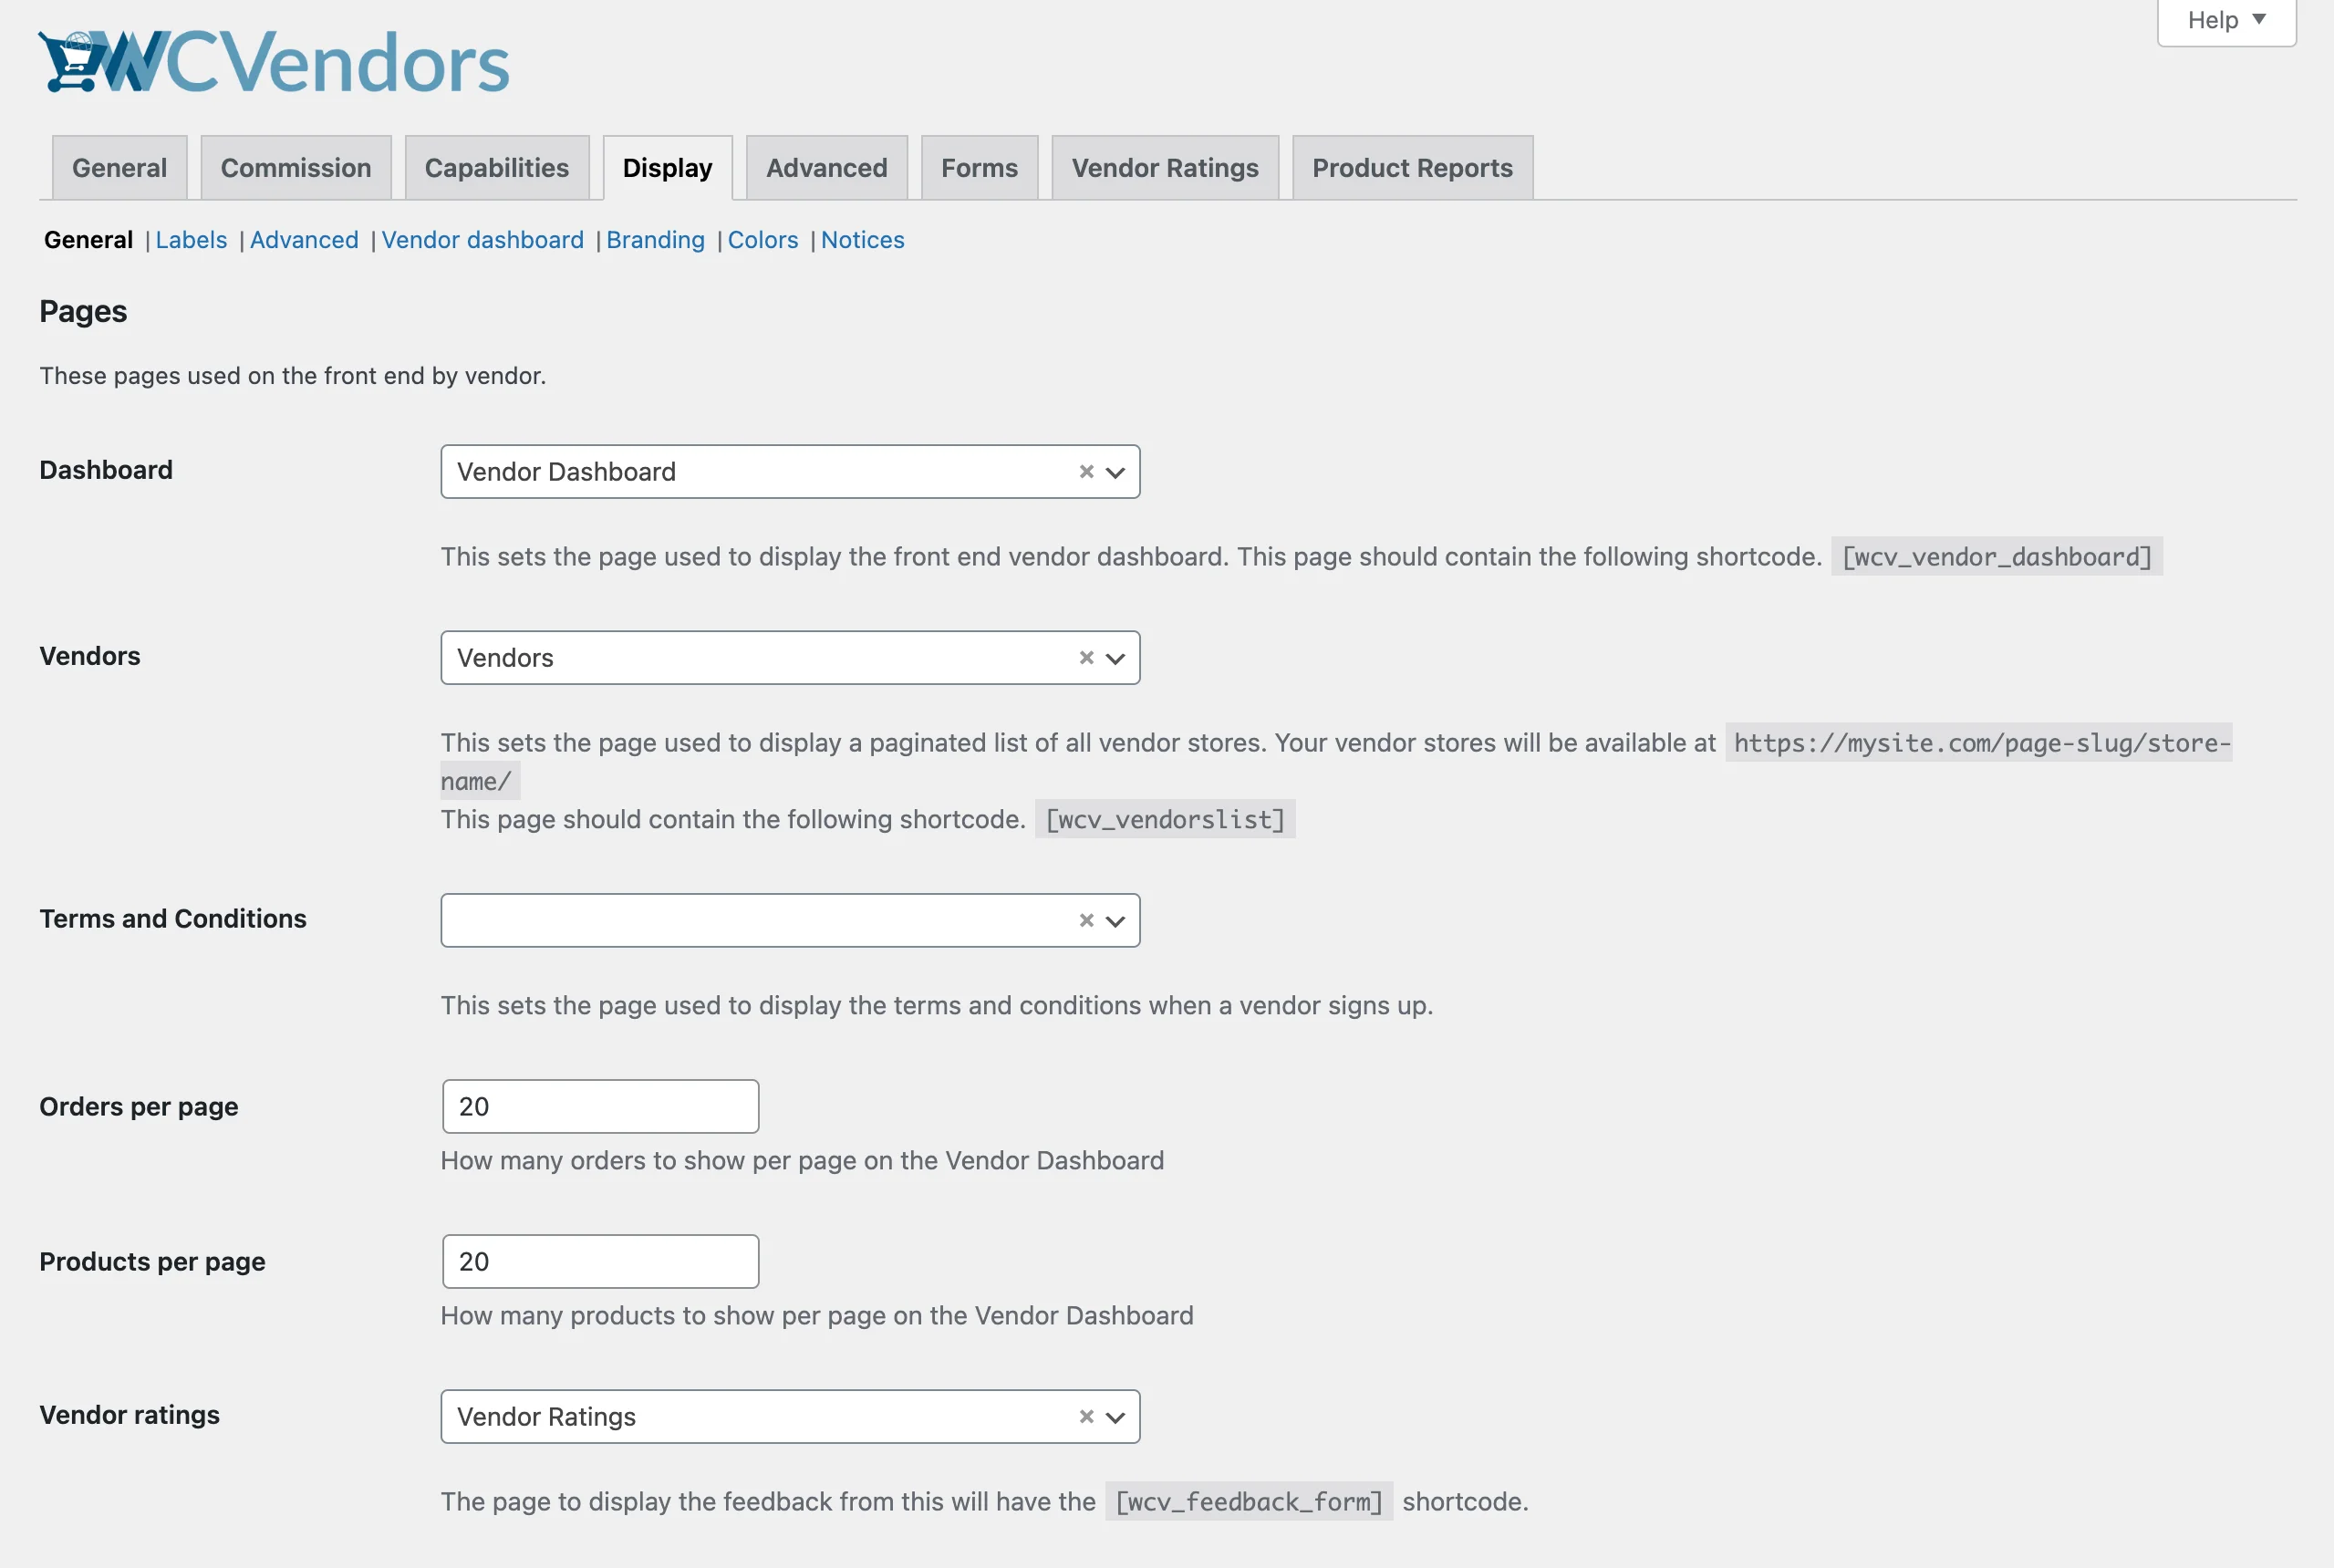
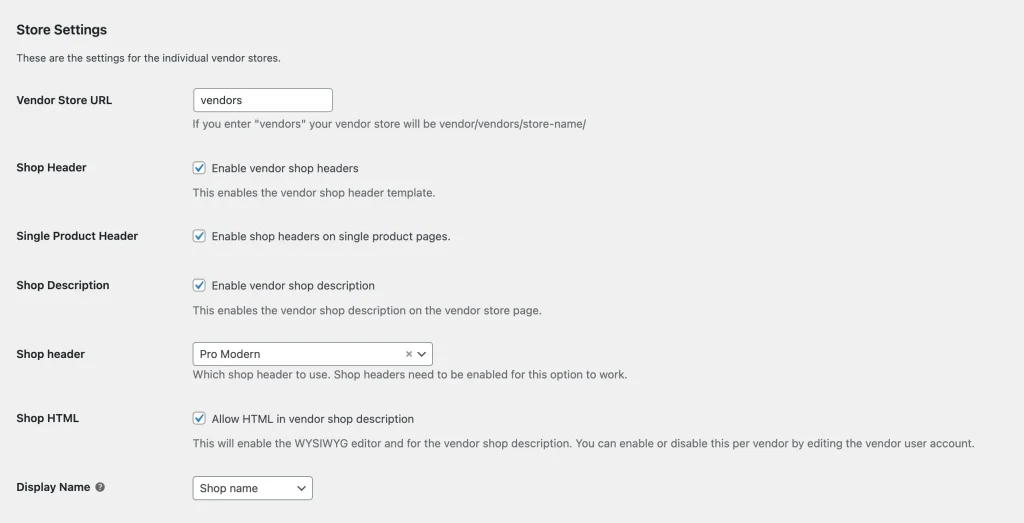
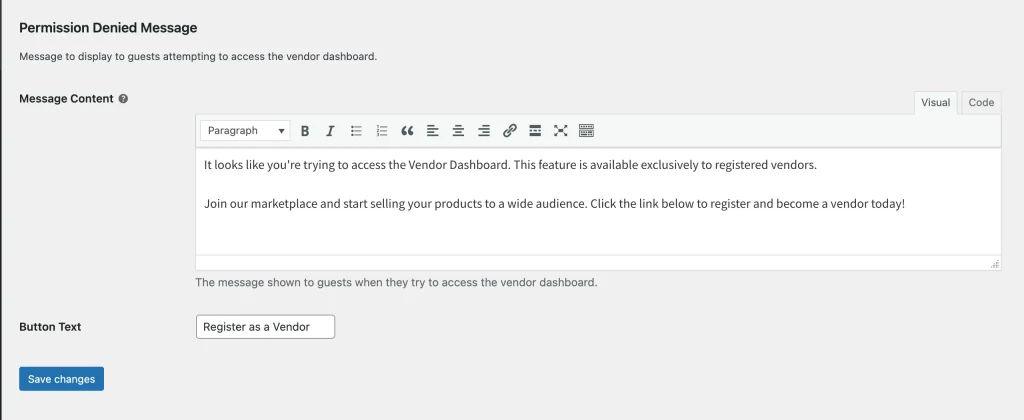
The General tab of the Display settings covers the core elements of the WC Vendors front-end experience. It is divided into four main sections:
- Pages – Configure essential pages used by vendors.
- Store Settings – Manage vendor store-related options.
- Vendors List Settings – Control how the layout of the vendor list page
- Permission Denied Message – Customize the message to non-vendor users on the vendor dashboard.
Pages
WC Vendors relies on several key pages and shortcodes to function properly. If these pages are missing or incorrectly set up, your marketplace may not work as expected.
All required pages are automatically created when you run the setup wizards for both WC Vendors Marketplace and WC Vendors Pro. If not, you can create them manually by adding the respective shortcodes.
Tip: For vendor dashboard-related pages, use a full-width page template if your theme offers one. In our documentation and screenshots, we use the Storefront theme, which includes this layout.
1. Vendor Dashboard
This is the page used by the WC Vendors Marketplace for the vendor dashboard. The page will be automatically created and selected when you complete the WC Vendors Marketplace setup wizard. If the page is removed or not created, you can manually set it up by adding the required shortcode.
To configure the page, make sure to include the [wcv_vendor_dashboard] shortcode. Once added, vendors will be able to access their frontend dashboard.
With WC Vendors Pro, the same vendor dashboard page is used, but Pro unlocks additional features, providing a full-featured dashboard for vendors. This removes the need for vendors to access the WordPress admin area, as they can manage orders, products, settings, coupons, and more directly from the dashboard.
Note: The [wcv_pro_dashboard] shortcode is no longer required. When WC Vendors Pro is active, all of its features are integrated into the main [wcv_vendor_dashboard] page, providing an enhanced and unified dashboard for vendors.
2. Vendors
This is the page you assign to display your vendor directory.
Tip: If you name this page “vendors” and have set the same slug in the Store Settings below, it will serve as both the vendor directory and the base URL for individual vendor stores.
Example:
- https://mytestmarketplace.com/vendors/ – Displays the full vendor directory
- https://mytestmarketplace.com/vendors/vendor1-store/ – Displays a specific vendor’s store page
To configure the vendor page with WC Vendors Marketplace, simply add the [wcv_vendorslist] shortcode to the page. This shortcode is used for both the free and Pro versions of WC Vendors, but with WC Vendors Pro, additional features and customization options are available.
For more details on the various options and features available with the [wcv_vendorslist] shortcode, refer to our shortcodes documentation.
3. Terms and Conditions
You can select a page for the Terms and Conditions option. This will display a checkbox on the vendor registration form, requiring vendors to review and agree to your marketplace’s terms before signing up.
Note: This page does not require a shortcode — simply create the content and assign the page in the settings.
4. Orders per page
Set how many vendor orders to display per page on the Vendor Dashboard. Useful for managing large order histories.
5. Products per page
Define how many products to show per page on the Vendor Dashboard for easier browsing and management.
6. Vendor Ratings [Pro]
The Vendor Rating System allows customers to leave feedback on their purchases. Once enabled, a “Leave Feedback” button will appear on the Orders section of the customer’s My Account page.
To set this up, create a page and add the [wcv_feedback_form] shortcode. This page will be used to display the feedback form when customers click the button.
Store Settings
The Store Settings section allows you to configure various aspects of each vendor’s store page. Here, you can manage settings such as the store URL, header, display name, and other important elements.
1. Vendor Store URL
The Vendor Store URL settings let you create a custom URL for each vendor’s store. This allows you to personalize the URL and make it unique to each vendor.
2. Shop Header
The Shop Header adds a distinct header section to each vendor’s store page. This helps visually differentiate vendor stores from the main product archive on your site.
3. Single Product Header
This setting allows you to enable or disable the vendor header on single product pages. It’s useful if you want to display a banner or store details on the vendor’s main store page but hide them on individual product pages.
4. Shop Description
The Shop Description setting is specific to WC Vendors Marketplace (free version). It displays the vendor’s store description within the store header. This is especially useful, as the free version does not include pre-built vendor store headers.
5. Shop Header (Pro)
The default header in WC Vendors Marketplace offers a basic layout that may require custom styling to match your theme. WC Vendors Pro enhances this by providing two pre-designed store header templates with cleaner, more polished styles — ready to use out of the box for a more seamless marketplace experience.
6. Shop HTML
This setting enables a WYSIWYG editor for the vendor shop description fields, allowing vendors to format their descriptions with rich text. You can also enable or disable this feature individually for each vendor by editing their user account.
7. Display Name
Use the Display Name dropdown to choose what vendor information appears on the front end. Options include the vendor’s name, shop name, username, or email address.
Vendors List Settings
These settings control the appearance and behavior of your Vendors List page, allowing you to customize how vendors are displayed and how access is handled for guests.

1. List Display
Choose the default layout for the vendor list. This controls how vendor profiles appear on the Vendors List page — such as grid or list view (depending on your theme or styling preferences).
2. Default Avatar
Set a default avatar image for vendors who haven’t uploaded their own profile picture. This helps maintain a consistent look across your marketplace.
Permission Denied Message
These settings customize the message shown to non-logged-in users or guests who try to access the Vendor Dashboard without proper permissions.
1. Message Content
The text is displayed when a guest attempts to access the vendor dashboard. This can be customized to guide users or encourage them to sign up.
2. Button Text
The label for the call-to-action button shown with the message. By default, it displays “Register as a Vendor”, but you can change it to better suit your tone or branding.


