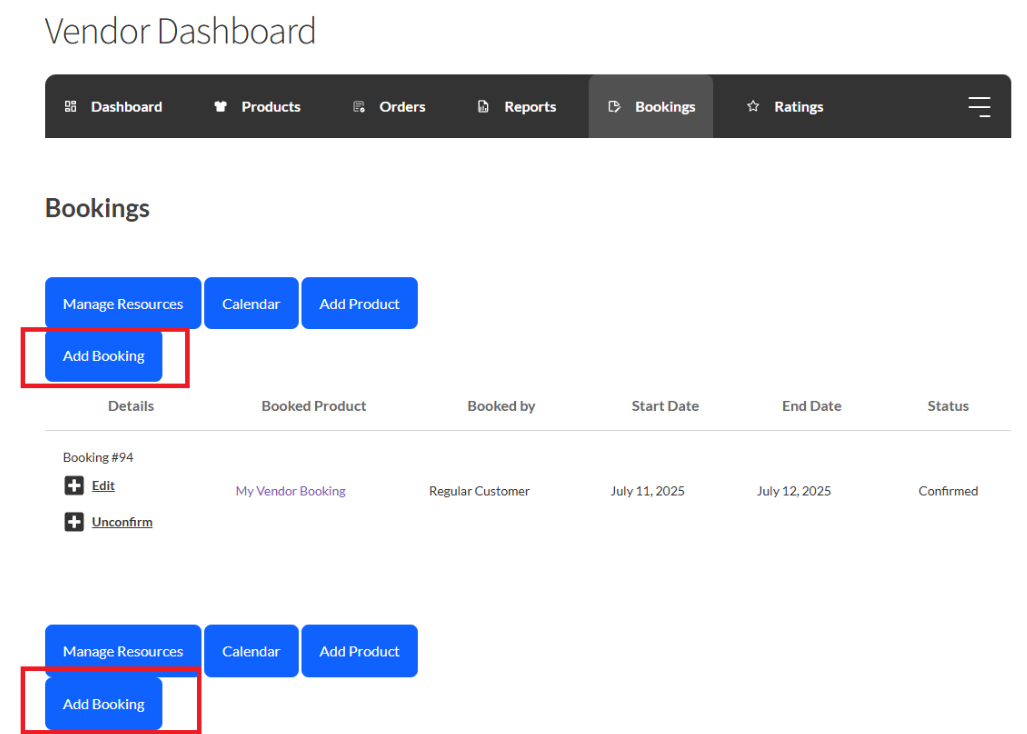
In the WC Vendors WooCommerce Bookings v1.4.1 release, we have added a feature that allows vendors to manually create bookings.
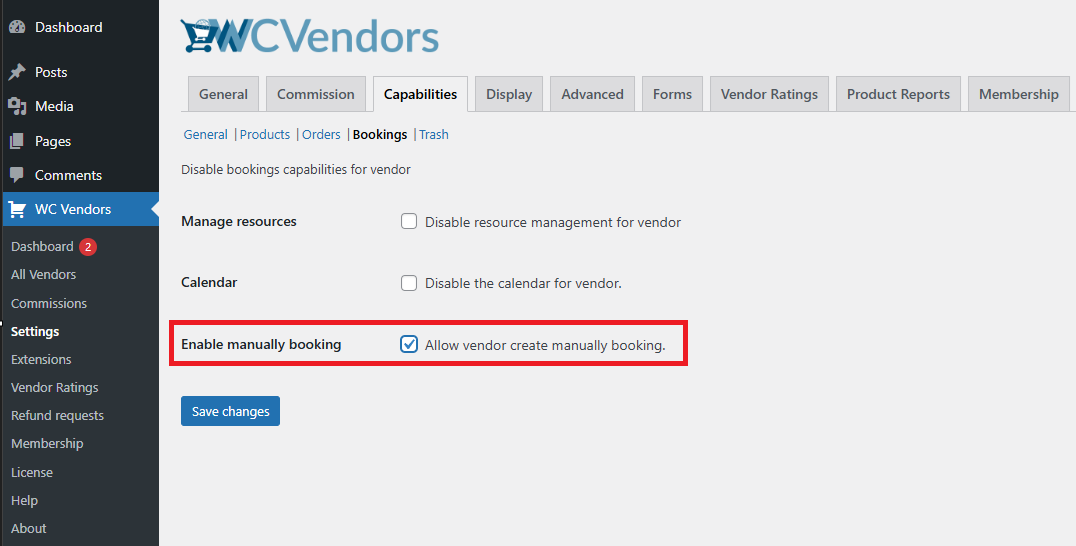
1. Enable the Capability (Admin)
You can enable this feature by following these instructions:
- Go to WP Admin → WC Vendors → Settings → Capabilities.
- Open the Booking tab.
- Tick Enable manual booking.
- Save changes.
Once enabled, every vendor role with booking permissions will see an Add Booking button on their dashboard.
2. Vendor Workflow
Launch the Form
The vendor logs in, goes to Pro Dashboard → Bookings, and clicks Add Booking to open a new booking form.
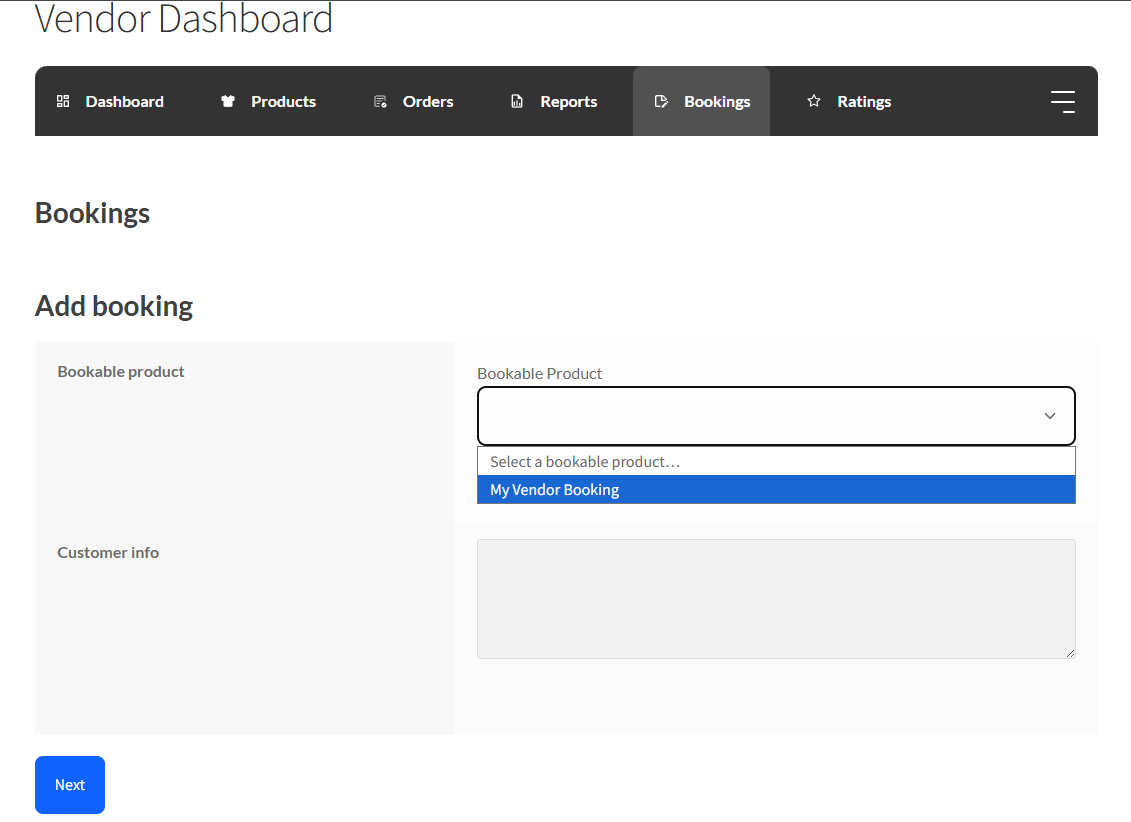
Select the product and customer
The vendor chooses the bookable product from the dropdown, then searches for an existing customer or creates a new one on the spot. These details can be edited later if needed.
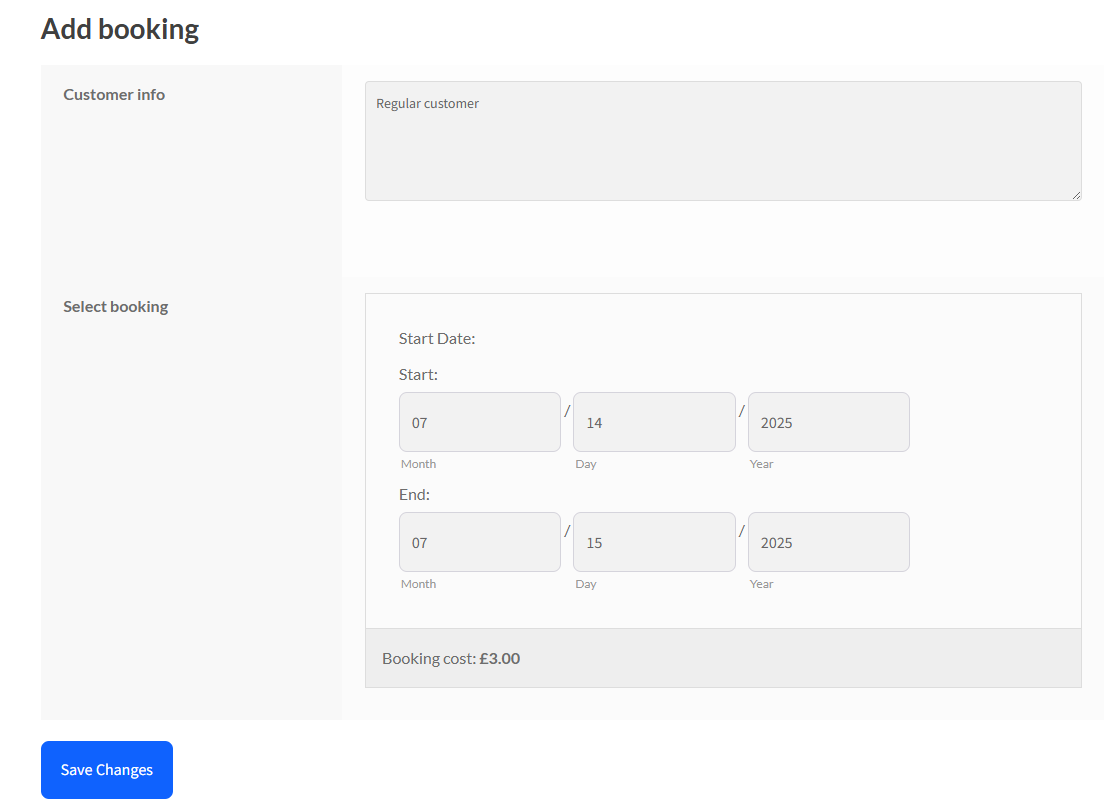
Pick a date and time
Using the calendar or availability picker, the vendor selects the required booking slot and clicks Save to proceed to the preview screen.
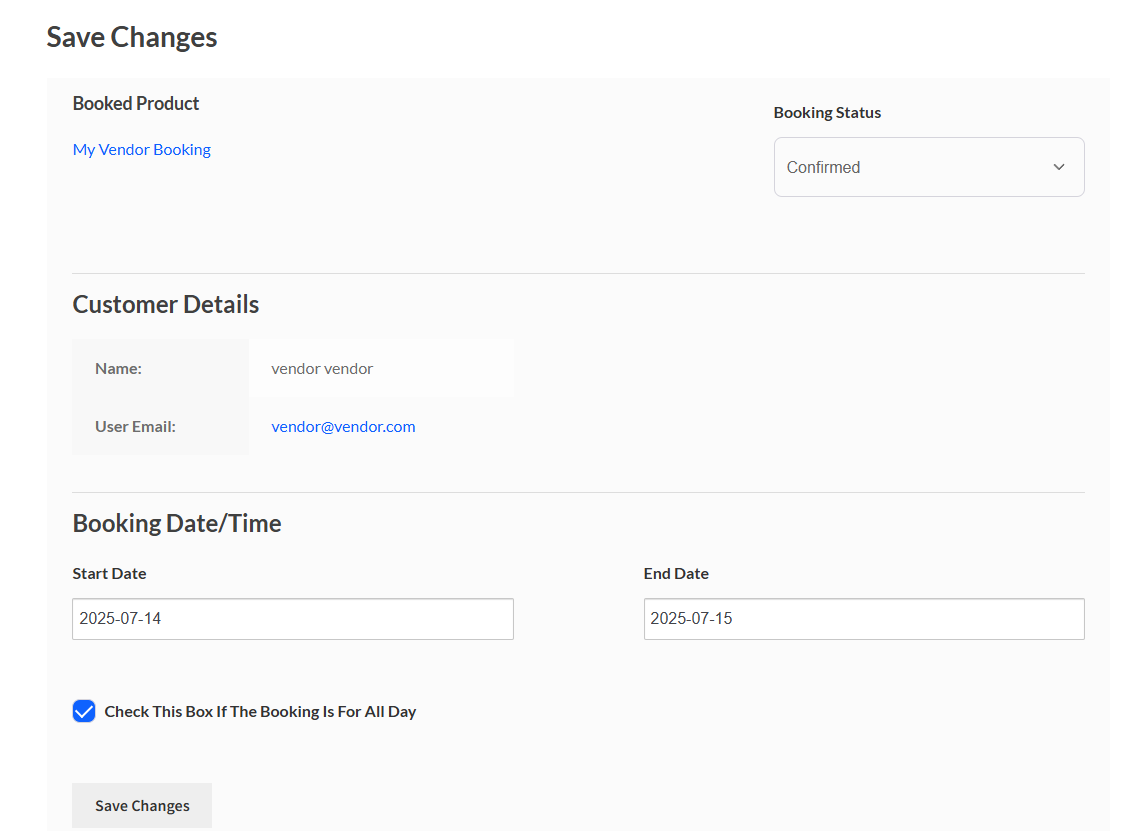
Review and edit
On the Booking Preview page, the vendor confirms the product, customer, and schedule, adjusts the status (for example, Pending Payment, Confirmed, or Cancelled), and can fine-tune the date, time, or duration before saving the booking.
