The WC Vendors Signup plugin also provides a ready-to-use login page, making it easy for vendors to sign in and manage their accounts securely.
Steps to Add a Vendor Login Page
1. Locate the Vendor Login Page
- A default Vendor Login page is automatically created when the plugin is activated.
- You can find it under Pages > All Pages in your WordPress admin.
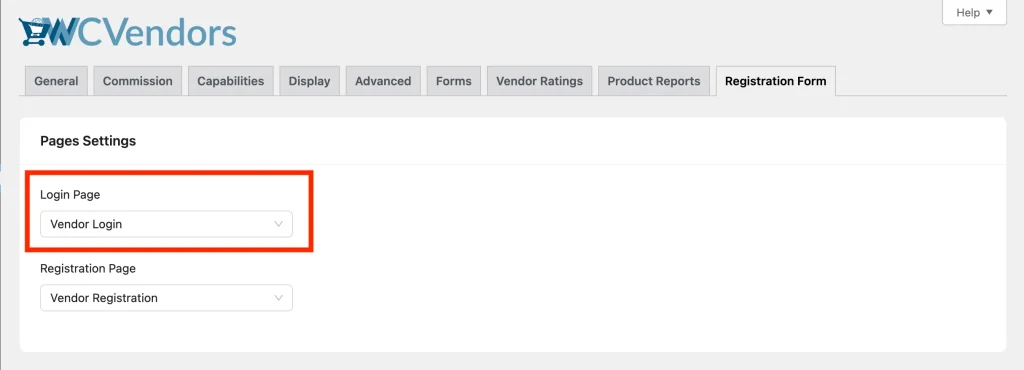
2. Assign the Vendor Login Page (Optional)
- If you need to change the default, go to WC Vendors > Settings > Registration Forms.
- Select the page you’d like to use as the login page.

3. Embed the Vendor Login Form Anywhere
- Use the shortcode
[wcv_login_form]to display the vendor login form in any page, post, or widget. - This gives you flexibility to include the login form where it fits best in your site’s flow.
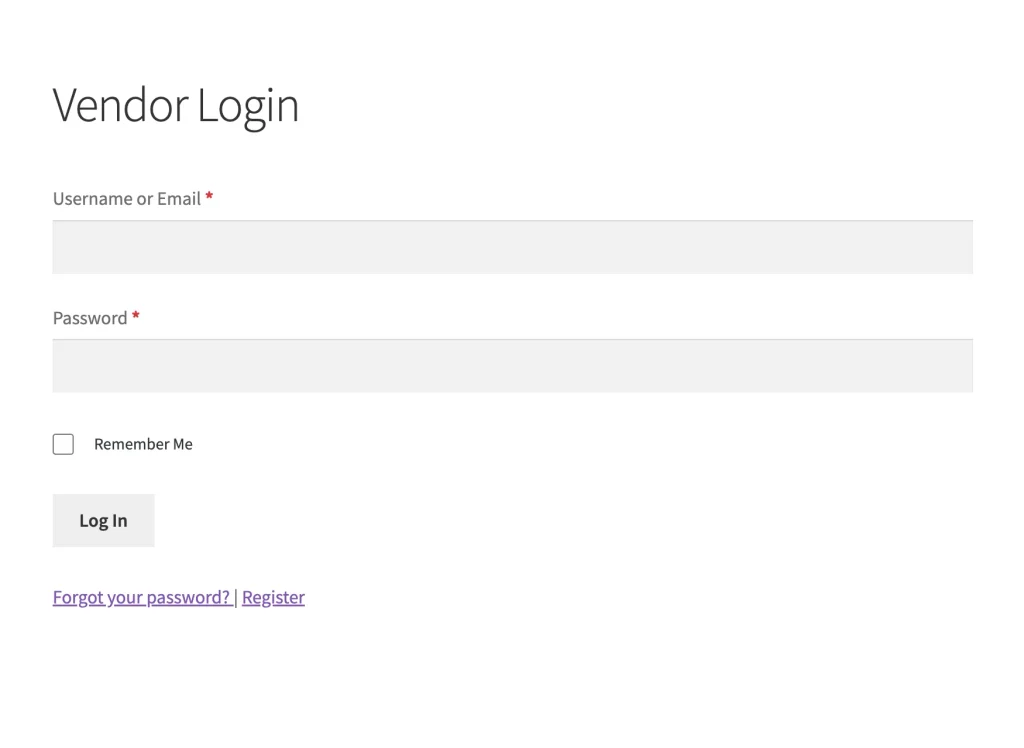
4. Vendor Login Form Details
The login form itself is not customizable.
It contains the standard fields for Username/Email Address and Password, similar to the standard WooCommerce login form.
Below the form, vendors will also see:
- A “Forgot Password?” link to reset their credentials
- A Register link to the signup page
5. Customize the Vendor Login Page
You can add extra content above or below the login form by editing the Vendor Login page in the WordPress editor.
For example, you might include:
- A welcome message for vendors
- Helpful links (e.g., “Having trouble logging in? Contact support here”)
- Marketplace guidelines or reminders
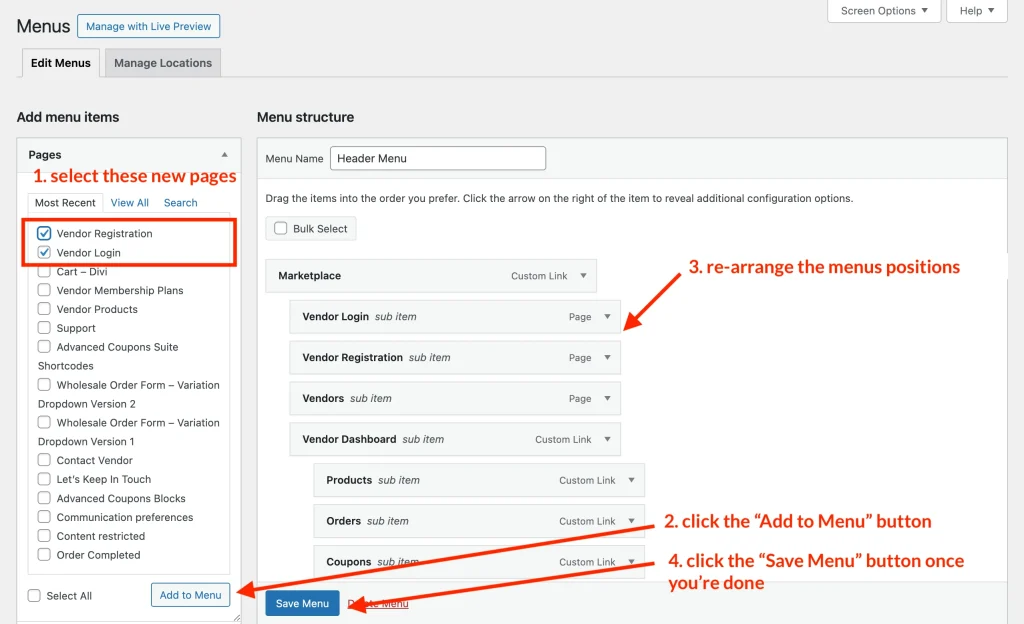
5. Add the Login Page to Your Menu
- Go to Appearance > Menus.
- Add the Vendor Login page to your navigation menu so vendors can easily find it.

6. Test the Vendor Login Flow
- Log out of your WordPress admin.
- Visit the Vendor Login page and log in as a vendor to confirm the process works smoothly.

Your vendors can now easily sign in and access their dashboards through a dedicated login page.
Looking to create a vendor registration page instead? Check out our guide here: How To Add A Dedicated Vendor Registration Page