The WC Vendors Signup plugin makes it simple to create a professional vendor registration page for your marketplace. This ensures potential vendors can apply with all the information you need, using a fully customizable form.
Steps to Add a Vendor Registration Page
1. Build Your Custom Vendor Registration Form
- Navigate to WC Vendors > Settings > Registration Forms.
- Use the drag-and-drop form builder to add or remove fields.
- Save your form once finished.
2. Available Vendor Registration Form Fields
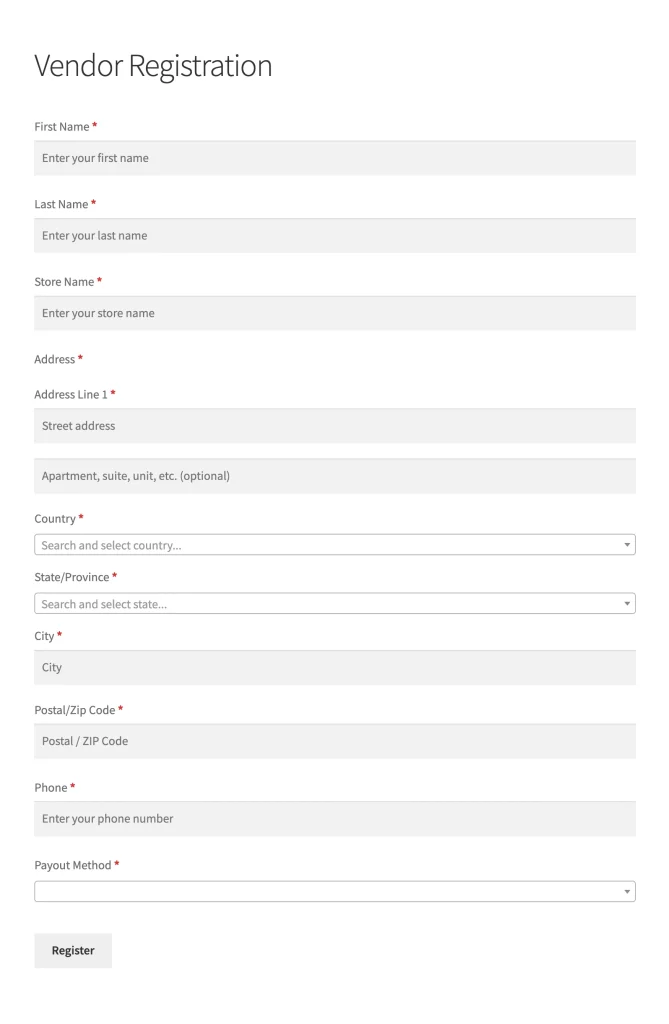
The WC Vendors Signup plugin comes with a set of default fields that are included in the vendor registration form:
- Email Address
- Password
- First Name
- Last Name
- Store Name
- Address
- Phone
- Payout Method
These are the essentials needed for a vendor account.
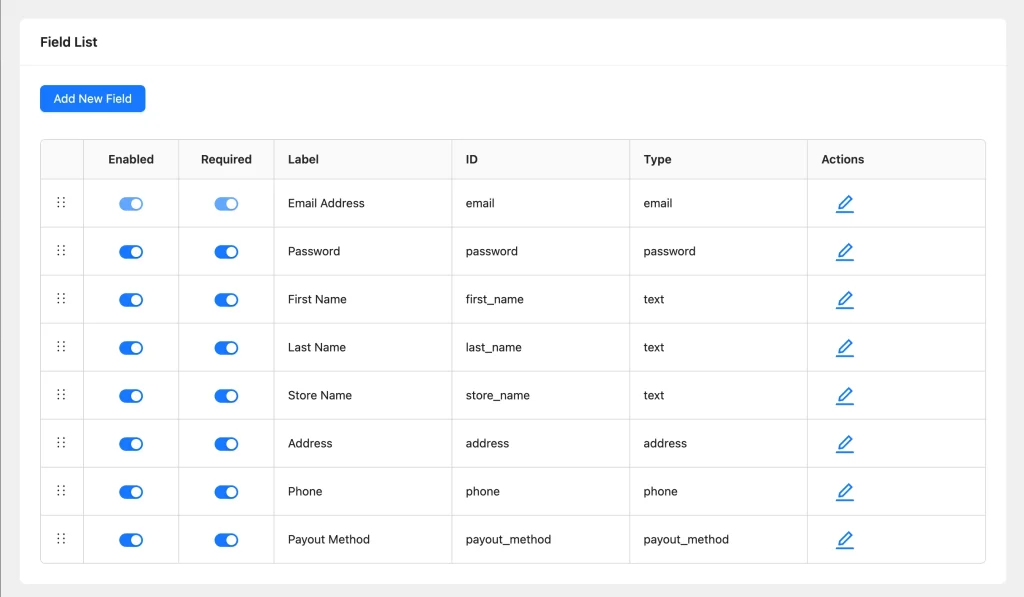
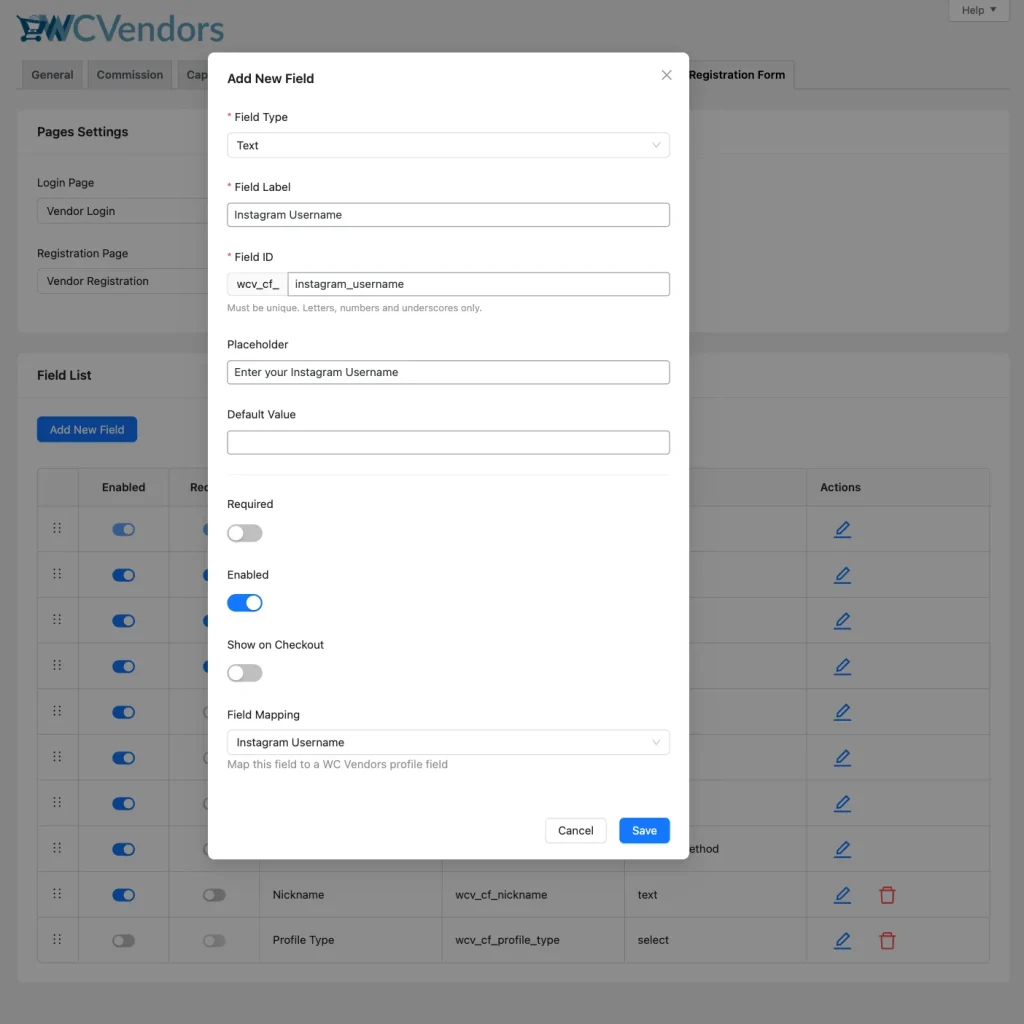
In addition to the default fields, you can add your own custom fields to collect more information during signup. Each custom field will have an ID prefixed with wcv_cf_ (for example: wcv_cf_business_license).
Here’s a breakdown of the available custom field types and how they can be used:
- Text
Collect short, single-line inputs such as business name or contact person’s title.
- Text Area
Useful for longer responses like business description or special requirements.
- Number
Accepts numeric input, e.g., tax ID number or years in operation.
- Email
For capturing additional email addresses, such as a support contact.
- Phone
Ideal for collecting a secondary or customer support phone number.
- URL
Great for gathering links like vendor websites or social media profiles.
- Select (Dropdown)
Vendors can choose from predefined options, e.g., product category (Clothing, Jewelry, Food).
- Radio
Best for single-choice questions such as Do you already sell online? (Yes/No).
- Checkbox
Allows multiple selections, e.g., sales platforms (Amazon, Etsy, eBay).
- Hidden
Records information behind the scenes without vendor input, such as referral source.
- File Upload
Vendors can upload files like a business license or tax certificate.
- Image Upload
Collect store logos or sample product images.
- Content
Displays text or instructions within the form (not an input field).
- Terms & Conditions
Adds a required checkbox for vendors to accept your marketplace policies before registering.
- Payout Method
Lets vendors select how they’ll receive payments (e.g., PayPal, Bank Transfer, Stripe).
3. Assign the Vendor Registration Page
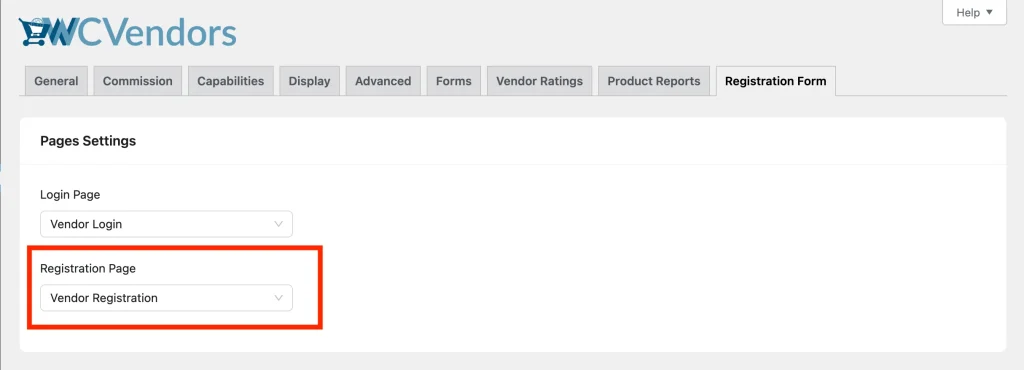
- A default Vendor Signup page is automatically created when the plugin is activated.
- If you’d like to use a different page, go to WC Vendors > Settings > Registration Forms and assign your preferred page.
4. Embed the Vendor Registration Form Anywhere
- Use the shortcode
[wcv_signup_form]to display the vendor registration form on any page, post, or widget area. - This gives you the flexibility to place the signup form where it fits best in your site’s layout or onboarding flow.
5. Customize the Registration Page
You can add extra content above or below the vendor registration form by editing the Vendor Registration page in the WordPress editor.
For example, you might include:
- A short welcome message inviting vendors to join your marketplace
- Instructions or tips on how to complete the registration form
- Links to important pages such as vendor guidelines or terms and conditions
- A note about approval process or next steps after submitting the form
6. Add the Vendor Registration Page to Your Menu
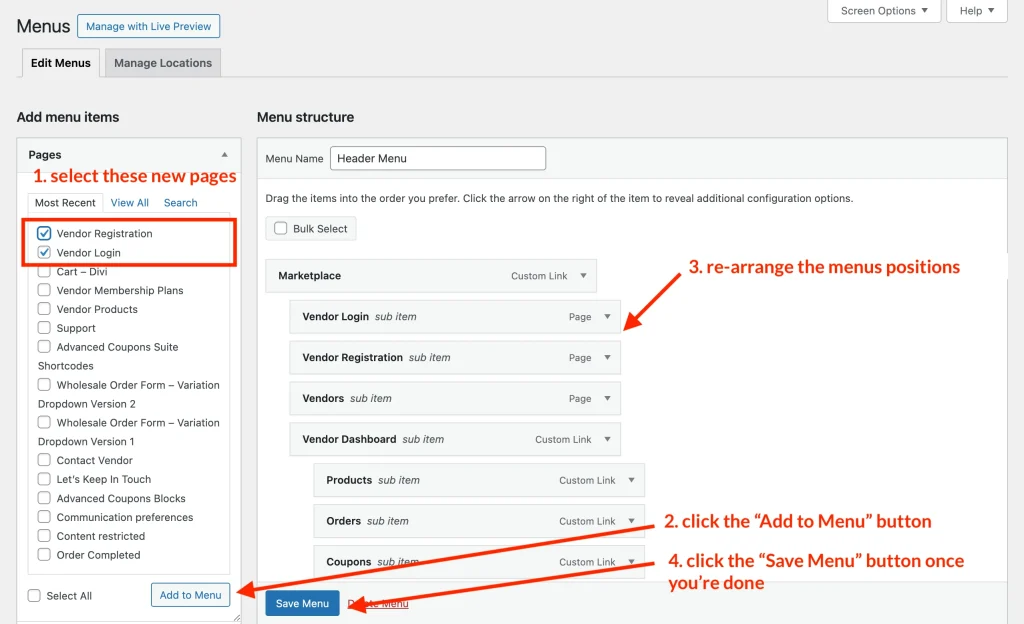
- Go to Appearance > Menus.
- Add the Vendor Registration page to your site’s navigation menu so it’s easy for vendors to find.
7. Test the Vendor Registration
- Visit the signup page and submit a test registration.
- Confirm the data is captured correctly and the vendor is added to WC Vendors.
8. Managing Vendors After Registration
Once vendors have signed up, you can manage their accounts under WC Vendors > All Vendors in your WordPress dashboard. From here, you can review, approve, or decline new vendor applications.
If you prefer to skip manual approval, you can enable automatic approvals by going to WC Vendors > Settings > General and disabling the “Vendor Approval – Manually approve all vendor applications” option.
9. What’s Next After Setting Up Your Vendor Registration Page
Your vendors can now easily sign in and access their dashboards through a dedicated login page.
Looking to create a signup page too? Check out this article: How To Add A Dedicated Vendor Login Page