WC Vendors Membership is a powerful extension designed to help marketplace owners manage and control vendor access through customizable subscription plans. To use this extension effectively, you’ll also need the WooCommerce Subscriptions plugin, as it powers the membership functionality.
To summarize, you need the following:
- WC Vendors Membership: Available from WC Vendors
- WooCommerce Subscription: Available from WooCommerce
Using these together allows you to create subscription-based vendor memberships with specific limitations and benefits tailored to your marketplace structure.
Key Membership Features & Limitations
Each vendor membership plan can include pre-defined rules and restrictions such as:
- Product Limits: Restrict the total number of products a vendor can create.
- Commission Settings: Select the commission type and rates to offer more competitive rates for higher-tier memberships.
- Disk Usage Limits: Define the maximum amount of server space (in MB) that vendors can use for their product images, files, and other data.
- File Upload Limits: Limit how many individual files a vendor can upload (separate from disk space).
- Category Restrictions: Control which product categories vendors can use.
Creating Vendor Membership Plans
Setting up a membership plan is straightforward:
- Go to Products > Add New
- Under Product Data, choose Vendor Membership
From there, you can configure:
- Membership cost
- Billing cycle and renewal terms
- Signup fees
- Free trial availability
You’ll also define specific vendor limitations such as:
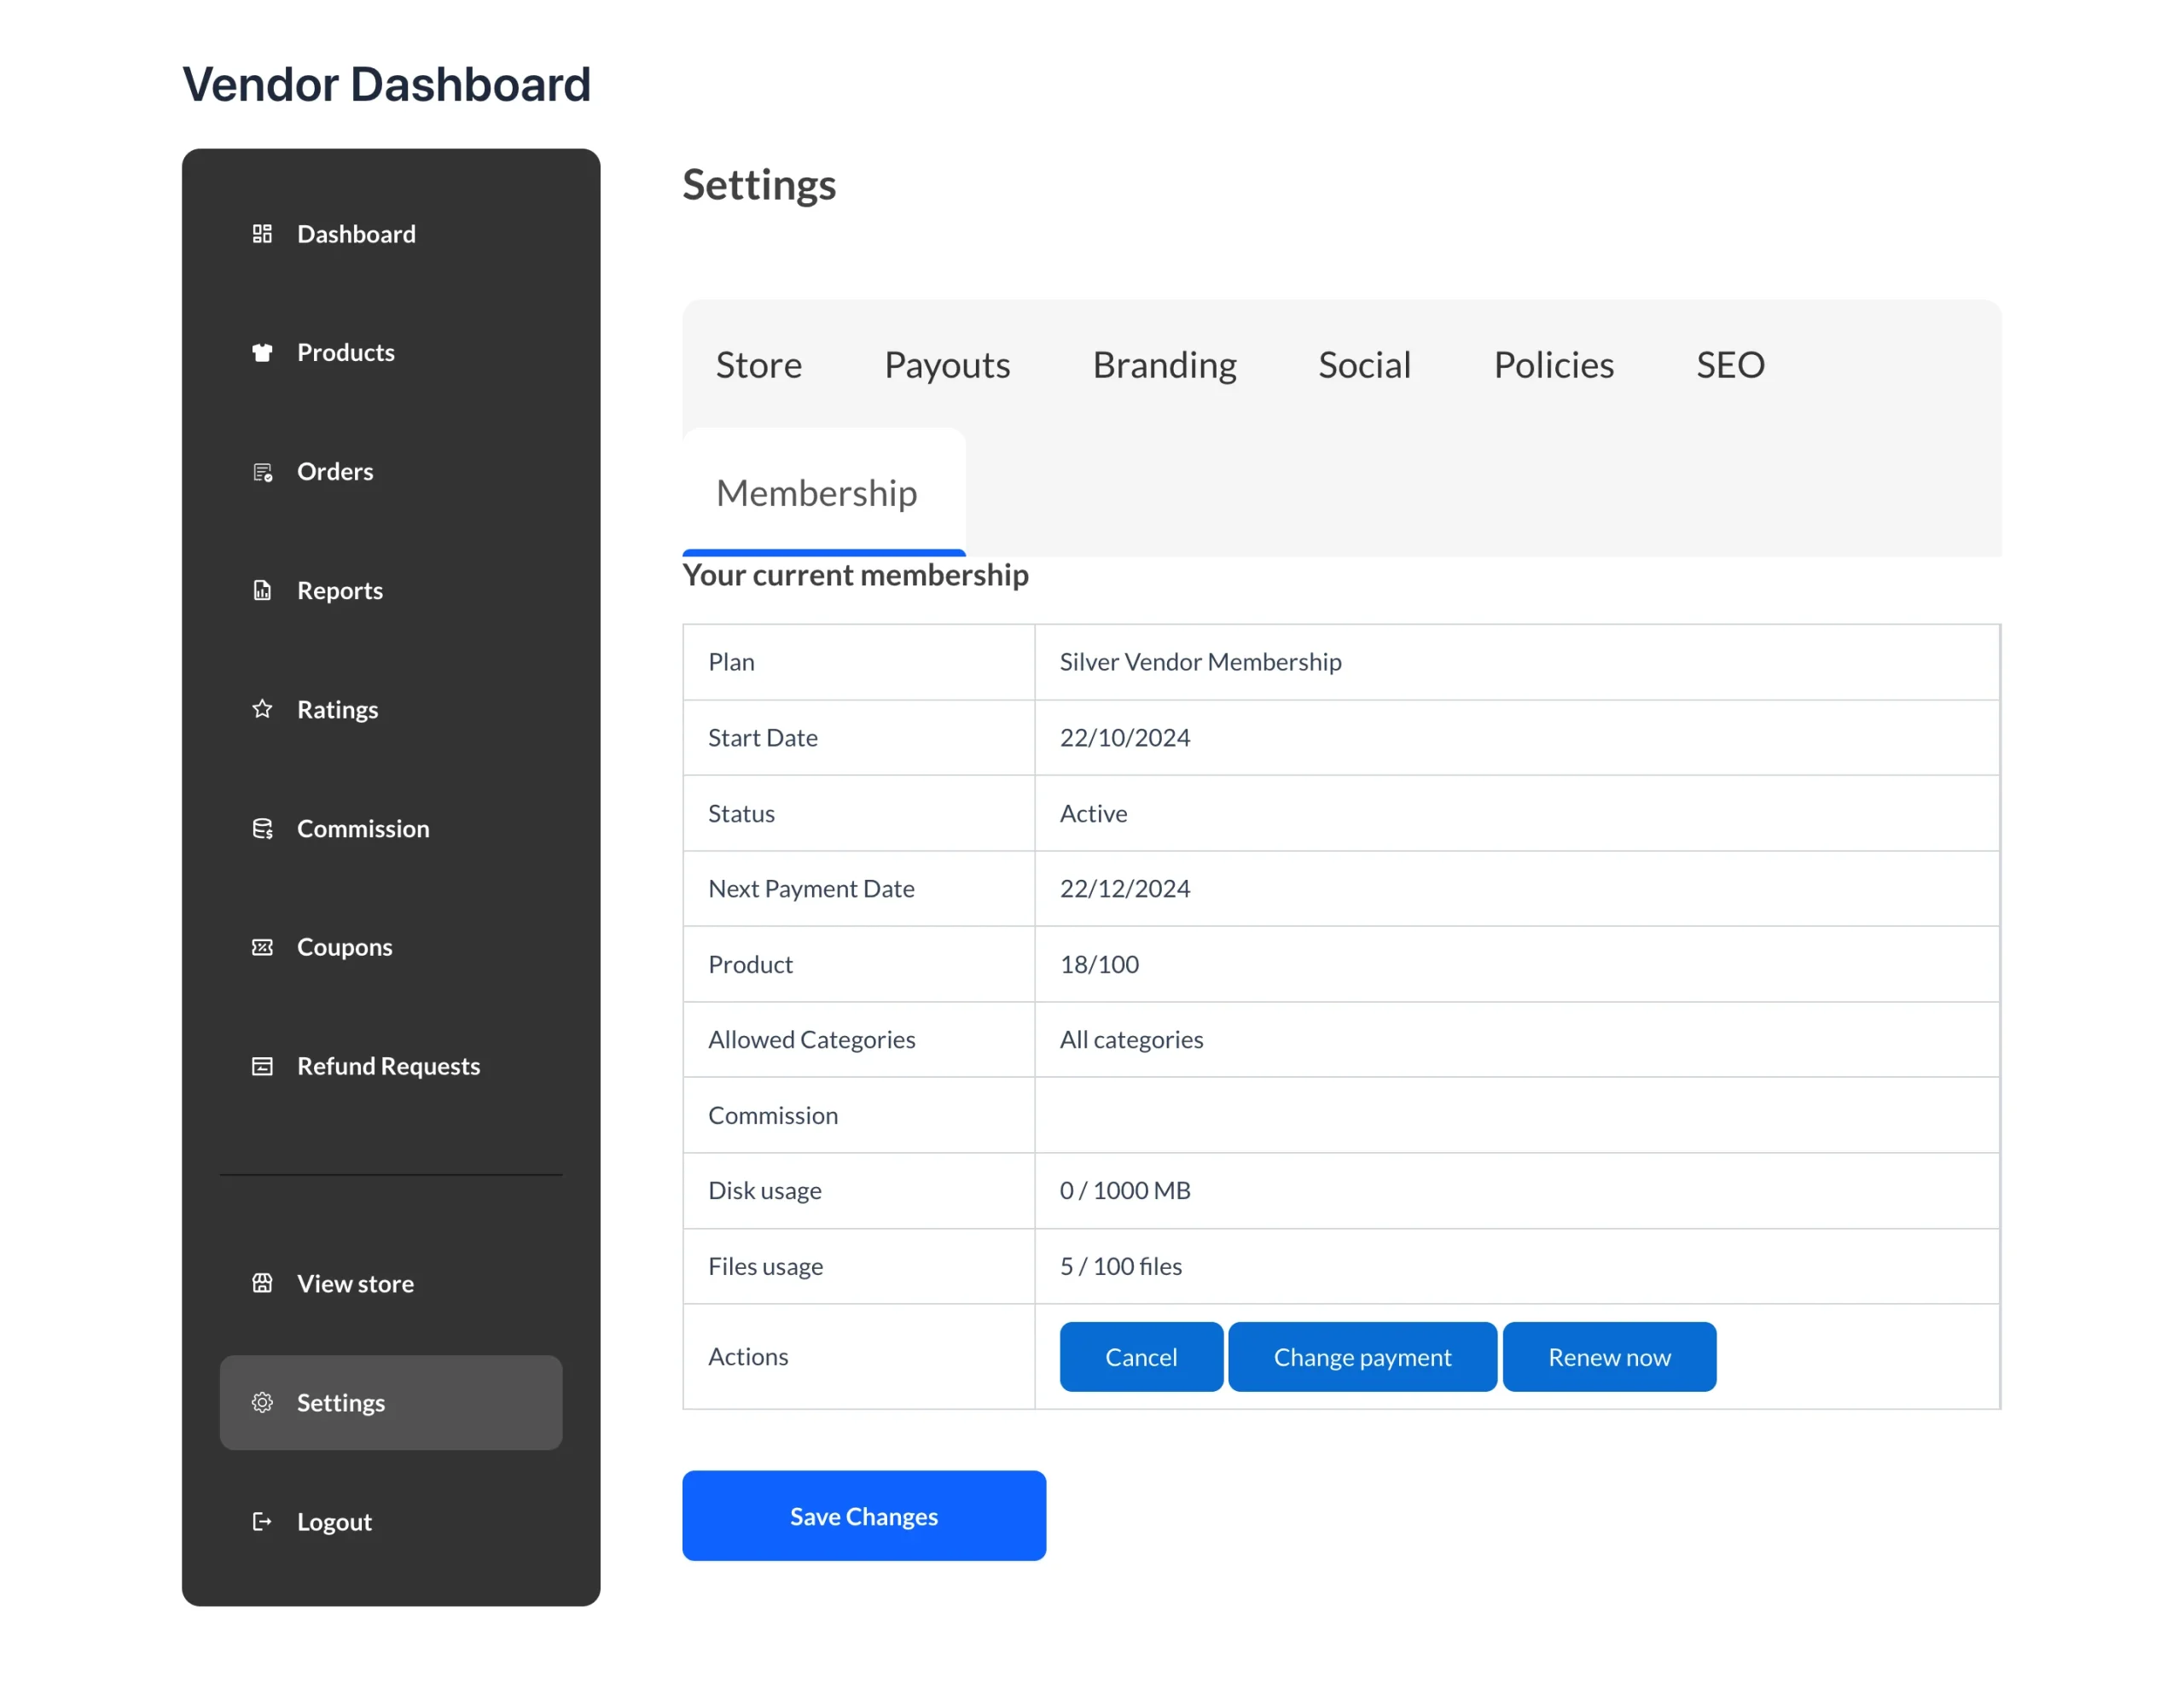
- Product Limit: Maximum number of products a vendor can list.
- Commission Type: Here, you can define the type of commission a vendor will earn. Additionally, you have the option to override the default commission rates for each type. This allows you to offer more attractive commission structures with higher-tier memberships, encouraging vendors to upgrade for better earning potential.
- Disk Usage Limit: Set the total storage space vendors can use (in MB). If your server has storage limitations, it’s recommended to choose a value that balances vendor needs with your server’s capacity.
- File Count Limit: Set the maximum number of files vendors can upload to their shop.
- Allowed Categories: This setting defines which product categories a vendor is allowed to use for their listings.
Vendor Membership Selection
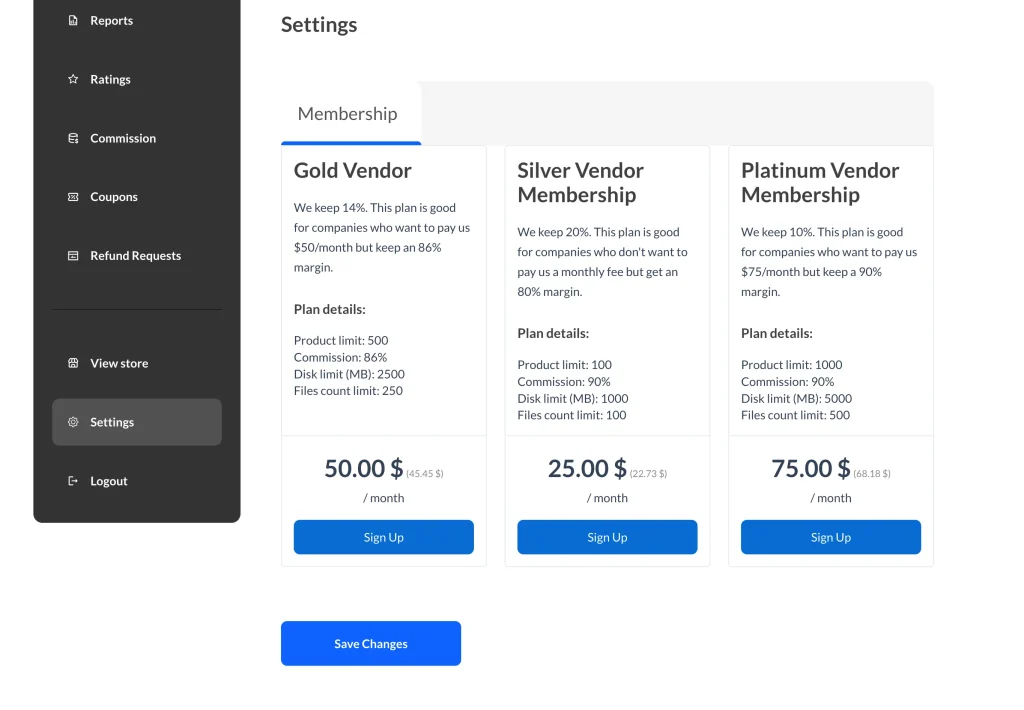
Vendors can select their membership plans through their dashboard at Vendor Dashboard > Settings > Membership.
You might be wondering about the difference between the Disk and File count, here is some extra information. Imagine we have the following restrictions:
- Disk Limit: 10MB
- File Count: 5
This would allow a vendor to upload:
- Up to 5 files totaling up to 10MB, or
- 1 file that is 10MB in size
If the vendor attempts to upload 1 file over 10MB or more than 5 files (even if under 10MB total), the upload will fail. Likewise, if they attempt to upload more than 5 files (even if the total size is under 10MB), it will also be rejected.
Membership Settings Overview
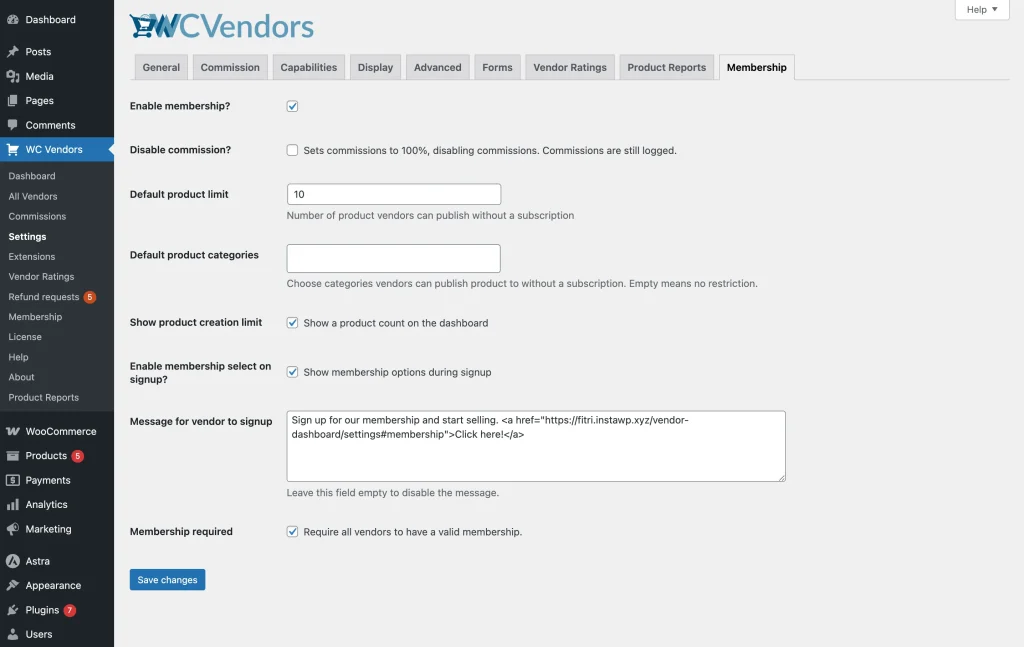
You can configure vendor membership settings by navigating to WC Vendors > Settings > Memberships.
Here, you can configure the default product limit and apply other restrictions. See the list below for further explanation:
Disable Commission: This option sets the vendor’s commission to 100% for any active membership, meaning the marketplace will not earn any revenue from those sales.
Default Product Limit: This option defines the number of products a vendor can create without an active WC Vendors Membership subscription.
Default Categories: This setting determines which product categories a vendor can use when creating products without an active WC Vendors Membership subscription.
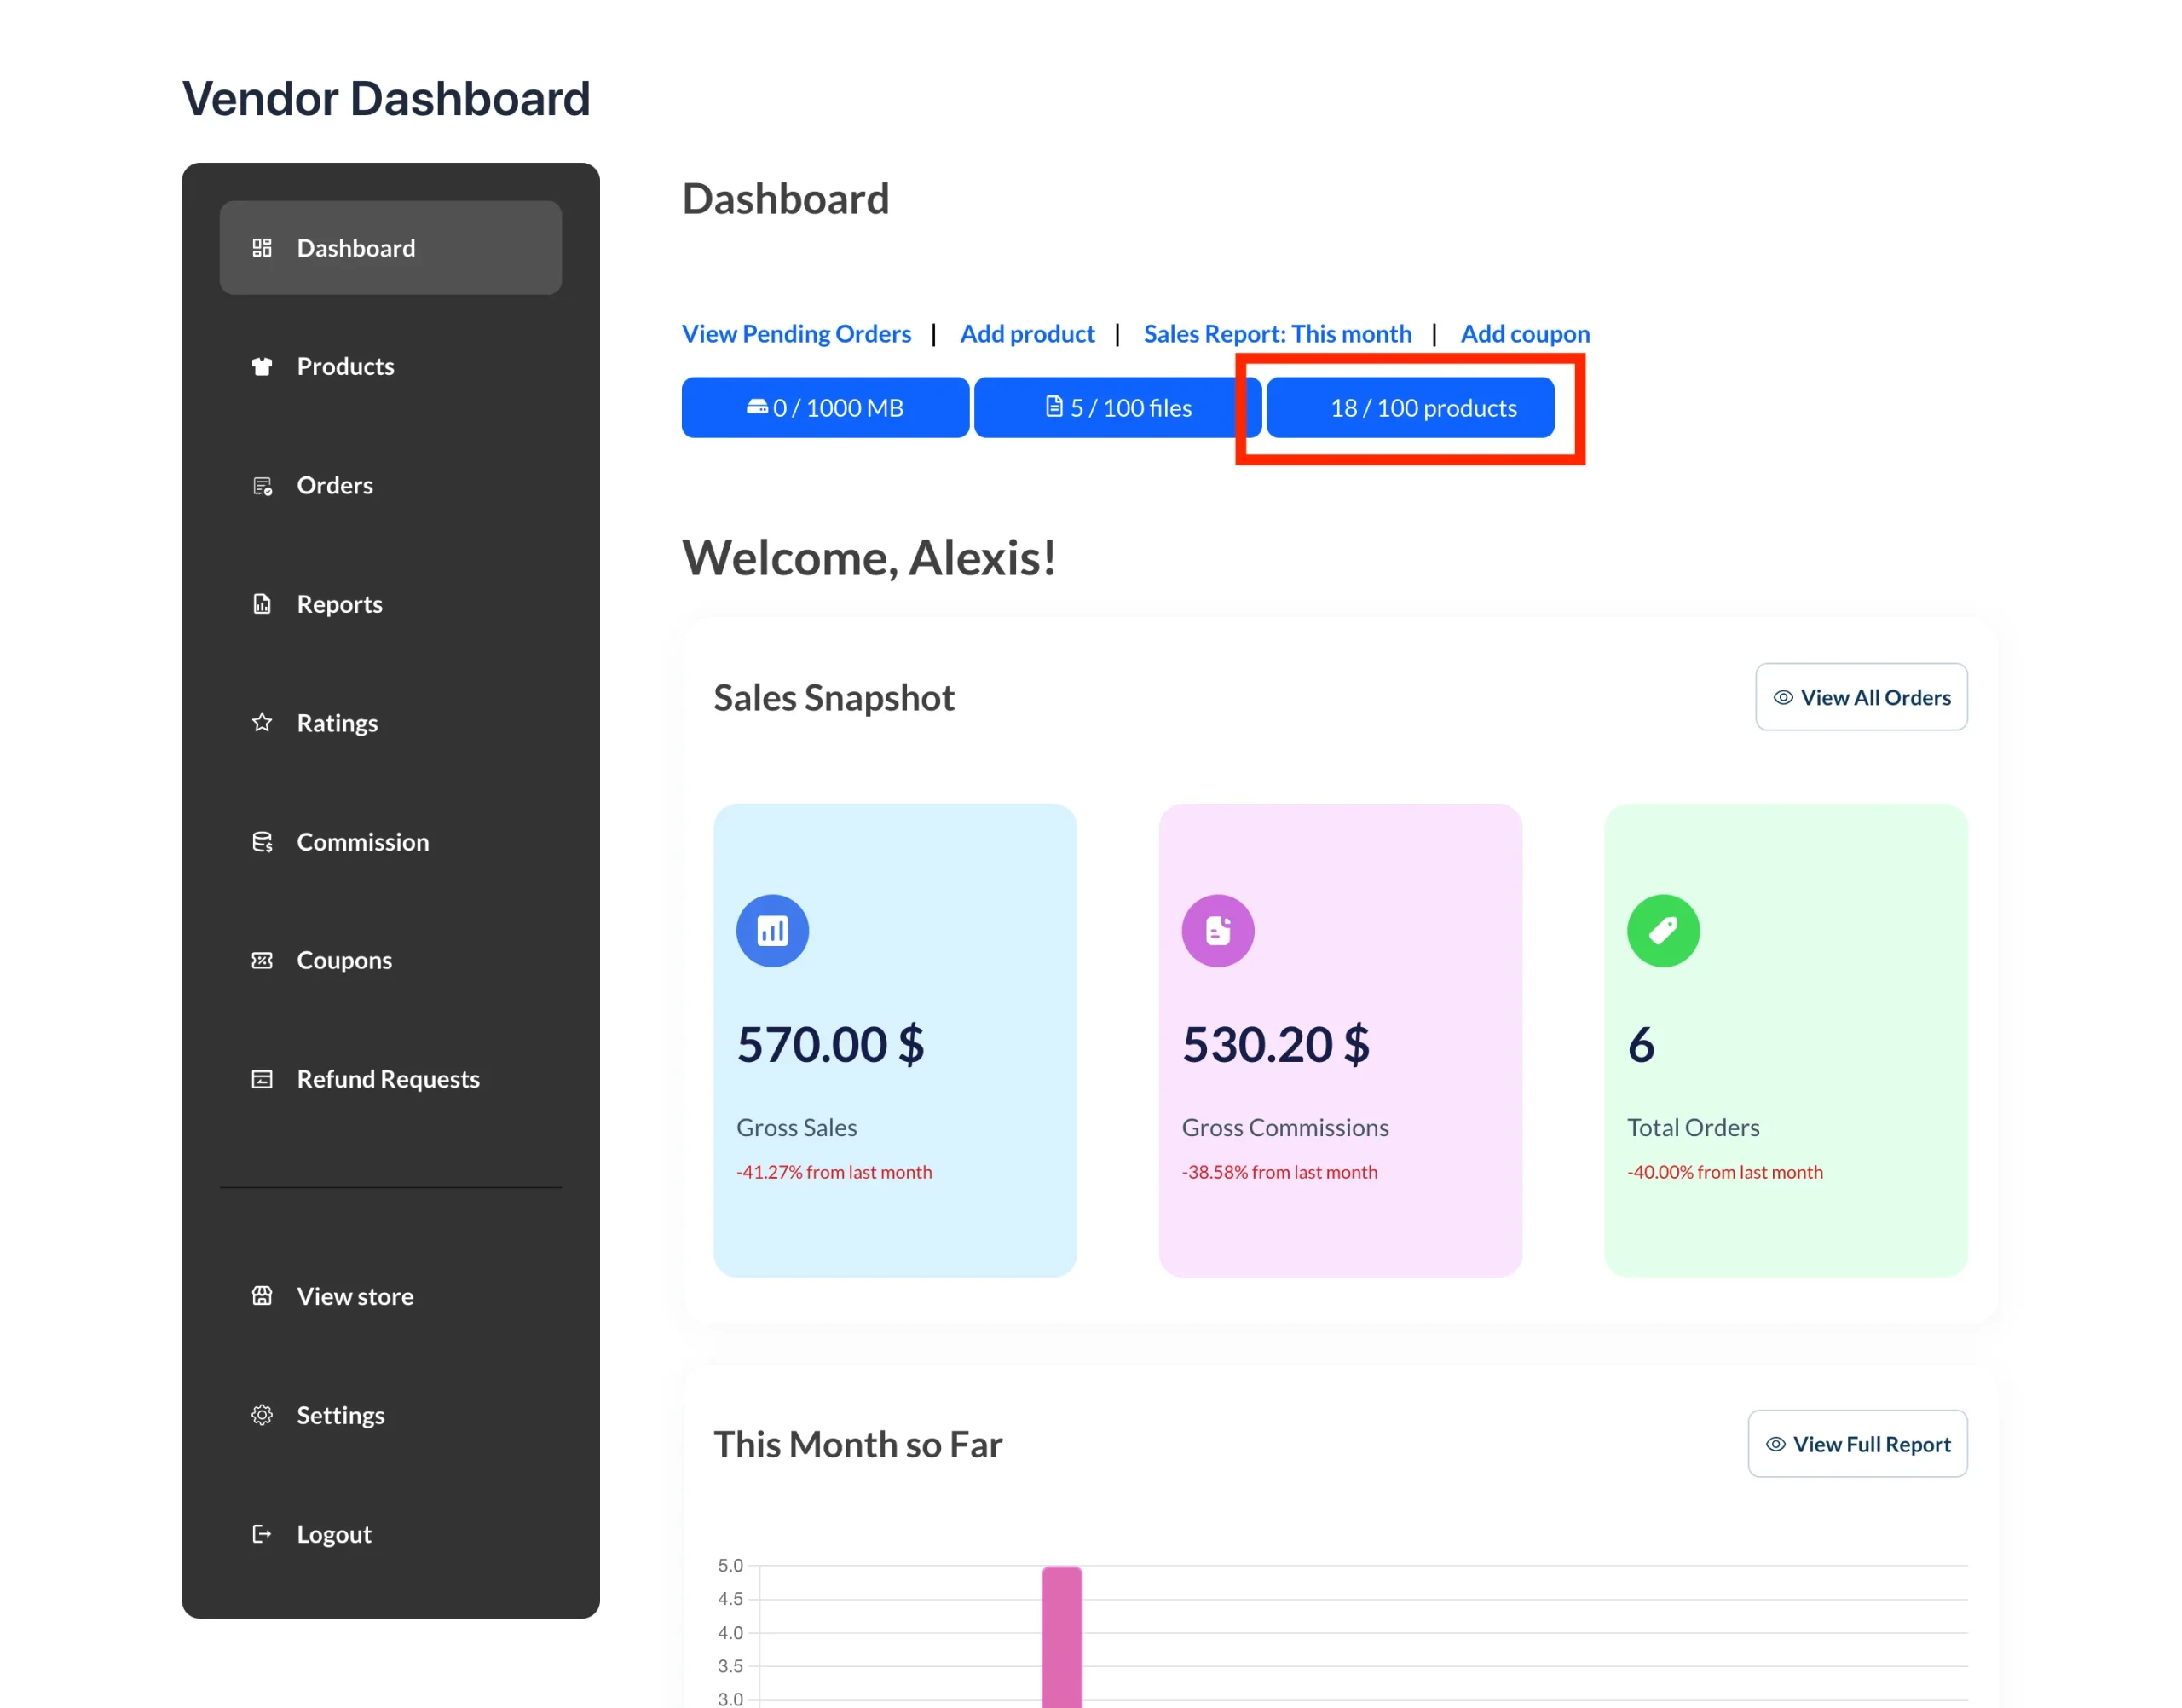
Show Product Creation Limit: Enable this to display the vendor’s product limit on the Vendor Dashboard.
Enable Membership on Signup: This option allows vendors to choose their membership level immediately after successfully registering on your marketplace.
Vendor Signup Message: This displays a notification encouraging existing vendors to sign up for a membership. You can customize the message to suit your preferences.

Membership Required: This setting requires vendors to have an active membership before they can sell products on your marketplace. It will also display a notification on the vendor dashboard.

Vendor Membership Management by Admin
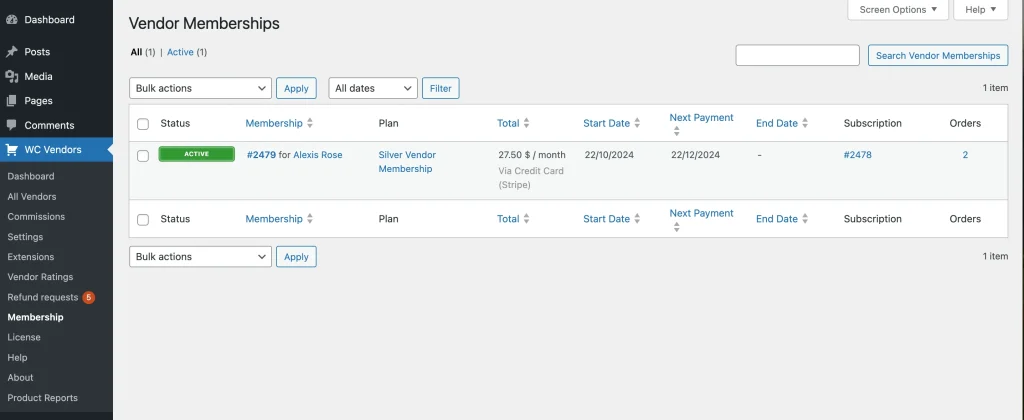
Admins can easily manage and monitor vendor memberships via the WordPress admin panel. Navigate to WP Admin > WC Vendors > Memberships.
Here, you’ll find a comprehensive overview of all vendor memberships with details including:
- Status: Shows whether the membership is currently active, expired, or pending.
- Membership: Identifies the vendor who holds the membership.
- Plan: Displays the specific membership plan assigned to the vendor.
- Total: Indicates the amount the vendor has paid for the membership.
- Start Date: Marks the date the membership began.
- Next Payment: Highlights the upcoming payment date to keep track of renewals.
- End Date: Reveals when the membership will expire.
- Subscription: Provides the reference number linked to the subscription.
- Orders: Counts the total orders connected to the membership.
This interface allows admins to keep track of vendor subscriptions, payments, and renewal dates, ensuring smooth marketplace management.
WC Vendors Membership gives you the control and flexibility to manage your marketplace efficiently. By offering tiered subscription plans with tailored permissions, you can encourage vendor upgrades while protecting your platform’s resources.


