Ever wondered why some online marketplaces display vendor hours?
Because the world of e-commerce is so competitive, you need to leverage every advantage available to you. For this reason, understanding the importance of sharing vendor hours with customers becomes crucial. After all, these hours dictate when shoppers can browse, buy, and engage with online stores within a marketplace.
However, it’s more than just convenience; it’s about ensuring a seamless shopping experience and fostering trust between buyers and sellers.
Today, we’ll delve into the significance of displaying vendor hours in online marketplaces. Additionally, we’ll provide a quick and easy guide on implementing this feature using WC Vendors, a powerful, user-friendly WooCommerce plugin for creating and managing online marketplaces.
Clock’s ticking; let’s dive in!
What Are Vendor Hours In The Context Of An Online Marketplace?
In an online marketplace, vendor hours (a.k.a. store opening hours or store operating hours) are the times when a store within the multi-vendor marketplace is open for customers to shop. These hours can vary depending on the type of store, where it’s located, and any rules in the area.
Some stores have set hours like 9:00 AM to 5:00 PM, while others stay open later, especially in busy areas. Furthermore, stores might change their hours for holidays or events.
Basically, showing marketplace vendor hours helps customers know when they can visit and shop. Thankfully, if you’re running a marketplace built using WC Vendors, you can take advantage of a feature to display vendor hours.
Take note, however, that the practice of displaying store operating hours can offer several other benefits. Which brings us to…
Why Your Marketplace Should Display Vendor Hours
Displaying vendor hours is important for several reasons:
Convenience for customers: When an online store shows its vendor hours, it lets people know when they can shop at said store. Therefore, it helps customers plan their visits more effectively, which can improve the customer experience. Speaking of…
Improved customer experience: Knowing the vendor hours prevents the frustration that can arise when a customer visits a store only to find it closed. As a result, it enhances customer satisfaction and the overall shopping experience, which is always good for business!
Efficient time management: When customers know when their favorite stores are open, they can allocate their time efficiently. This can help them save time and effort, once again boosting customer satisfaction.
Transparency: Offering clear information about a store’s opening hours promotes transparency. Thus, it fosters trust between sellers and customers, which can encourage loyalty and repeat purchases.
Building trust: Transparently displaying vendor hours demonstrates a commitment to customer satisfaction. As a result, it builds trust and loyalty in the marketplace platform.
Legal compliance: In some jurisdictions, there may be legal requirements for businesses to display their operating hours.
Overall, showing vendor hours benefits both customers and sellers by streamlining the shopping process and fostering a transparent and trustworthy marketplace environment.
How To Display Your Marketplace Vendors’ Store Hours (In 3 Easy Steps)
Have you already built a marketplace using WC Vendors? Then displaying your vendors’ store hours should be a cinch. After all, WC Vendors makes it easy to create, launch, and manage online marketplaces!
However, if you’ve yet to create a multi-vendor platform powered by WC Vendors, we highly recommend checking out the following guides:
- How To Create An Online Marketplace: A Beginner’s Guide
- How To Build Your First Multi-Vendor E-Commerce Website (Full Guide)
With all that in mind, let’s proceed!
Step 1: Navigate to the Settings Form page
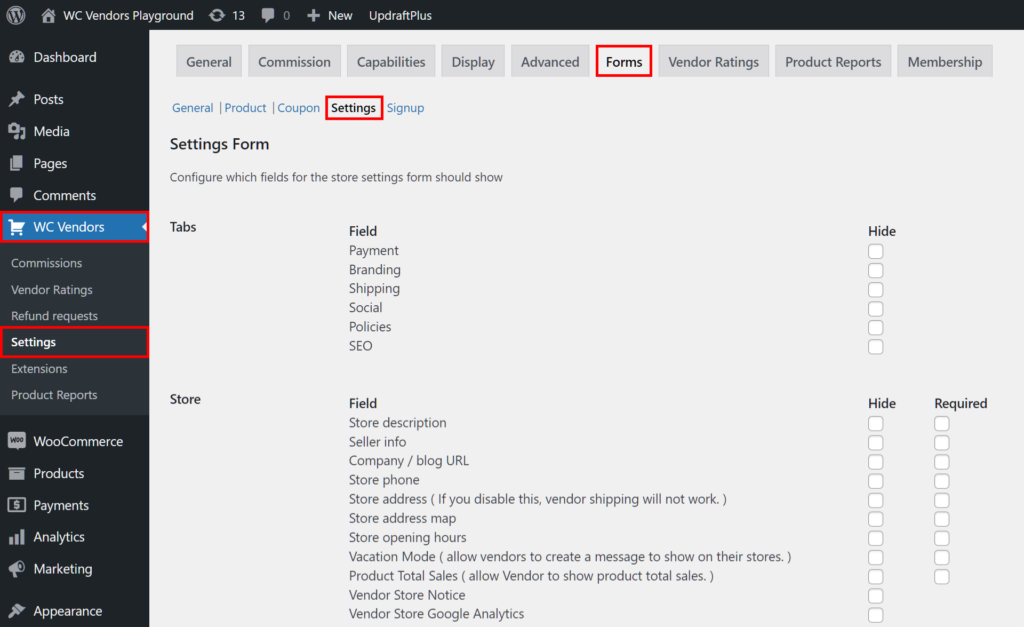
The Settings Form page allows you to choose which details vendors can display on their stores, including their store opening hours. Thus, your first order of business is to get to this page.
So, head to your WordPress dashboard and click WC Vendors > Settings > Forms > Settings.
Now that you’re on the Settings Form page, you’re ready for the next step…
Step 2: Enable the Store Opening Hours option
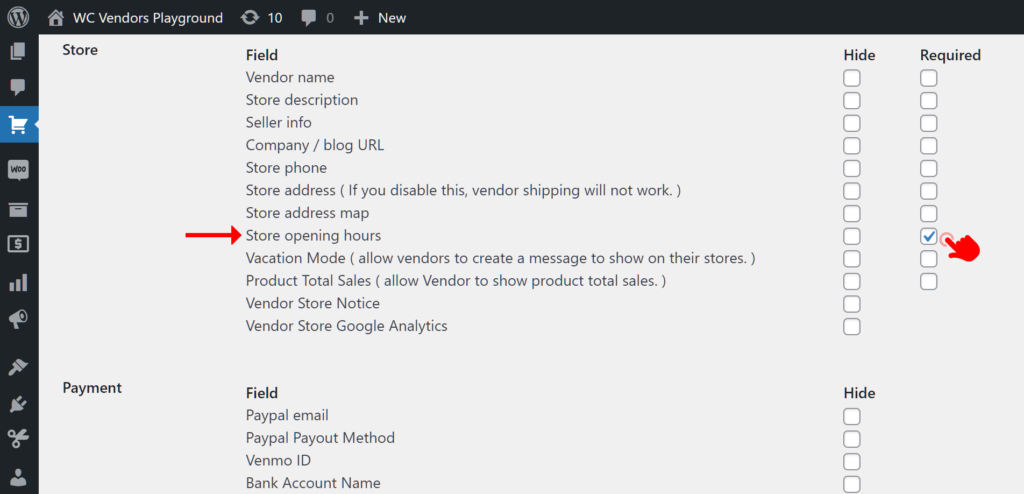
Scroll down to the Store option and take note of its fields.
Find the Store Opening Hours field. By default, this and other fields on the page are already enabled. In other words, you don’t have to do anything to activate them.
However, you can require vendors to submit information associated with these fields by ticking their “Required” checkboxes.
Feel free to examine the other Store fields, as they can all be useful to your vendors’ stores!
For instance, if you want every store to show customers the information below, tick their “Required” checkboxes:
- Vendor name
- Store description
- Seller info
- Company/blog URL
- Store phone
- Store address
- … ec.!
For this tutorial, we don’t recommend ticking any “Hide” checkboxes. Hiding a field removes it from the product form, preventing vendors from submitting information that might be important to customers.
When you’re done, scroll down to the bottom of the page and click the Save Changes button. This implements all the settings you’ve made on the page.
Take note: There’s a lot more you can do with the Settings Form page, which allows you to grant vendors a considerable degree of control over their store settings.
For example, like we did in this article, you can use the Settings Form page to allow vendors to choose which store details to present to customers via their store page. So if you’d like to know more about Settings Form, check out our article, “Vendor Store Mastery: Fine-Tuning Your Settings For Success (A Complete Guide).”
Step 3: Create a widget
Some details, such as the store opening and close times, only appear on the vendor storefront via widgets. Thus, you must create a widget to display vendor hours.
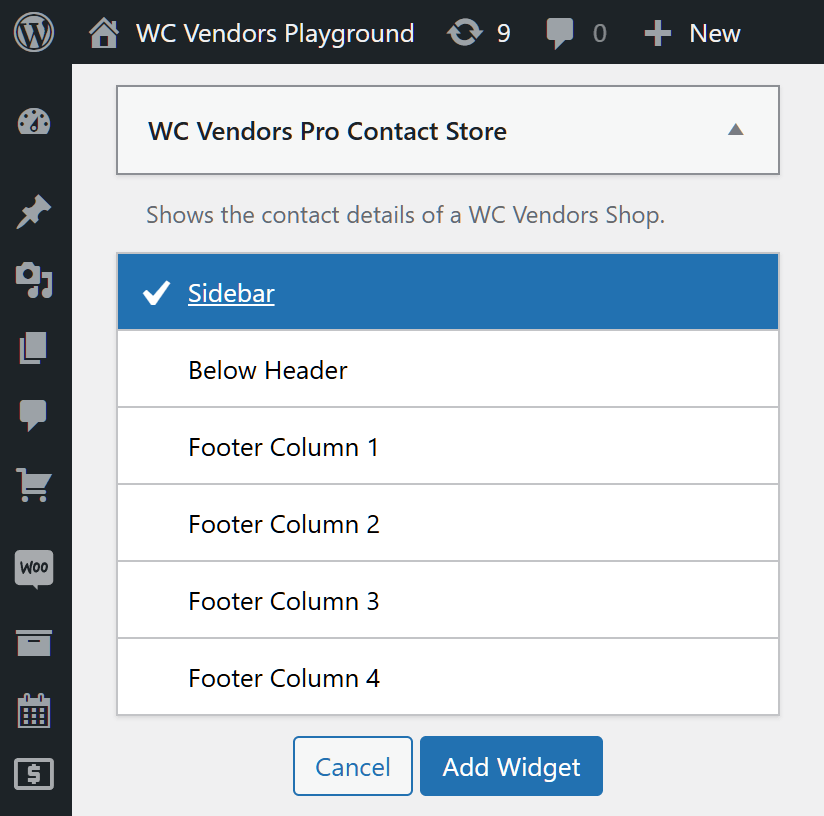
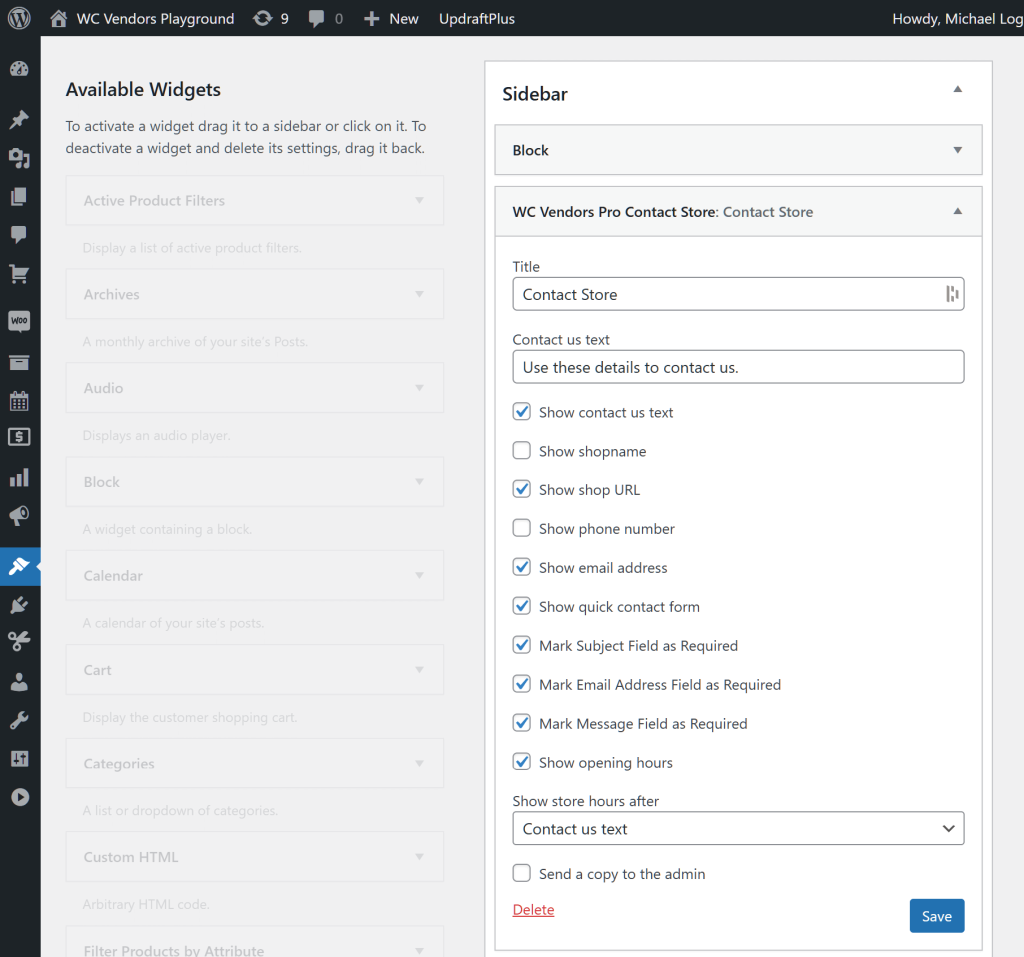
On your WordPress dashboard, click Appearance> Widgets. Then, under Available Widgets, look for WC Vendors Pro Contact Store.
Now, click the arrow to see your options. Where you place the widget depends on you, but for our example, we’ll display the vendor hours on the sidebar. So we’ll click “Sidebar,” then the Add Widget button.
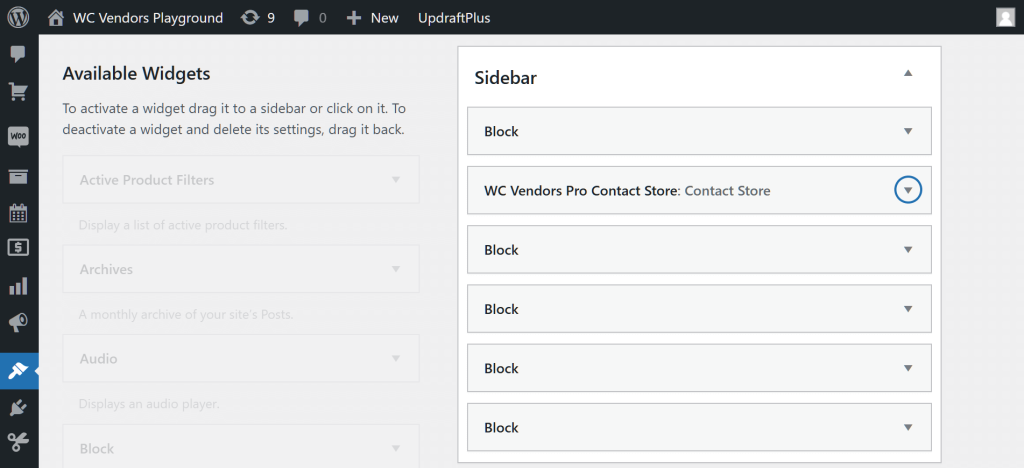
Next, look for the Sidebar box. Drag the WC Vendors Pro Contact Store panel up or down the list to determine its position on the sidebar. We’ll position ours near the top.
In addition, you can click the arrow to select which details to display. Make sure to enable “Show opening hours” by ticking its checkbox!
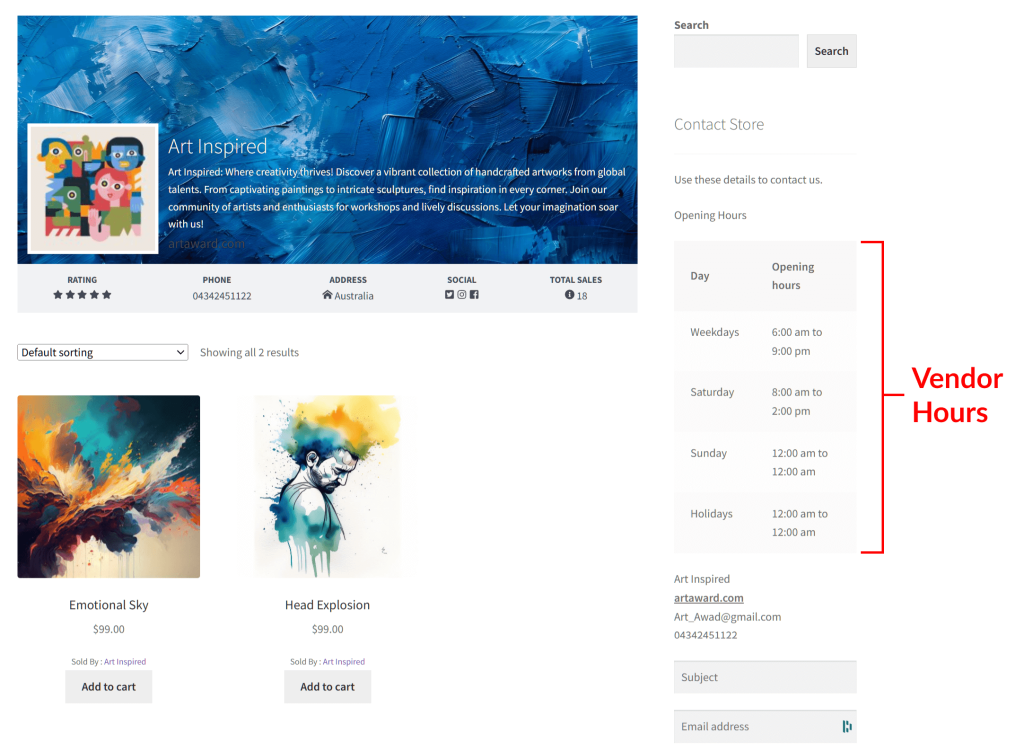
And that’s it! Every store in your marketplace will now display the vendor hours, letting customers know when their favorite seller is available:
The Vendor’s Perspective: Setting Vendor Hours
With the Store Opening Hours option enabled, vendors can display these details on their stores.
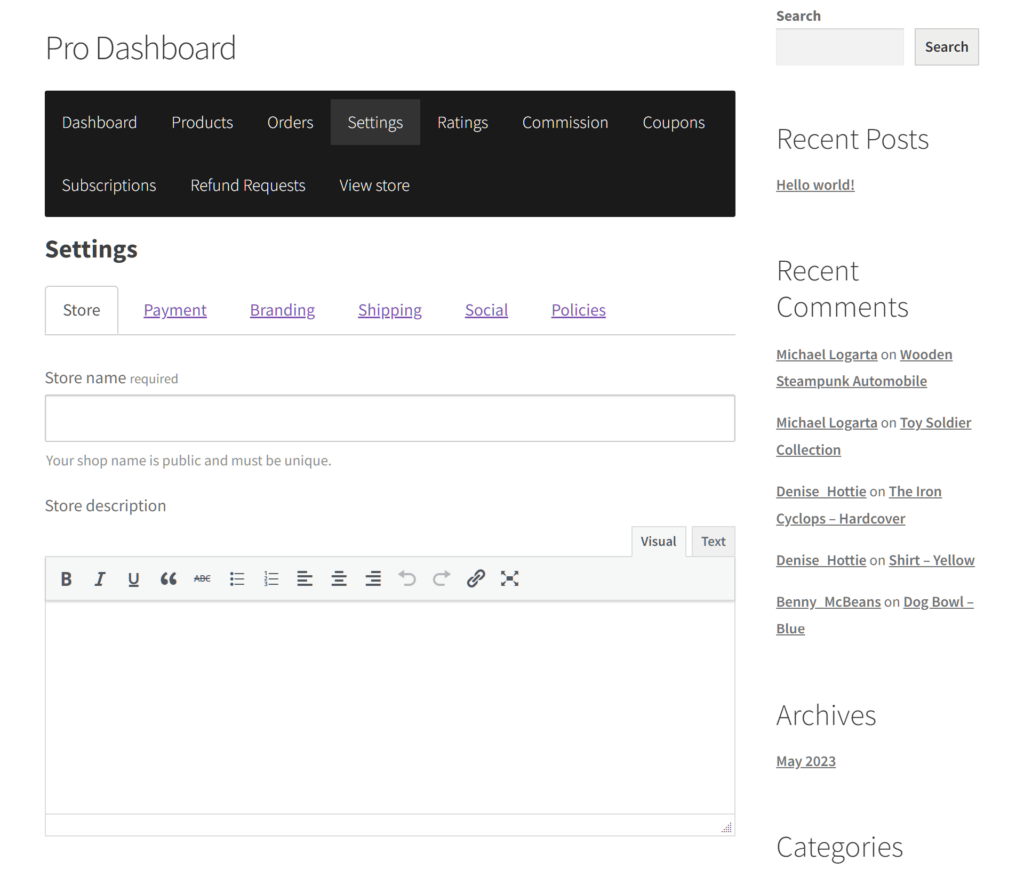
For a vendor to do this, they must first go to their dashboard and choose the Settings panel.
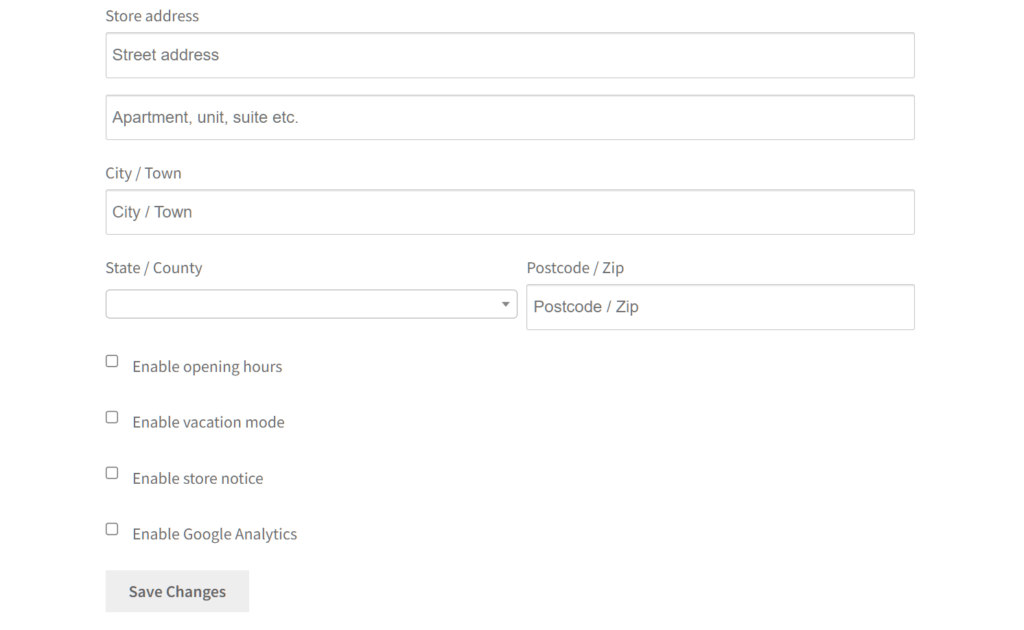
Next, they must scroll down to the bottom of the page, where they’ll see Enable Opening Hours.
When they tick this option’s checkbox, they gain access to an interface that allows them to fine-tune their store’s operating hours.
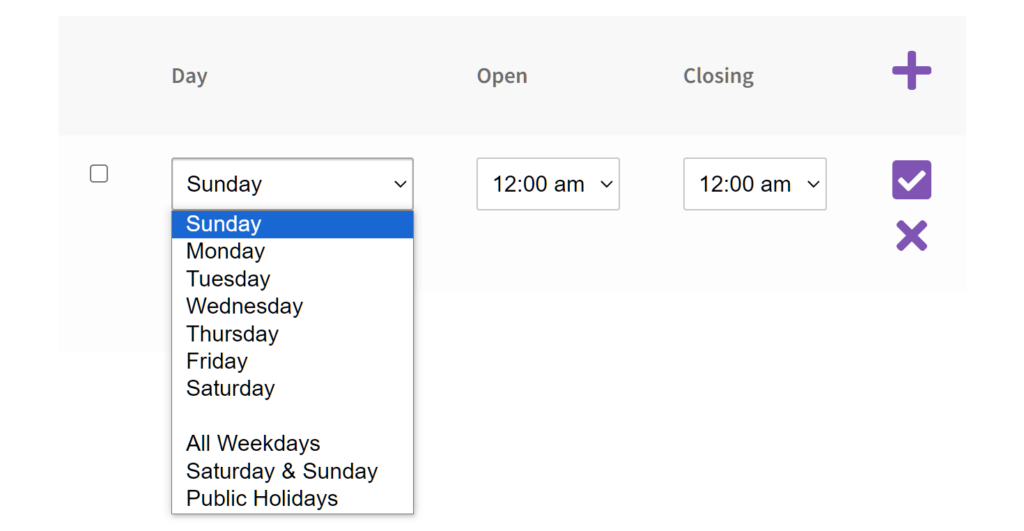
For example, a dropdown menu lets them choose the days the store is open:
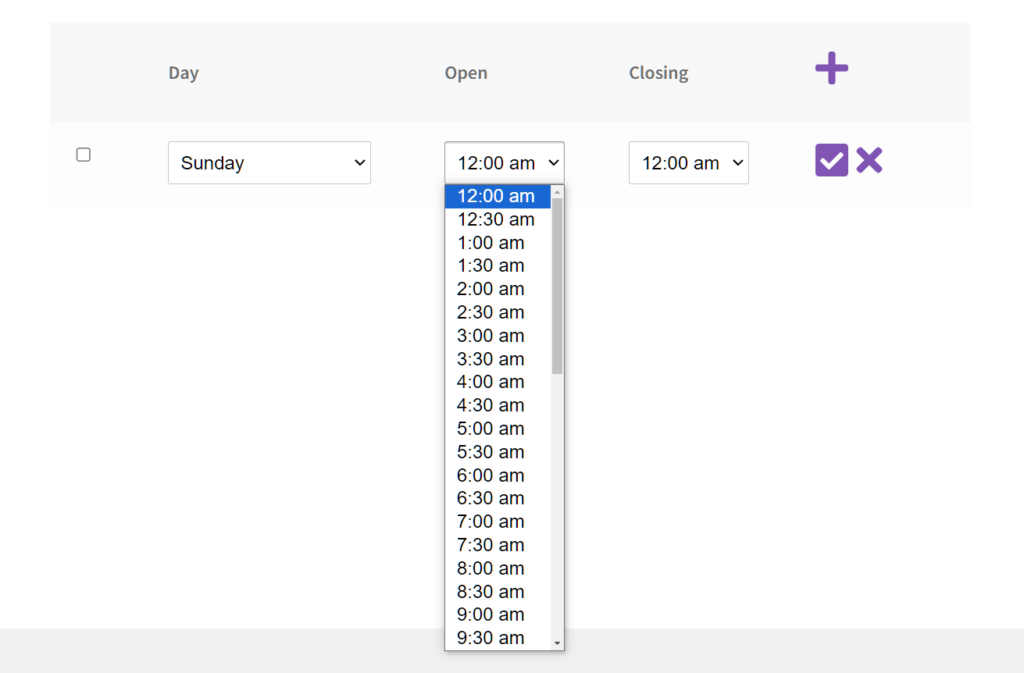
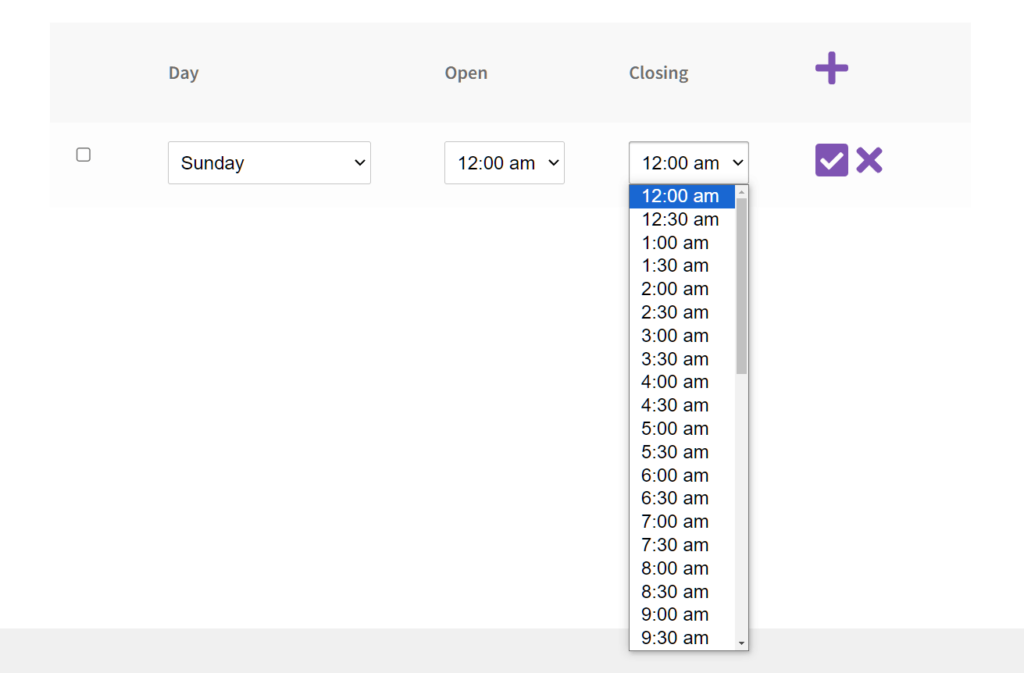
They can also choose the opening and closing hours:
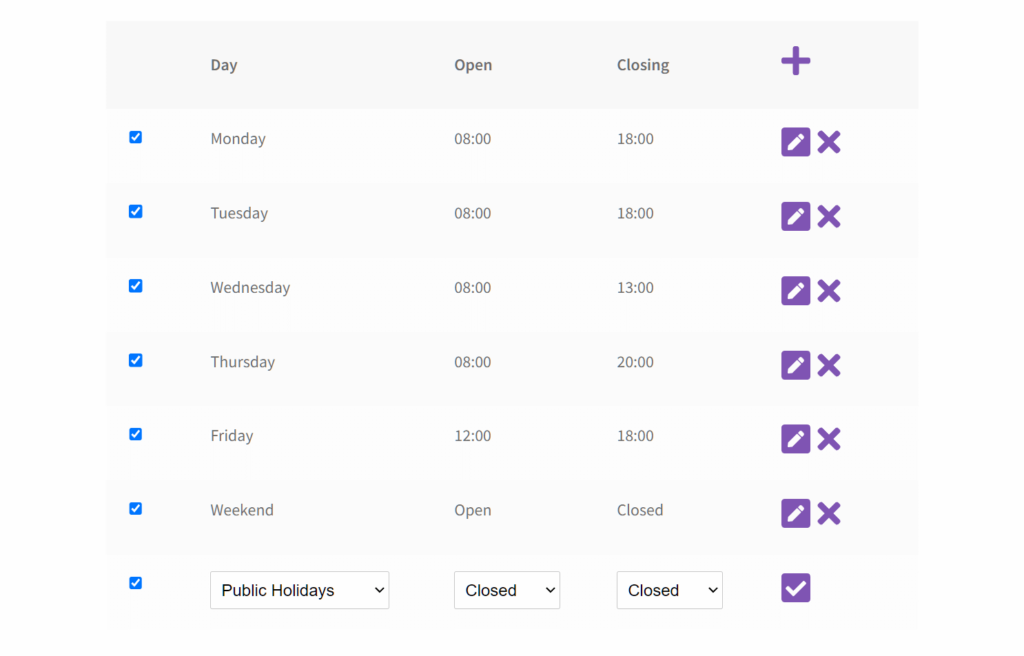
To finalize a timeframe, all they have to do is click the checkmark button. However, they can always edit this information by clicking the pencil button and delete it by using the x button.
In addition, they can add or remove more timeframes using the plus button. This gives them a great degree of control over the presentation of their vendor hours.
Once the vendor is happy with their vendor hours, they must click the Save Changes button to implement their setting changes.
Their store should now show its operating hours to customers!
Conclusion
Displaying the vendor hours for every store in your marketplace can contribute to the success of your multi-vendor platform. After all, by providing such important information to customers, your platform helps customers plan their visits and make better shopping choices. In addition, it ensures transparency in business operations, which can boost customer satisfaction and loyalty.
In summary, you can use WC Vendors to display vendor hours in every store. To do so, you simply have to implement the following steps:
Do you have any questions about how to display vendor hours? Reach out to us and let us know; we’d be happy to hear from you!


