For your online multi-vendor marketplace to succeed, you need the help of vendors. And if you want your vendors to perform at their best, you should grant every one of them control over their vendor store.
Thankfully, with the right marketplace solution, you can offer your vendors access to abilities that can enhance their sales, from crafting compelling store descriptions to displaying unique branding elements. For instance, WC Vendors enables sellers to configure their store settings. This way, they can modify their stores, making them more attractive and memorable to existing and potential customers.
Today, we’ll teach you how to use WC Vendors to give your vendors the power to shape their stores. By the end of this article, you’ll know one of the best ways to ensure the success of your sellers and thus your marketplace as a whole.
So let’s get started!
The Vendor Store Dashboard
The right marketplace solution will provide every vendor you recruit with their own vendor store. Just like a physical store, this vendor store is where each seller can showcase and sell their products, display their branding, offer their customers contact information, and more.
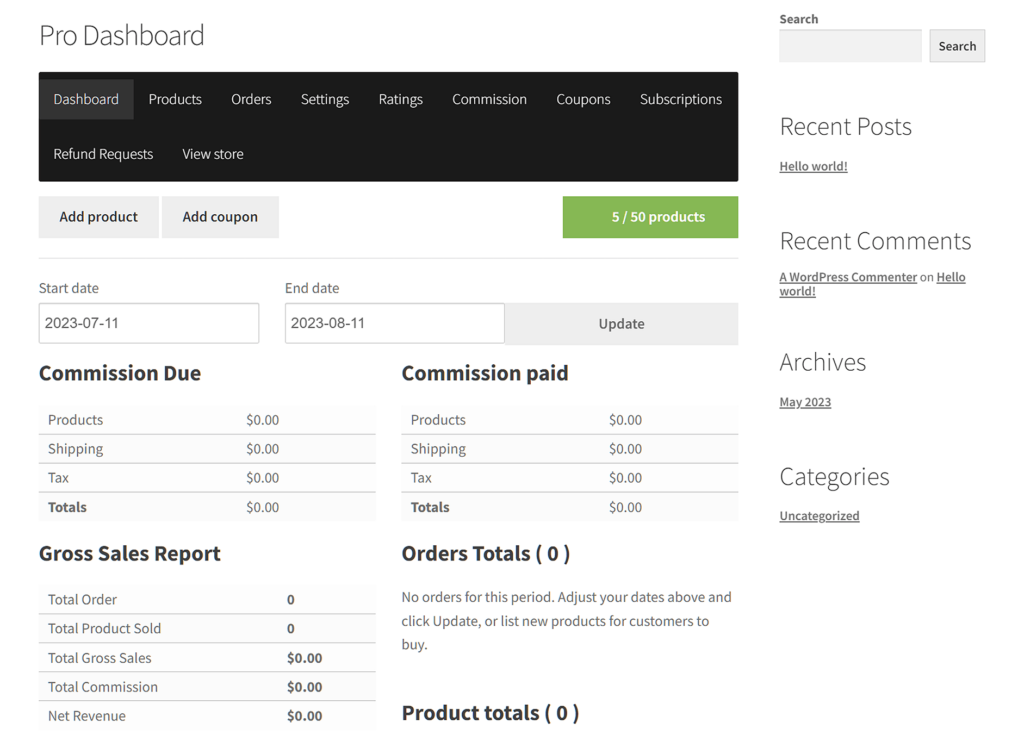
To control their store, each vendor uses a vendor store dashboard. Consider the following dashboard, which was created using WC Vendors:
Basically, this dashboard is a special interface that comes with multiple sections. Each section, in turn, allows vendors to perform various actions, including adding products to their store, viewing orders, enabling coupons, and more.
This article will focus on Settings, which is the section that allows vendors to configure their store settings.
How To Use WC Vendors To Enable Vendors To Configure Their Vendor Store Settings
Allowing vendors to configure their vendor store settings may sound complex. Fortunately, this couldn’t be further from the truth. In fact, the entire process is super simple, only requiring you to activate specific options by ticking checkboxes. No headache-inducing coding required!
This simplicity is thanks to WC Vendors, the powerful marketplace solution that we’ll discuss in this guide.
However, as WC Vendors is a WooCommerce plugin, you’ll first need a WordPress-based online store powered by WooCommerce.
Once this online store is operational, you then have to convert it into a multi-vendor marketplace using WC Vendors. If you’d like to know how to accomplish this, check out the following guides:
- How To Build Your First Multi-Vendor E-Commerce Website (Full Guide)
- How To Create An Online Marketplace: A Beginner’s Guide
With all that in mind, let’s dive into the tutorial!
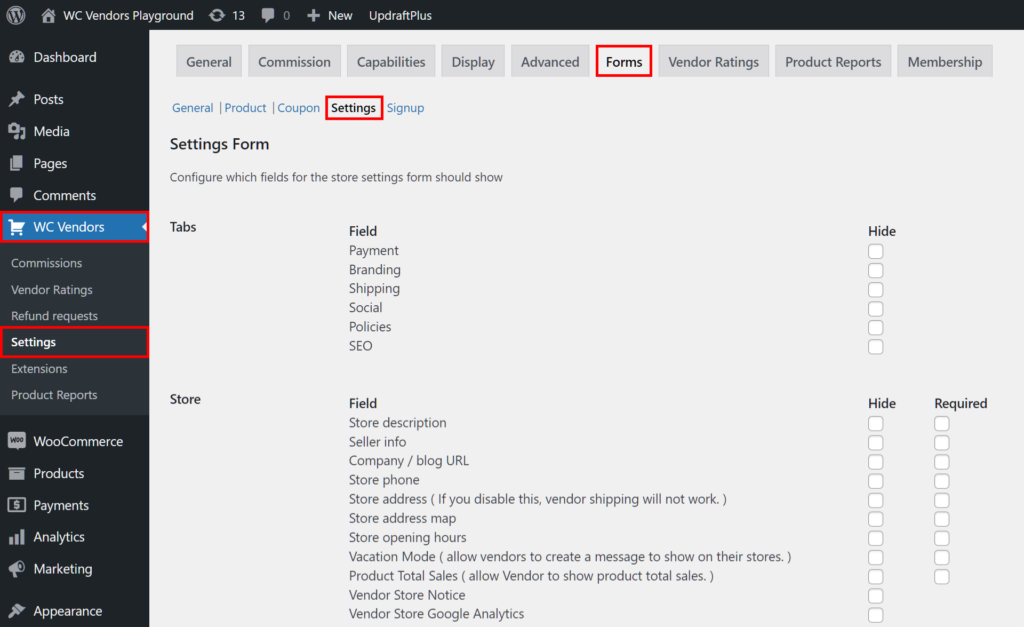
WC Vendors lets you grant vendors the ability to configure their store settings through the Settings Form page.
To get there, access your WordPress dashboard and click WC Vendors > Settings. Then, click the Forms tab followed by the Settings subtab.
As illustrated above, the Settings Form page is chockfull of fields. You can activate and deactivate these fields as you please.
When a field is activated, an option appears in the vendor store dashboard, providing the vendor with a setting to tweak.
To activate a field, simply leave the “Hide” checkbox unticked. In addition, you can tick the “Required” checkbox to make it mandatory for vendors to use the option. For instance, if you want to make it a non-negotiable requirement for vendors to write store descriptions, tick the Store Description’s “Required” checkbox.
In contrast, when you deactivate a field, the associated option vanishes from the dashboard, preventing every vendor from using it.
To deactivate a field, tick its “Hide” checkbox. For example, if you don’t want vendors to write store descriptions, simply tick the Store Description’s “Hide” checkbox to remove the option from the dashboard.
Step 2: Activate or deactivate fields
Now, it’s time to decide which options to give your vendors access to. To do this, let’s discuss each area found on the Settings Form page.
1. Tabs
The Tabs area is where you’ll find the Payment, Branding, Shipping, Social, Policies, and SEO fields.
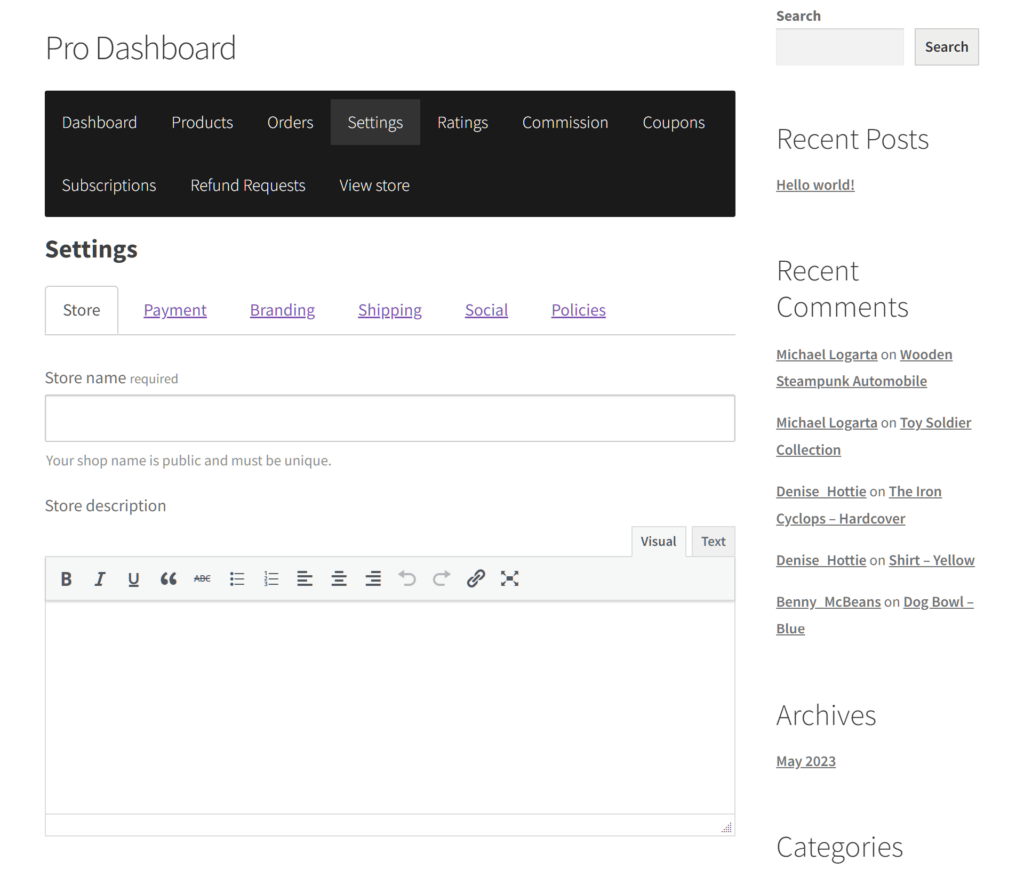
When activated, these fields become the main tabs found in the vendor store dashboard’s Settings page.
As you can see above, the SEO tab doesn’t appear on the vendor store dashboard Settings page. This is because we clicked the SEO field’s “Hide” checkbox, thus deactivating the tab.
You’ll also notice that the only tab you can’t deactivate is the Store tab.
2. Store
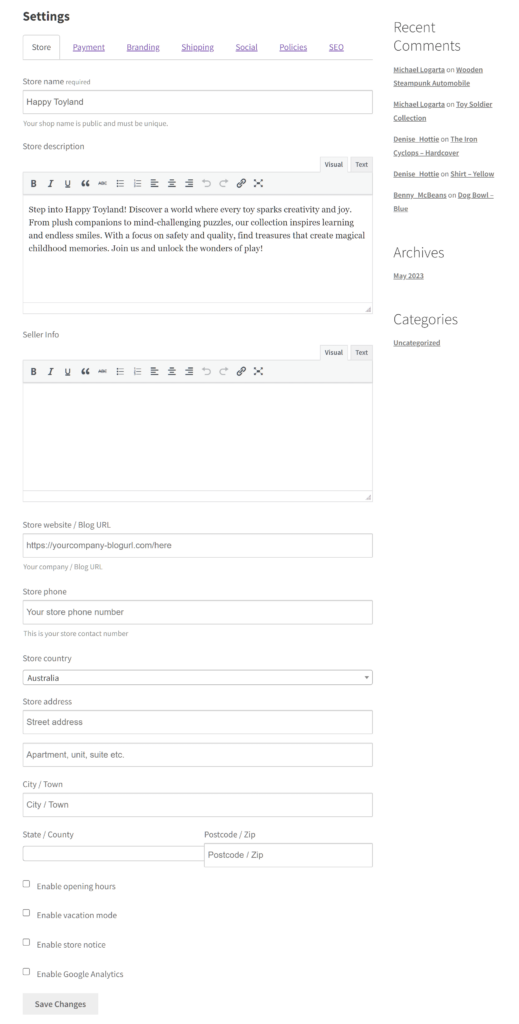
The Store area on the Settings Form page contains the fields that let you activate or deactivate the options found in the dashboard’s Store tab.
These are crucial fields as they allow vendors to share information that customers would find useful.
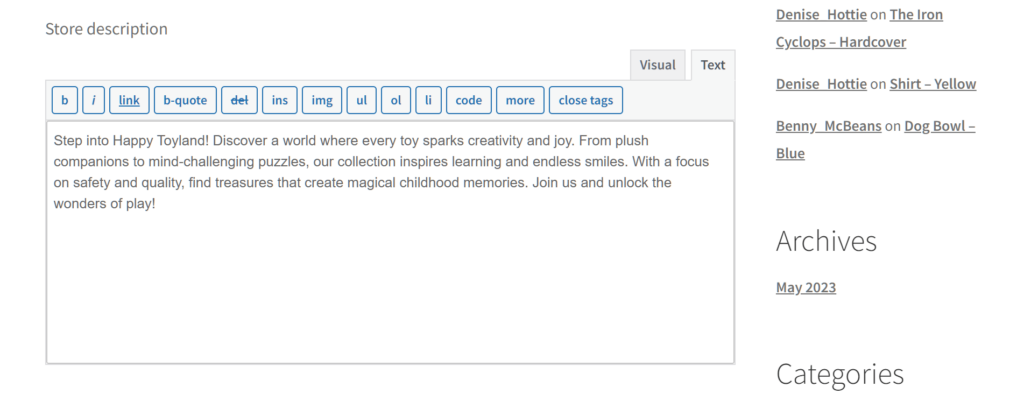
For example, if you activate Store Description, you allow every vendor to craft a brief yet compelling description of their store. This way, they can inform customers about their brand, products, values, and more. Meanwhile, activating the Seller Info field lets the vendor share information about themselves.
Activate the Store Phone field if you want to allow every vendor to share their phone number with customers. In addition, you can activate Store Address so that any vendor with a physical store can share said store’s location. Take note that you need to activate this field if you want to take advantage of vendor shipping (more on this below).
In addition, you can enable vendors to share their store opening hours, total sales, availability, and more.
3. Payment
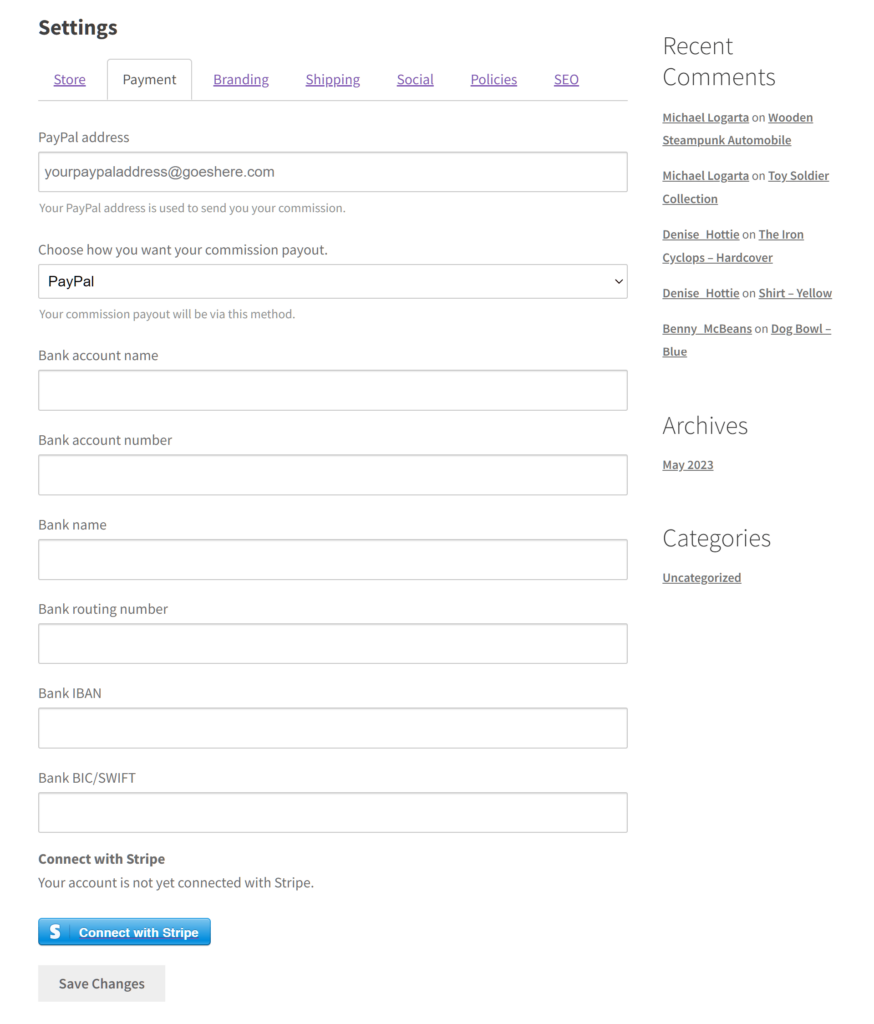
The Payment fields allow your vendors to choose how they get paid by the marketplace owner.
For example, they can choose their Paypal payout method as well as provide you with their Paypal email so that you can send them commissions. They can also give their bank account name and number, among other details.
4. Branding
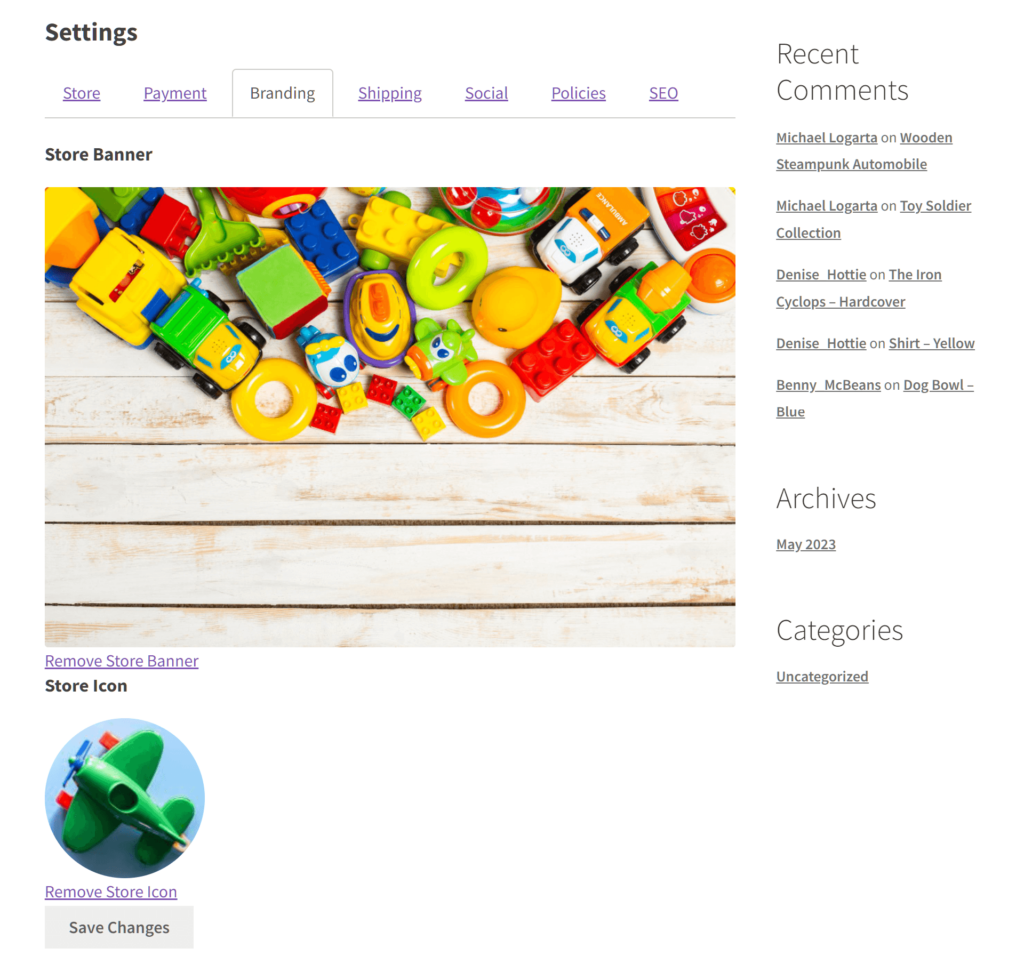
When activated, the Branding fields offer the vendor options to personalize their brand.
Specifically, the vendor can upload a store banner – a prominent image that customers will see upon visiting the vendor store. In addition, the vendor can choose their vendor store icon.
Both of these visuals help every seller implement unique branding that can set their store apart from the competition, entice new customers, and foster loyalty that can encourage existing customers to make repeat purchases.
5. Shipping
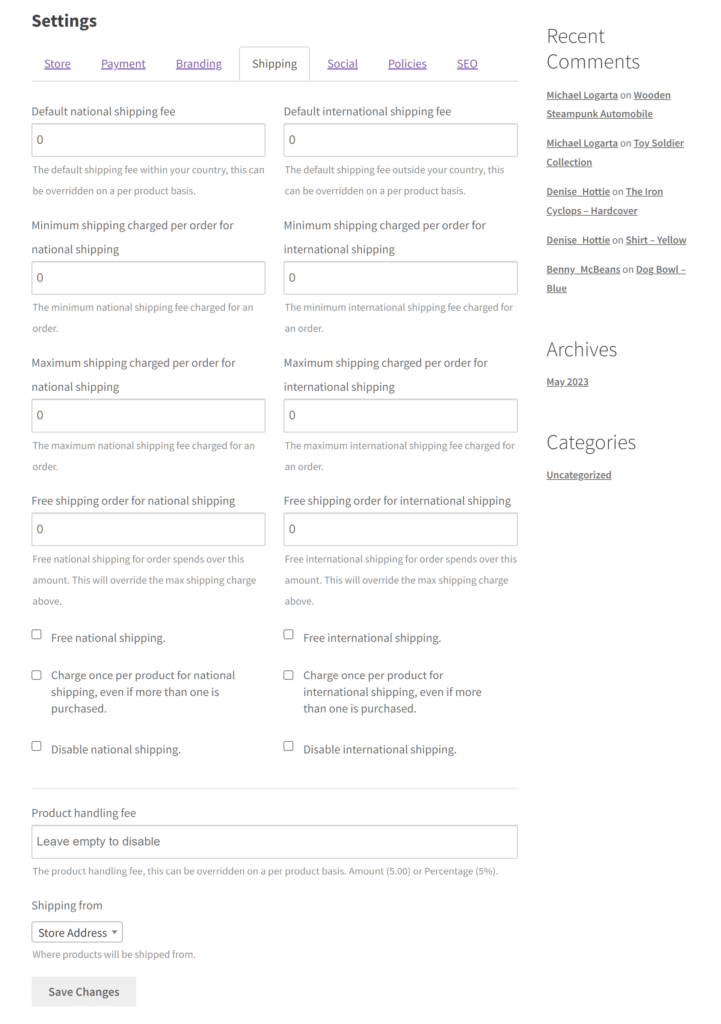
The Shipping fields let vendors set up various shipping details, including product handling fees, international shipping fees, and more.
For example, when activated, the National Default Shipping Fee field lets the vendor determine the default shipping fee within their country. On the other hand, International Shipping Disable allows them to disable international shipping.
6. Social
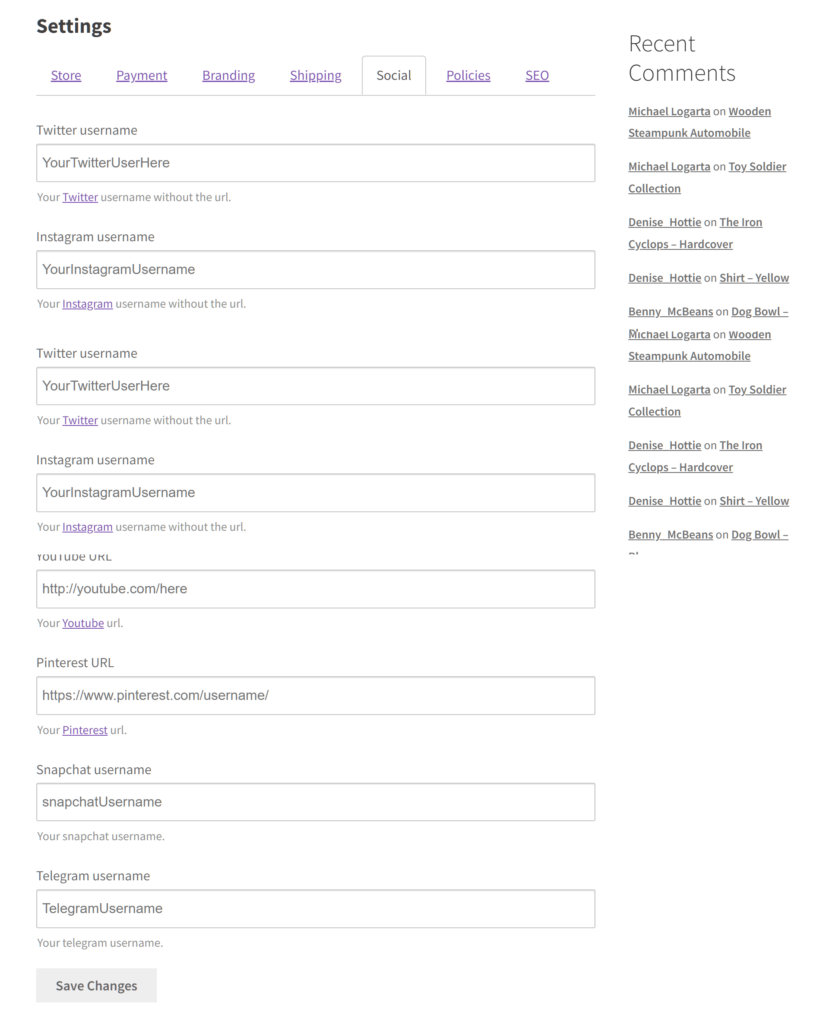
Activating the Social fields enables vendors to share information about various social media platforms.
For example, if a vendor has Facebook, Instagram, and Twitter pages, they can share their URLs and usernames via their vendor store. As a result, customers can visit these platforms and learn more about the vendor and their products.
Social media is a powerful marketing tool that allows sellers to promote their products or services to a wider audience, form relationships with their customers, engage their audience via compelling social media posts, etc. Thus, enabling these options can go a long way in helping your vendors succeed.
7. Policies
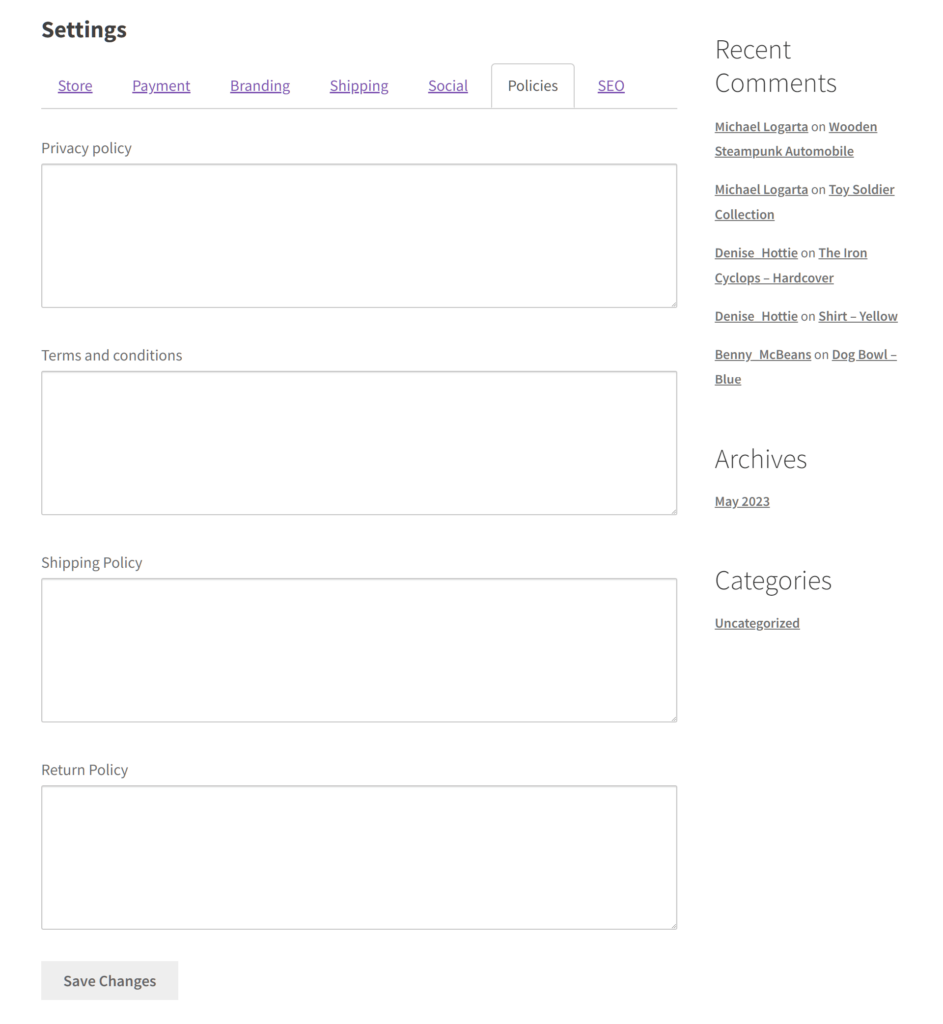
Activate the Policies fields to let vendors share various vendor store regulations with their customers.
For instance, activating the Return Policy field allows vendors to make their rules about refunds available on their online store. Similarly, the Shipping Policy field lets them be transparent about their shipping regulations.
By exhibiting this kind of transparency, vendors make themselves more credible and trustworthy in the eyes of their customers. This can boost customer loyalty, thus enhancing vendor sales and marketplace revenue.
8. SEO
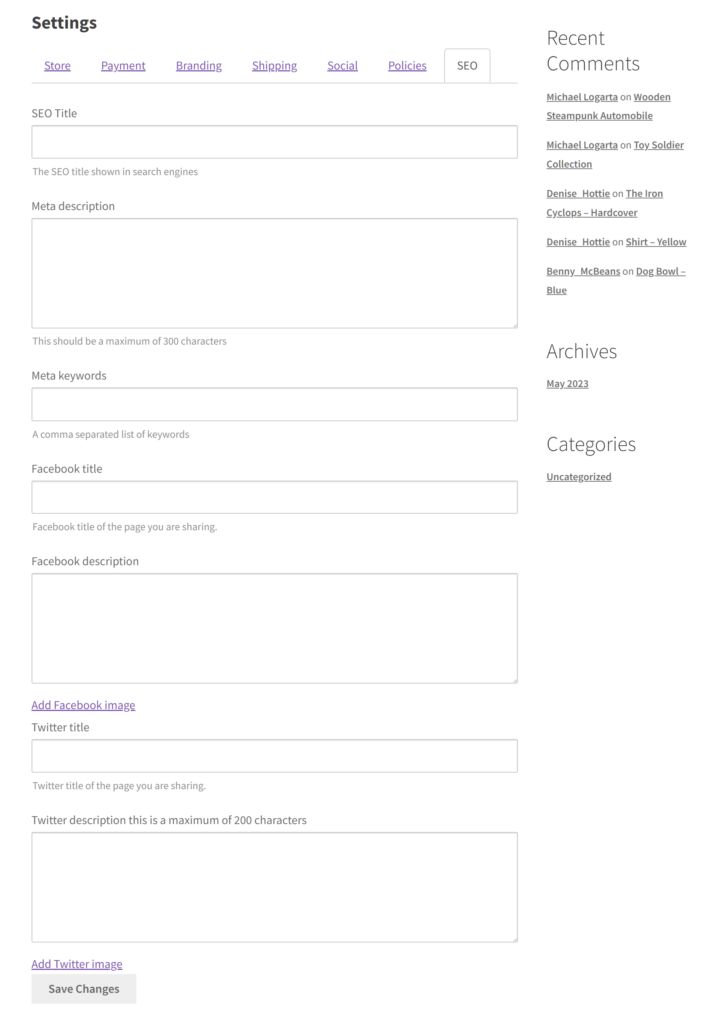
The SEO fields grant vendors various options to boost their online visibility through search engine optimization.
For instance, activating SEO Title lets then choose an SEO title for their store that will be shown in search engines. Moreover, they can craft meta descriptions and keywords, Facebook titles and descriptions, and the like.
SEO is crucial for your online marketplace, as it can improve its ranking in search engine results pages (SERPs). As a result, your platform becomes easier to find via search engines such as Google Search. These can lead to more people visiting your marketplace, clicking on links, and buying vendor store products, all of which can contribute to the growth of your business.
9. Use HTML for policy/store notice
When ticked, these checkboxes enable HTML for the WordPress editor.
This allows the vendor to use HTML, giving them a finer degree of control when crafting their policies and/or store notices.
Step 3: Save your work!
Once you’re happy with your settings, scroll down the Settings Form page and click the Save Changes button. This implements all the modifications you’ve made, giving your vendors access to various settings via their vendor store Settings page.
Now, your vendors are ready to help your marketplace rise to the top!
Conclusion
If you’re eager to elevate your multi-vendor marketplace to amazing heights, you must allow your vendors a considerable degree of control over their vendor stores. One of the most effective ways to do this is by granting them the power to configure their store settings.
Thankfully, WC Vendors lets you offer your vendors the ability to tweak such store settings. To do this, you simply have to observe the following steps:
Do you have questions about how to let vendors configure their vendor store settings? Let us know in the comments section below!
