If you want to change the wording or labels displayed on your vendor dashboard (for example, Bank Account Name, Store Settings, or Shipping Options), the easiest and safest method is by using the Loco Translate plugin.
This guide will walk you through each step to translate or modify text strings in WC Vendors and WC Vendors Pro using Loco Translate.
Why Use Loco Translate
The Loco Translate plugin allows you to edit and manage translations directly from your WordPress dashboard.
You can use it to:
- Translate plugin text into your language.
- Customize existing text (for example, change “Bank account name” to “Account Holder Name”).
- Store translations safely so they are not overwritten during updates.
Step-by-Step Guide
Follow these steps to modify WC Vendors strings easily:
Step 1: Install and Activate Loco Translate
- Go to Plugins → Add New.
- Search for Loco Translate.
- Click Install Now, then Activate.
Once activated, you will see Loco Translate in your WordPress admin menu.
Step 2: Open the WC Vendors Plugin in Loco Translate
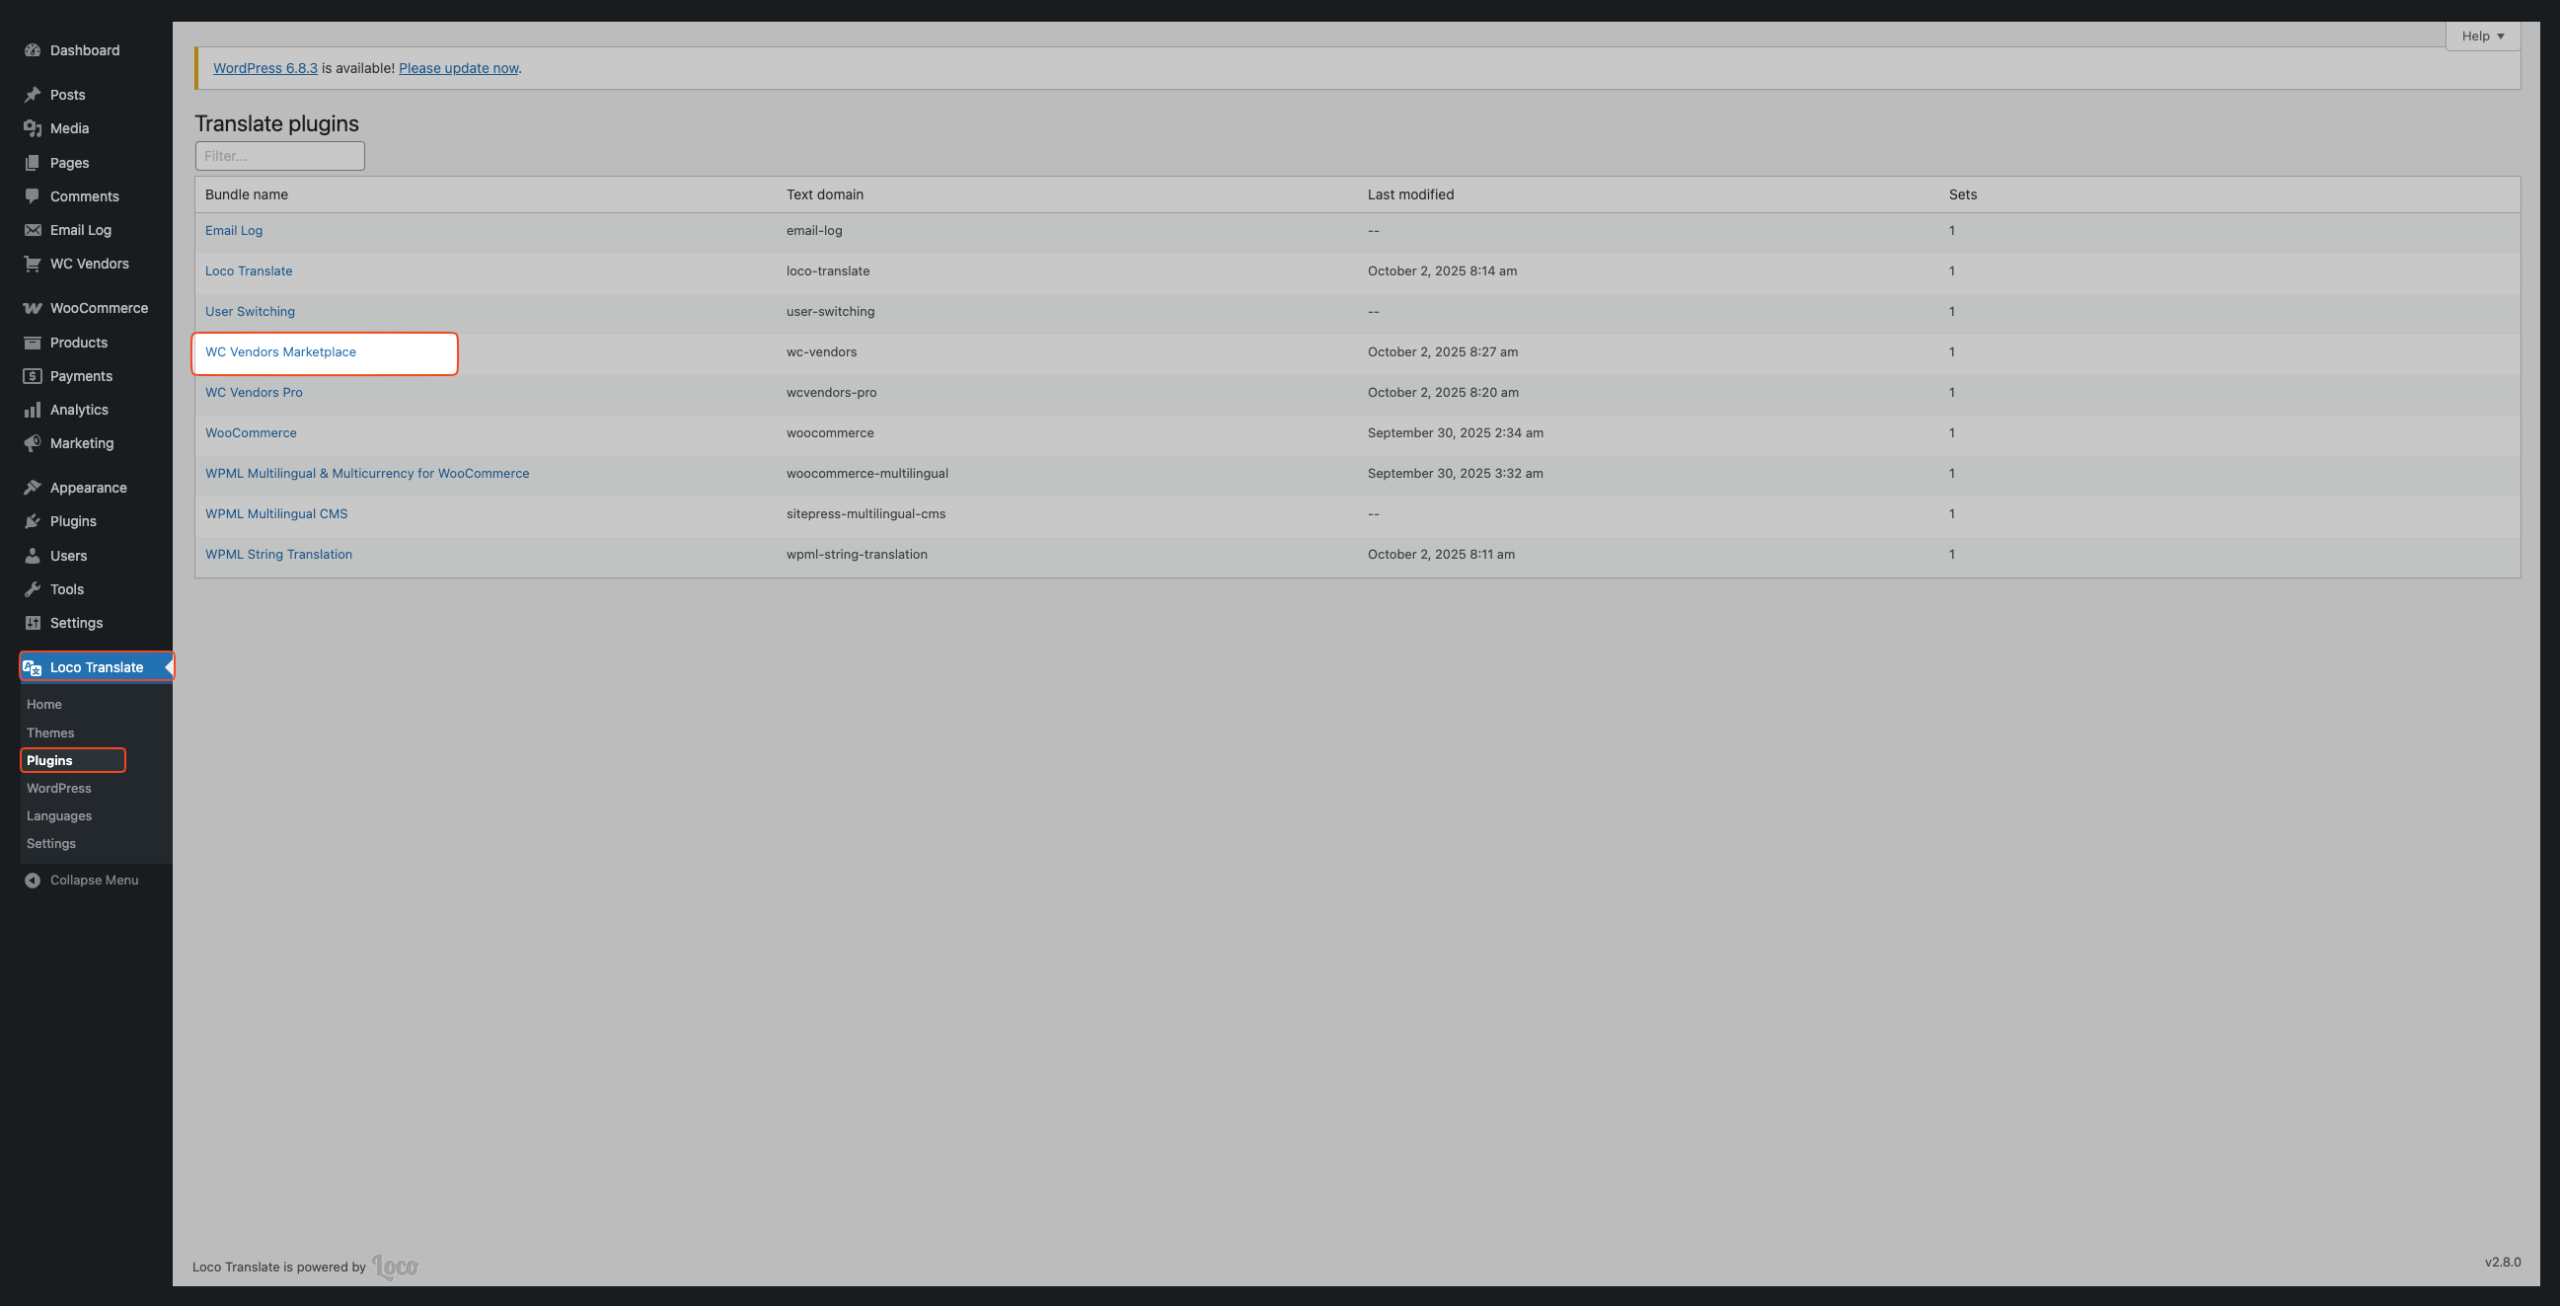
- Navigate to Loco Translate → Plugins.
- From the list, select WC Vendors Marketplace (and later WC Vendors Pro, if you use the Pro version).
Step 3: Create or Open a Translation File
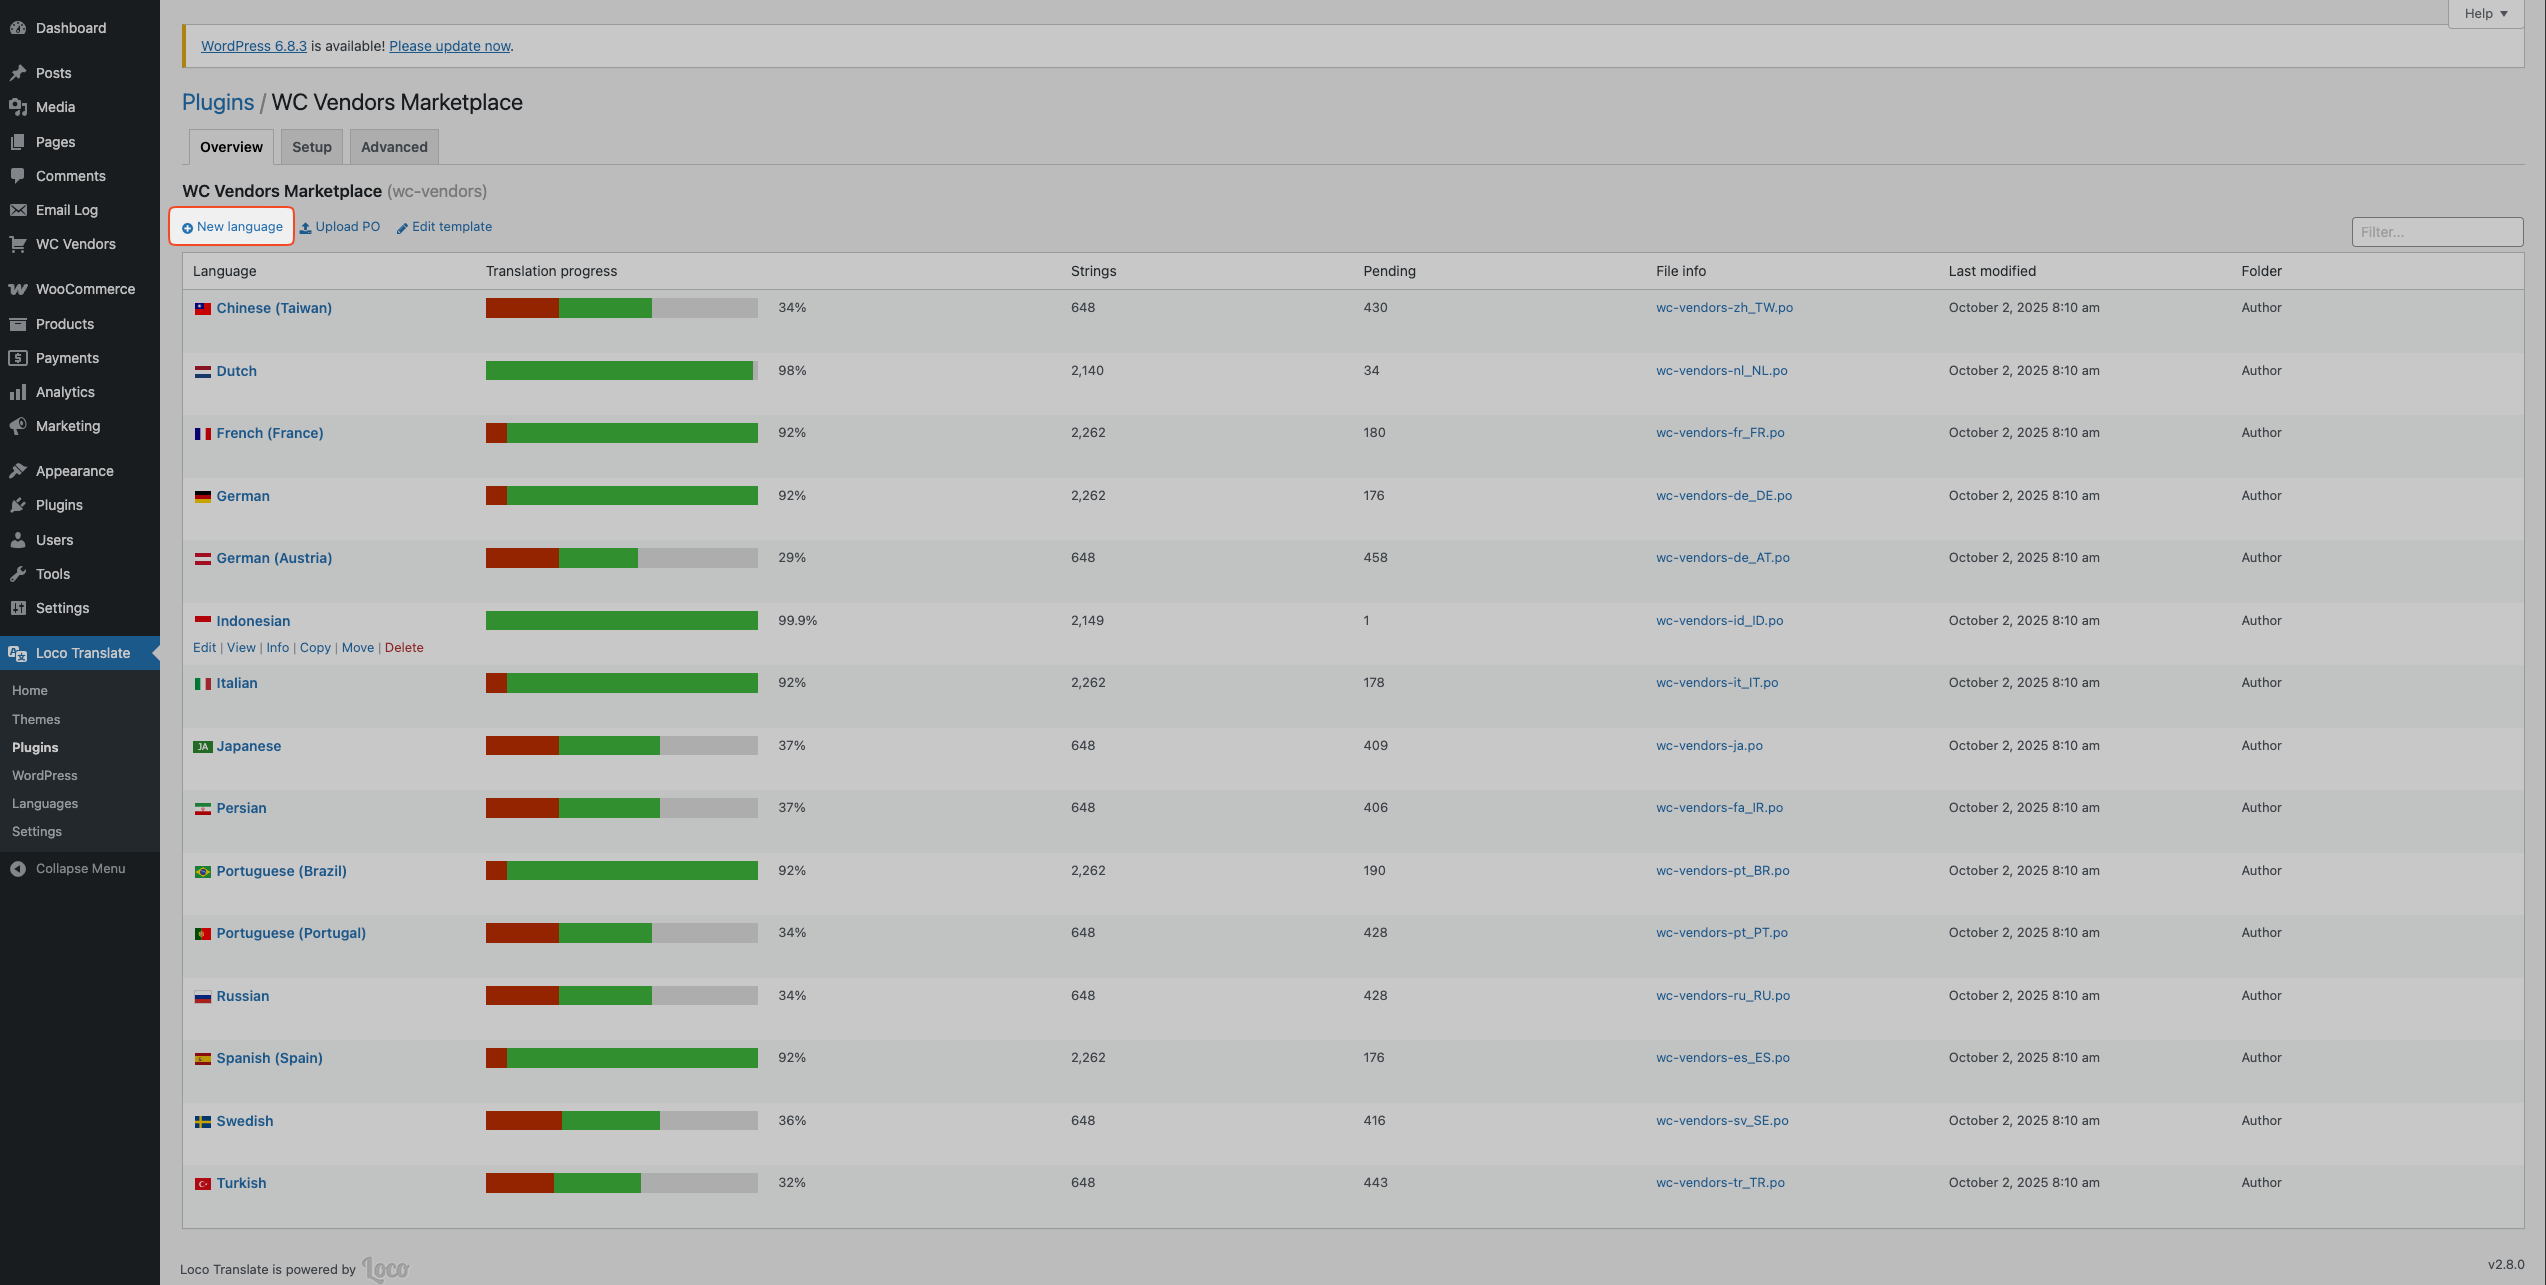
If you do not have an existing translation file:
- Click New language.
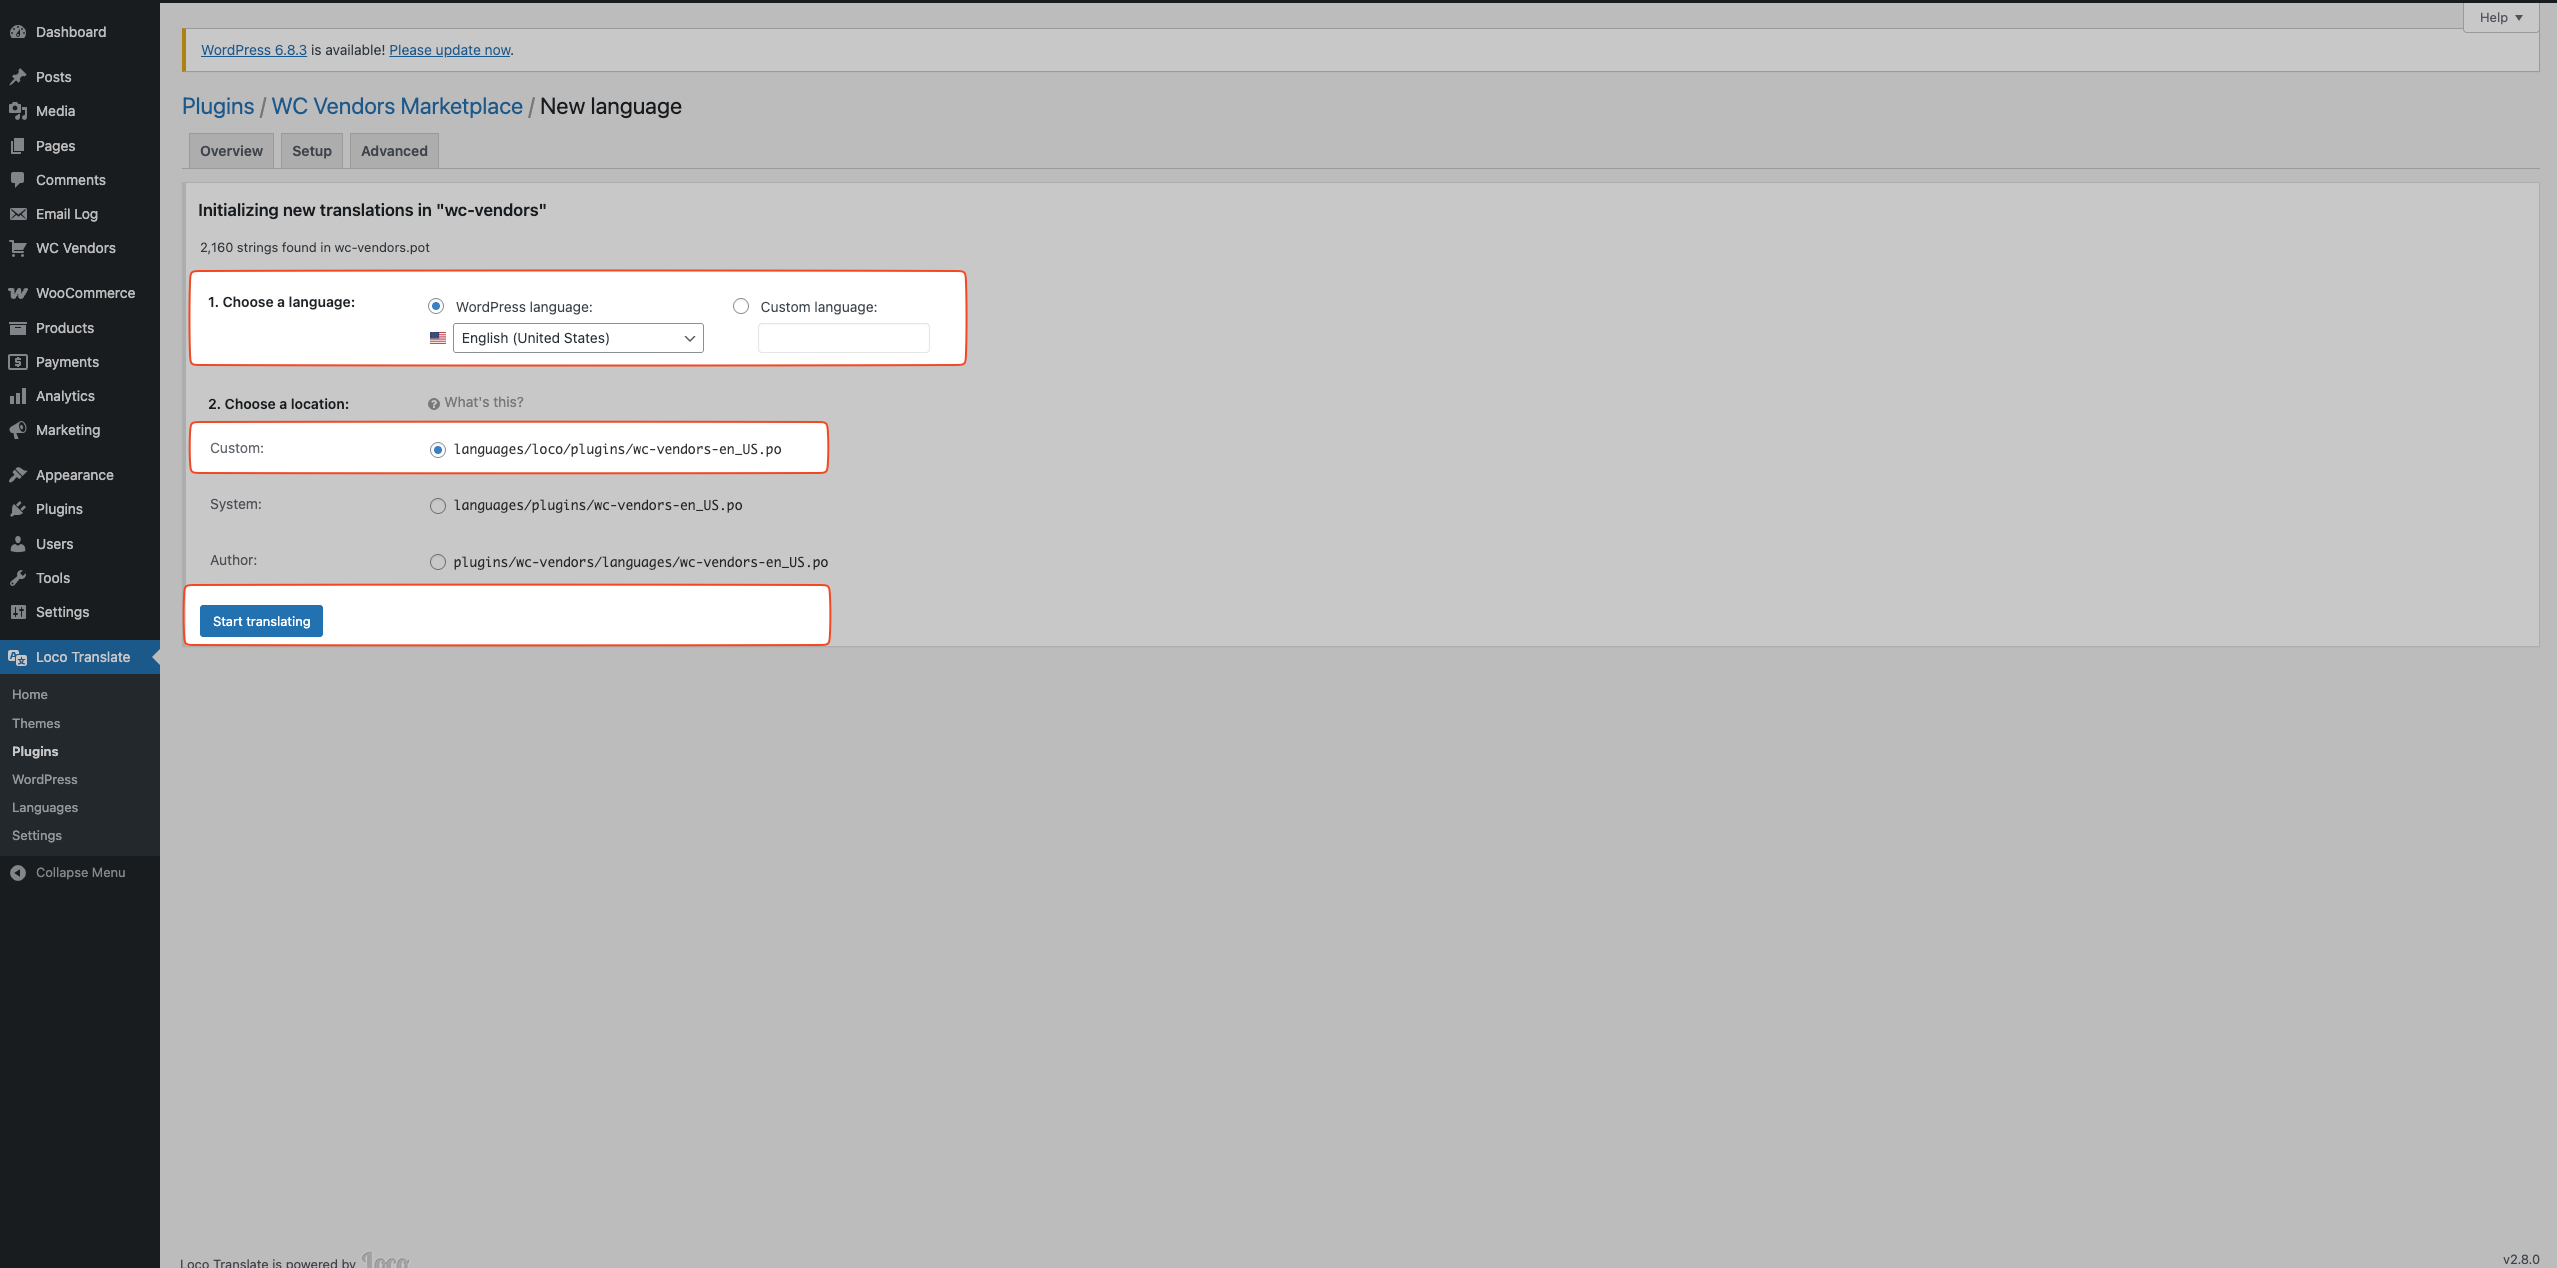
- Choose your WordPress language (for example, English (United States)).
- Select Custom location — this ensures your translations will not be lost during plugin updates.
- Click Start translating.
Step 4: Search and Edit Strings
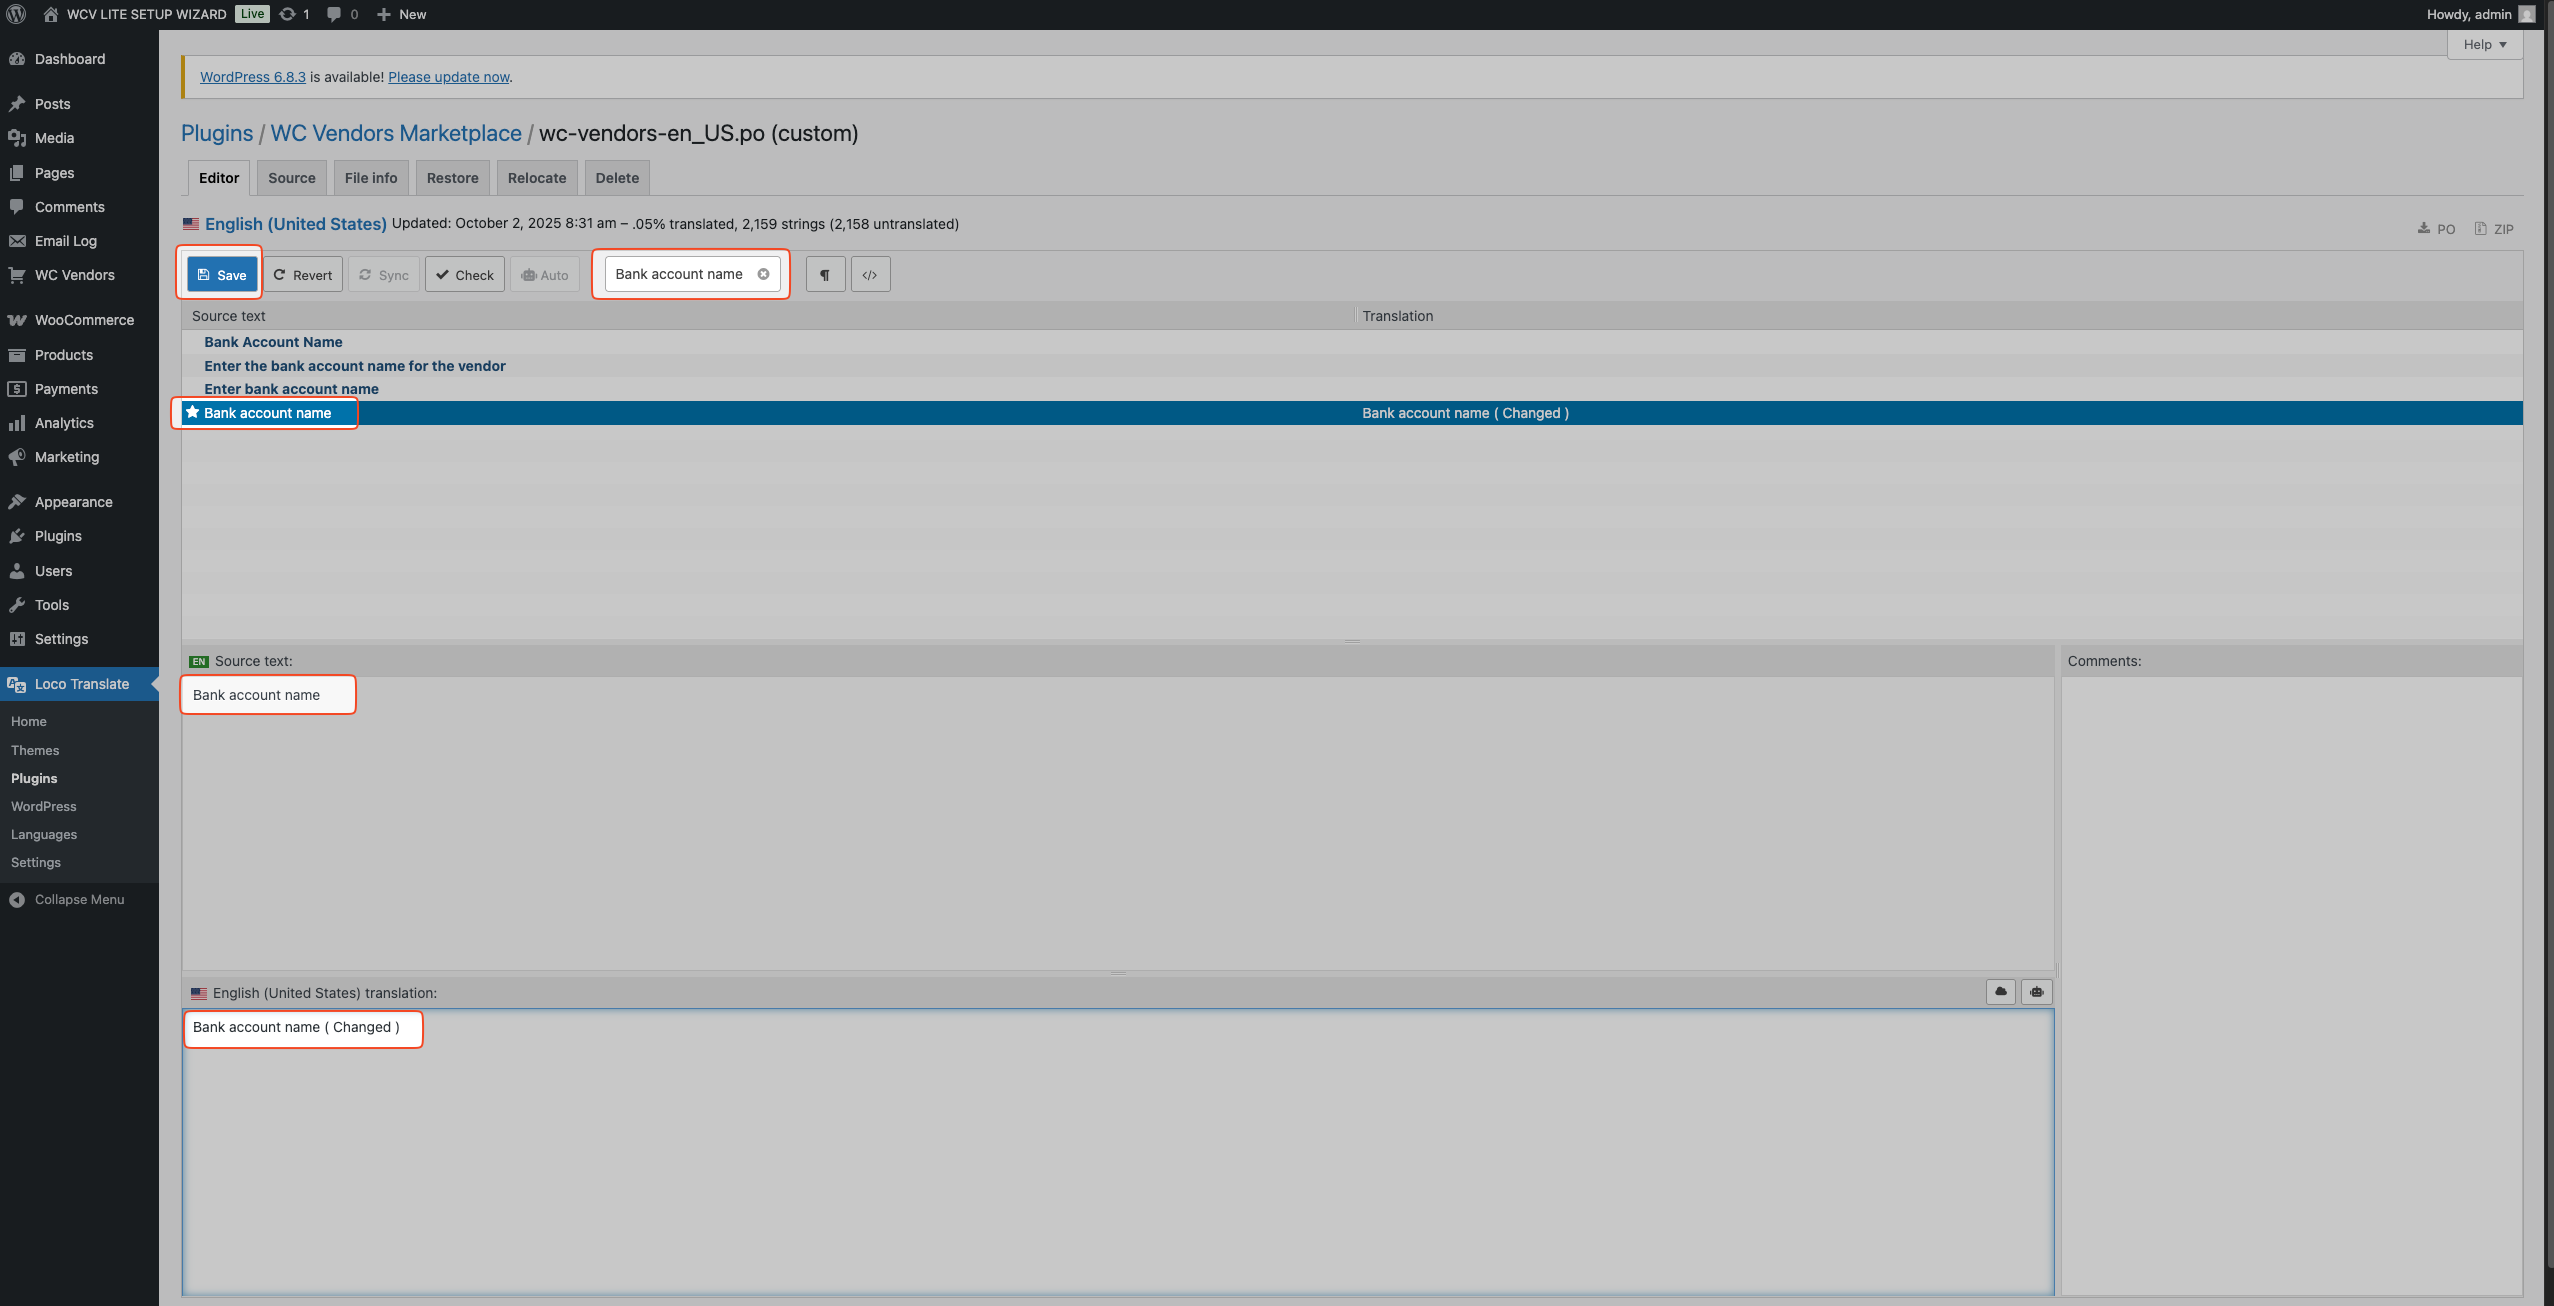
- Use the Filter translations search bar to find the string you want to edit (for example, Bank account name).
- Click on the string from the source text list.
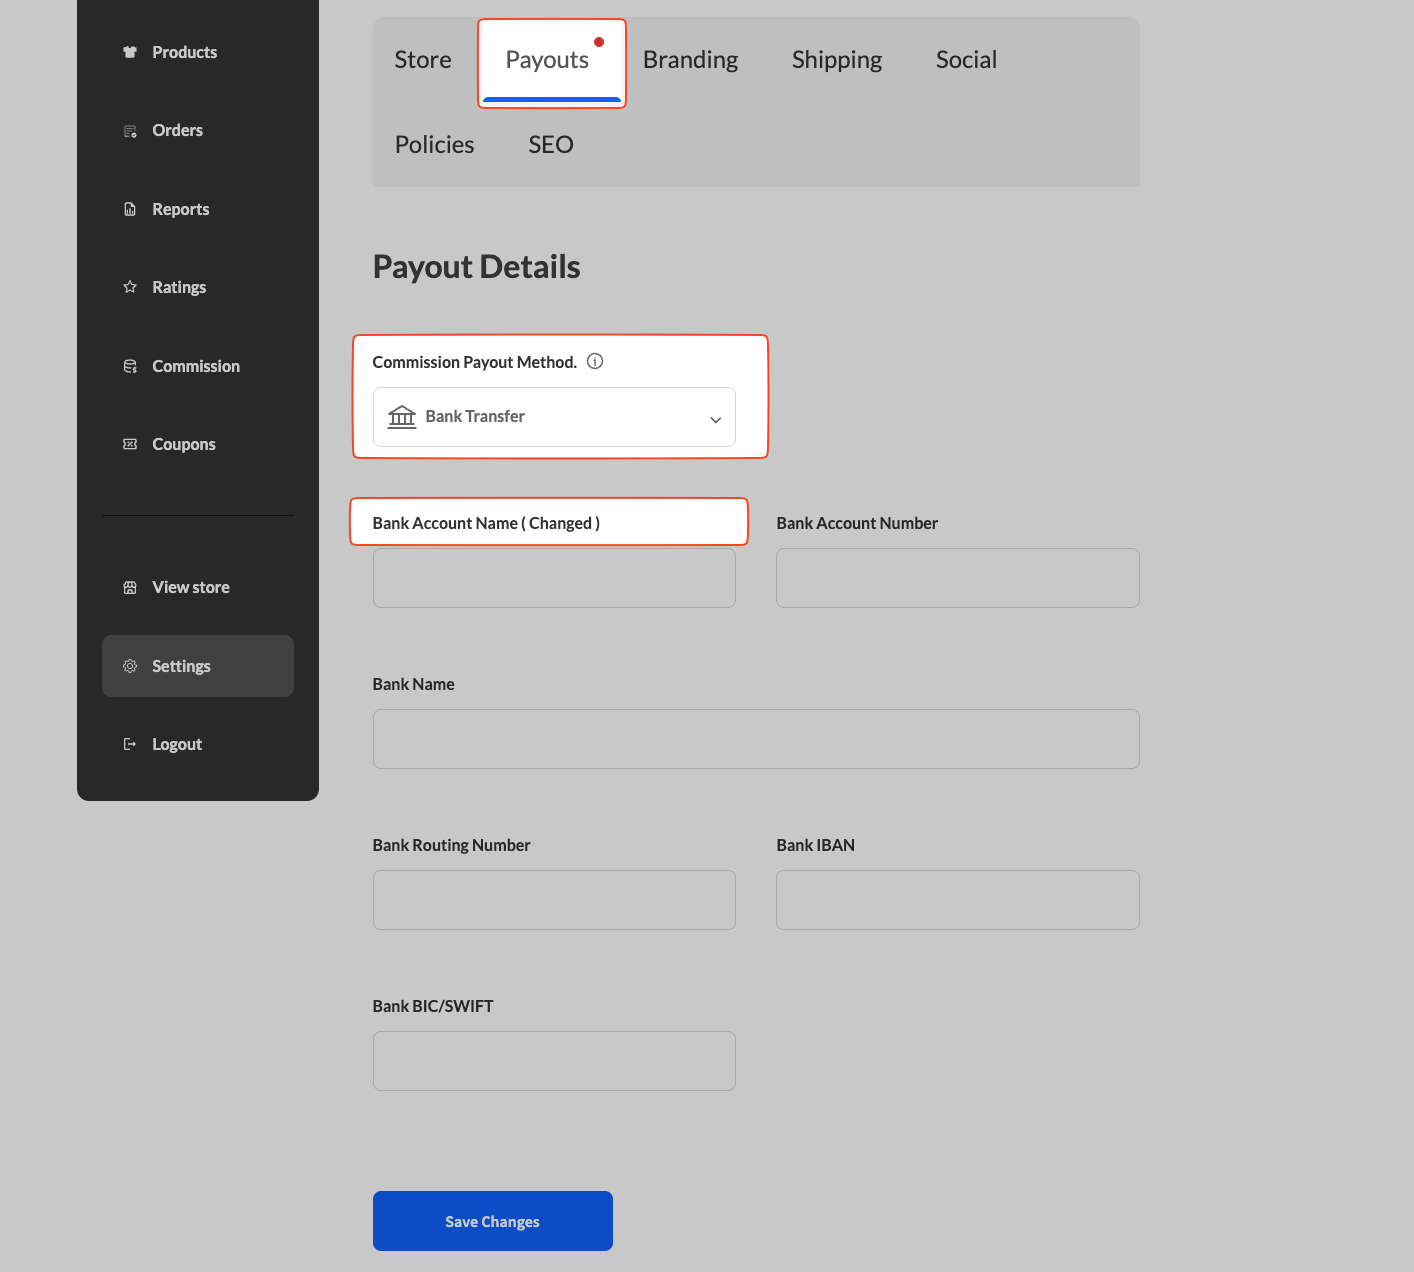
- In the Translation field below, enter your new label (for example, Bank Account Name (Changed)).
- Click Save when done.
Step 5: Verify the Changes on the Vendor Dashboard
- Ask your vendor (or log in as one) and go to Settings → Payouts.
- Check if the updated label appears correctly (for example, Bank Account Name (Changed)).
Tips and Troubleshooting
- If you do not see your text:
- Click Sync in Loco Translate to update available strings.
- Make sure you are editing the correct text domain (wc-vendors or wc-vendors-pro).
- For multilingual sites:
- Use WPML or Polylang with Loco Translate for language-specific customization.
- After updates:
- Always check that your custom translations are stored in the Custom location, not the Author or System folders.
Summary
With Loco Translate, you can easily rename, translate, or personalize any text label within WC Vendors. It is the safest and most up-to-date way to localize your marketplace and give your vendors a more tailored experience.
If you need help applying these changes, feel free to contact our support team — we are always happy to assist.