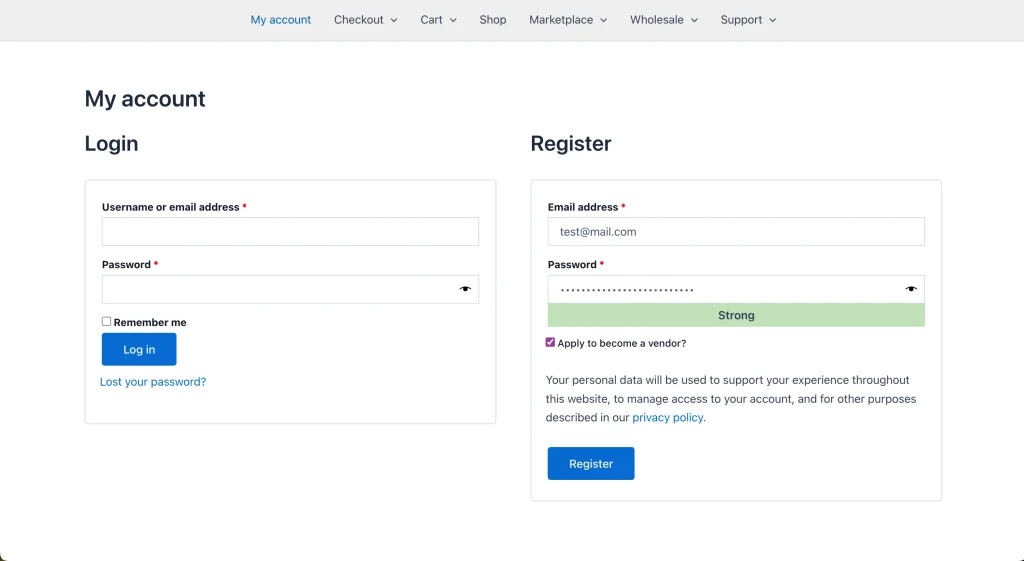
Vendor registration is handled via the WooCommerce registration system. Users register from the WooCommerce my-account page, and then check the “Apply to become a vendor” checkbox if they are interested in joining your site as a Vendor. If they do not check the box, they will be registered with the WooCommerce Customer role.
There are several steps you need to take to ensure that vendor registration is enabled. The first is to ensure that WooCommerce registration has been enabled.
Enable user registration
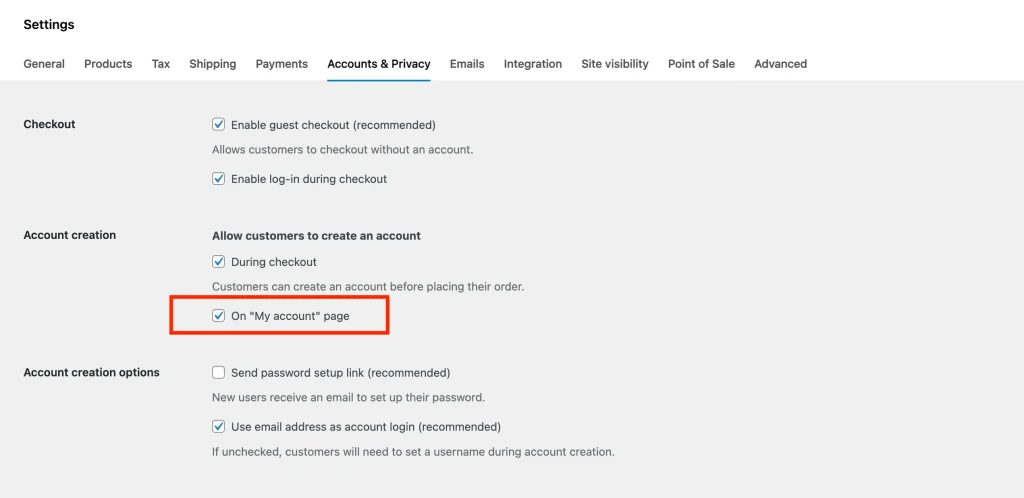
User registration must be enabled under the WooCommerce settings for this to be available. Please go to WooCommerce > Settings > Accounts & Privacy > Account creation > mark the checkbox for “On My account page”.
Check this documentation to learn more about account creation in WooCommerce.
Vendor Registration
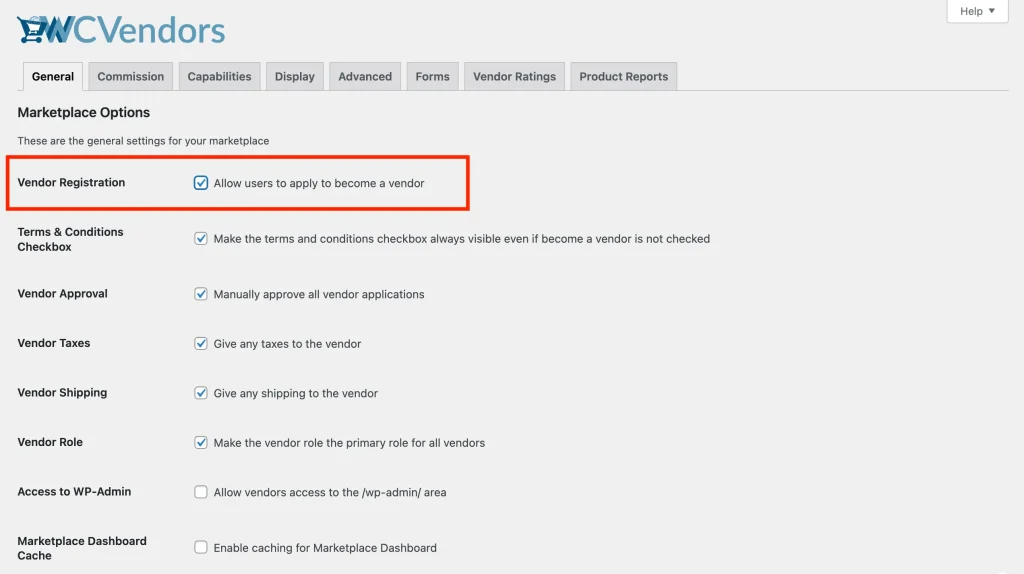
Once the WooCommerce registration system is enabled, you will need to enable “Vendor Registration” in WC Vendors > Settings > General. This enables the self-service options for vendor registration.
Automatic or manual vendor approval
There are two options when vendors register on your marketplace. Automatic or manual approval.
Automatic approval
Automatic approval, as the name suggests, allows vendors to register on your marketplace and start listing products and selling immediately. This is the quickest way to get your vendors onboarded.
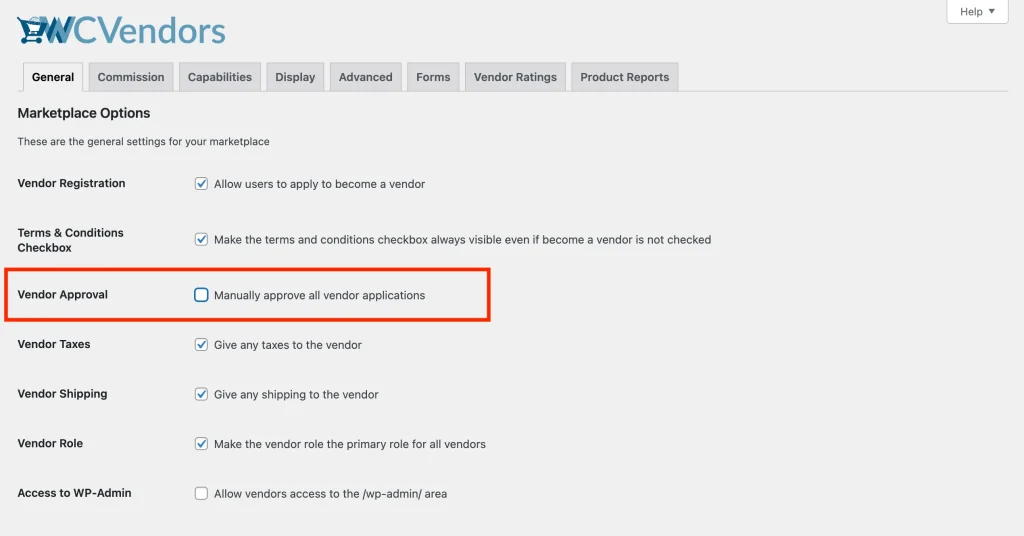
Manual approval
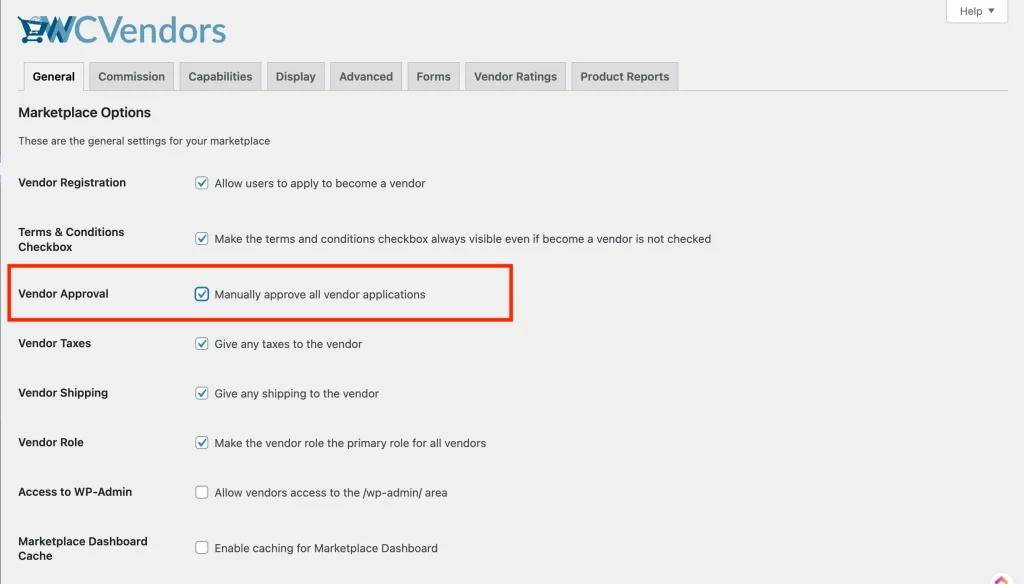
Manual approval requires marketplace admin approval before the user becomes a vendor. This can be useful if you have specific requirements for applications to your marketplace. When a user applies their user role will be a Pending Vendor. Only after they have filled out the required information can you approve them.
How to approve a vendor application
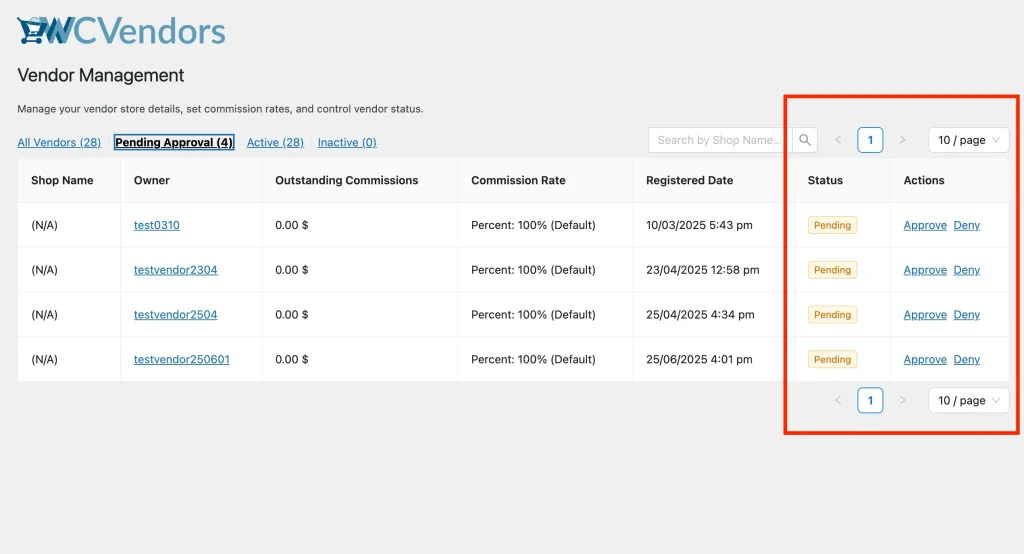
If you have manual approval enabled, you will need to approve or deny the vendor application. You can do this by navigating to WC Vendors > All Vendors > Pending Approval. From there, you can approve or deny their application. If the emails are enabled, then the vendor will be notified of their application status.
Vendor registration notifications
When a user registers to be a vendor, the marketplace admin can be notified via email. You can configure this by following the instructions in our Emails Overview article.
Register Vendor Manually
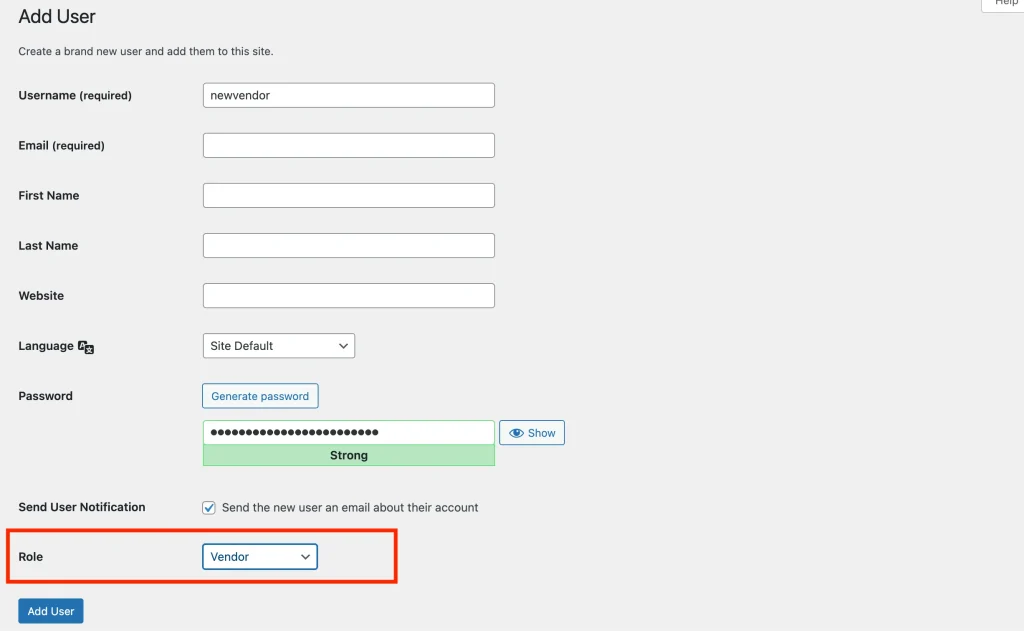
If you do not enable user or vendor registration, you can still add vendors manually from the Users screen in the WordPress Admin. This is particularly useful if you have a closed marketplace with select vendors. This provides an option for you as the marketplace admin to completely handle the vendor registration.
- Navigate to WordPress Admin > Users and click Add New
- Fill out the relevant information and select the ‘Vendor’ role from the dropdown.
- Click Add New User.
- The vendor has been manually created, and the user is notified via email
Once the base vendor user has been created, you can edit this new user to update their store information.
Roles Added
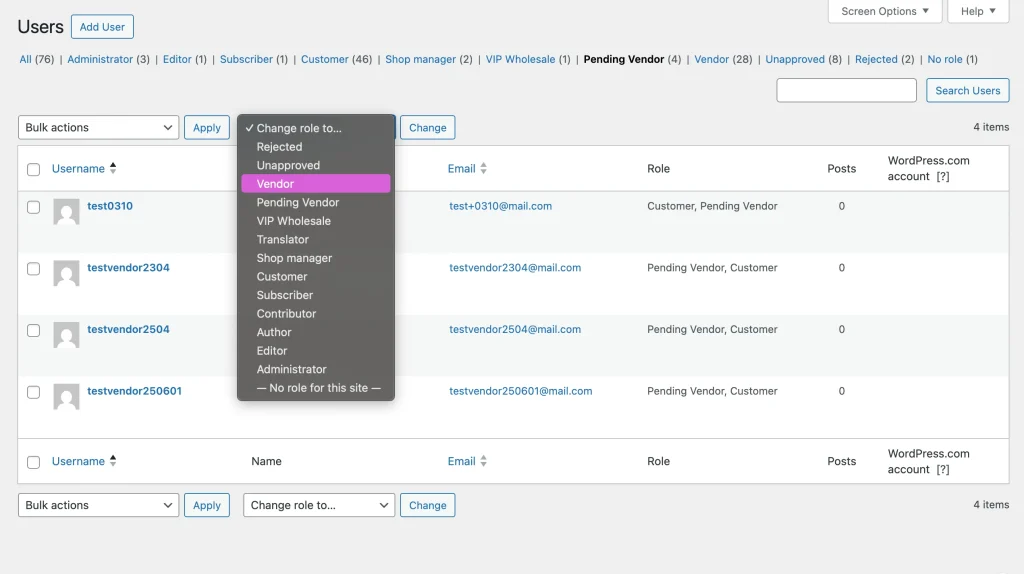
Once WC Vendors is installed and activated, there will be two new WordPress roles created.
- Vendor
- Pending Vendor
You can view these roles by going to the WordPress admin panel and then navigating to Users. Click the drop-down box that says, “Change role to…”.
Pending Vendor Role
If you have chosen to approve vendor applications manually, then users will first be given the Pending Vendor role when they apply to become a vendor on your site. Both the admin and the pending vendor will be sent an email notifying them of the application/pending vendor status.
After ticking the “Apply to Become a Vendor” checkbox and then clicking register, the pending vendor will be redirected to the vendor dashboard, and will see this message:
The marketplace admin will need to approve these applicants before they will be given the Vendor role and the permissions to list products, set up their shop, view the vendor dashboard, etc. The marketplace admin can also deny the applicant. To approve or deny the pending vendor and ensure that an email is sent to the pending vendor to notify them of their approval or denial, please follow these steps:
If the vendor is approved, they are given the VENDOR role and can now visit your site and access the vendor dashboard to configure their shop and list products on your site.
Vendor Role
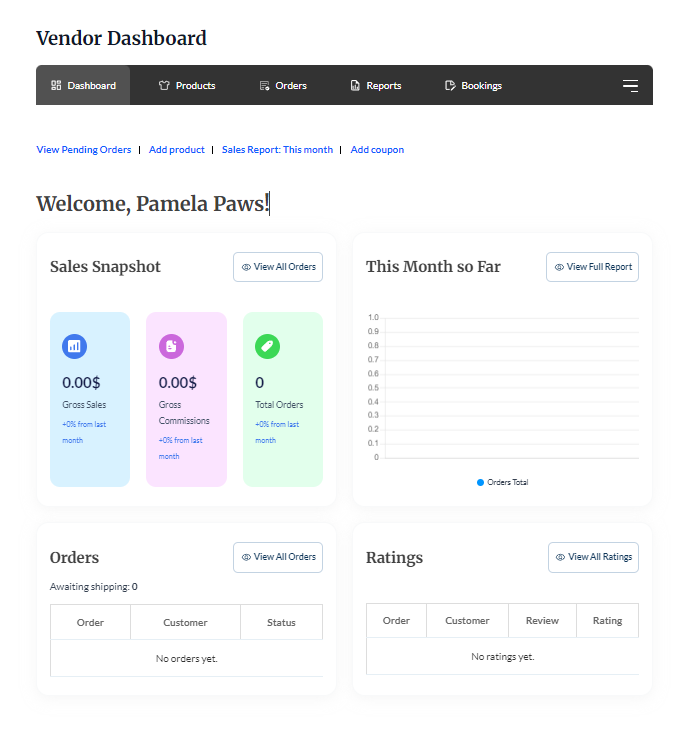
If you have chosen to allow automatic approval of vendors, then the users who check the “Apply to Become a Vendor” checkbox during registration will be given the vendor role. This will allow them to immediately view the vendor dashboard to begin setting up their shop and adding products to their shop.
After ticking the “Apply to Become a Vendor” checkbox and then clicking register, the automatically approved vendor will be redirected to the vendor dashboard, and will see the vendor dashboard page:
