As the marketplace admin, you can control your vendors, their products, and what they are allowed to do. Settings that apply to all vendors can be managed from the WC Vendors Settings. To view or edit individual vendor details, go to the Users section in your WordPress dashboard.
Manage a vendor
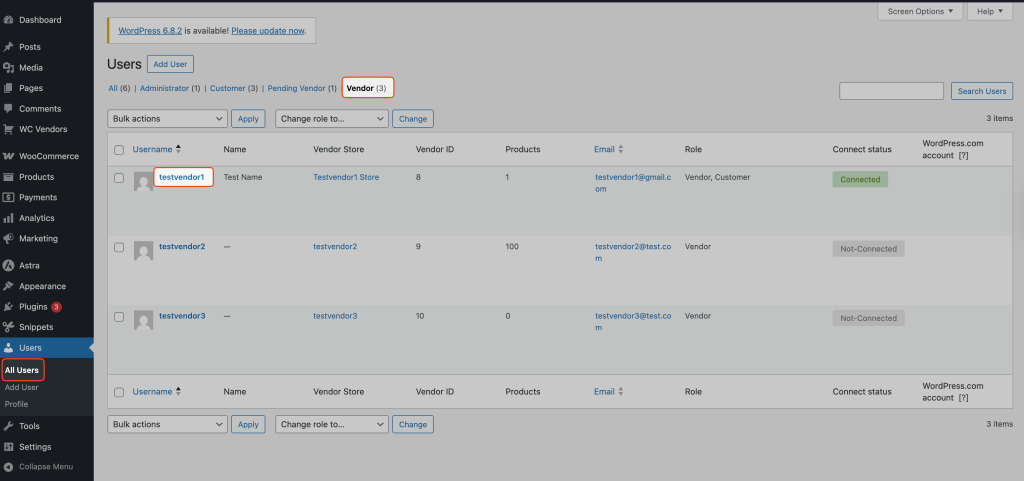
To manage a vendor, go to the Users page from your WordPress admin panel. Find the vendor you want to edit and click on their username. You can also use the filter to show only users with the vendor role, so it is easier to find them.
Vendor Information
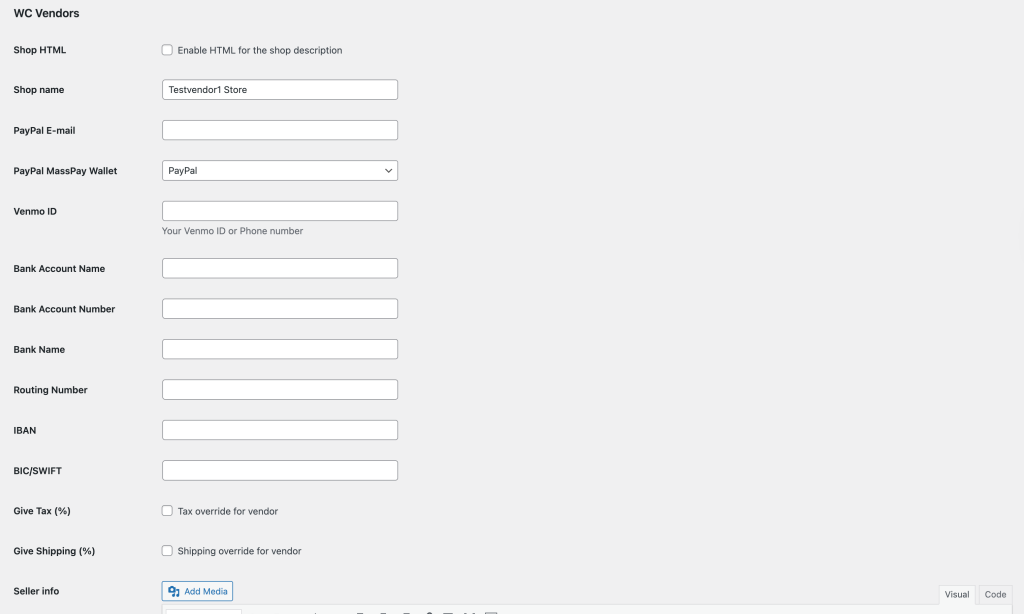
This screen allows the marketplace admin to update the vendor’s store settings. You will find all the settings under the WC Vendors section on the vendor’s edit page. Please note that some options are only available if you are using WC Vendors Pro.
- All vendor store data, including Shop name, address, description, information, url
- Payment information
- Commission override
- Shipping settings (Pro)
- Set the vendor to be trusted/untrusted (Pro)
- Set the vendor to be verified (this shows on their store header) (Pro)
- Update branding details (Pro)
- Lock vendors from editing or publishing products (Pro)
- Vacation mode, notice, and cart disable (Pro)
- Store notice (Pro)
- Disk and file usage limits (Pro)
- Social media links (Pro)
- Store policies including privacy, refund, shipping, and terms & conditions (Pro)
- Store SEO (Pro)
Change the existing user to vendor
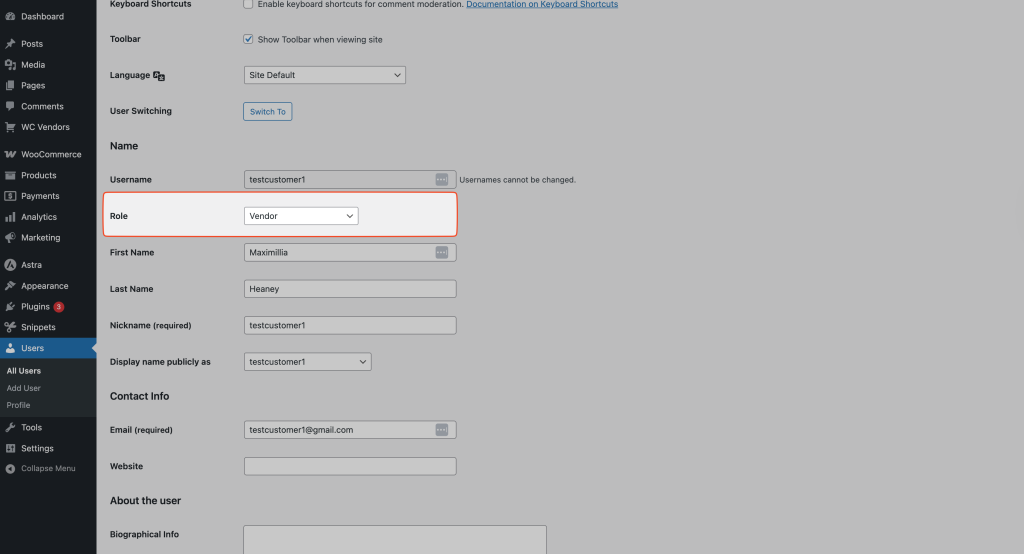
You can make an existing user a vendor if they are not one already. To do this, go to your WordPress admin panel and click on Users. Find the user you want to update and click on their name. On their profile page, look for the Roles section. From the drop-down menu, select Vendor.
Vendor Products
The marketplace admin can also assign products to vendors. There are three simple ways to do this:
- Import products and choose a vendor during the import.
- Bulk edit multiple products and assign them to a vendor.
- Edit a single product and select the vendor for that product.
Import Products
If you need to help the vendor add products, CSV upload products for a vendor, and assign them at import. Or if you have already existing products, you can bulk assign products or assign a single product. Vendors can also import their own products from their dashboards.
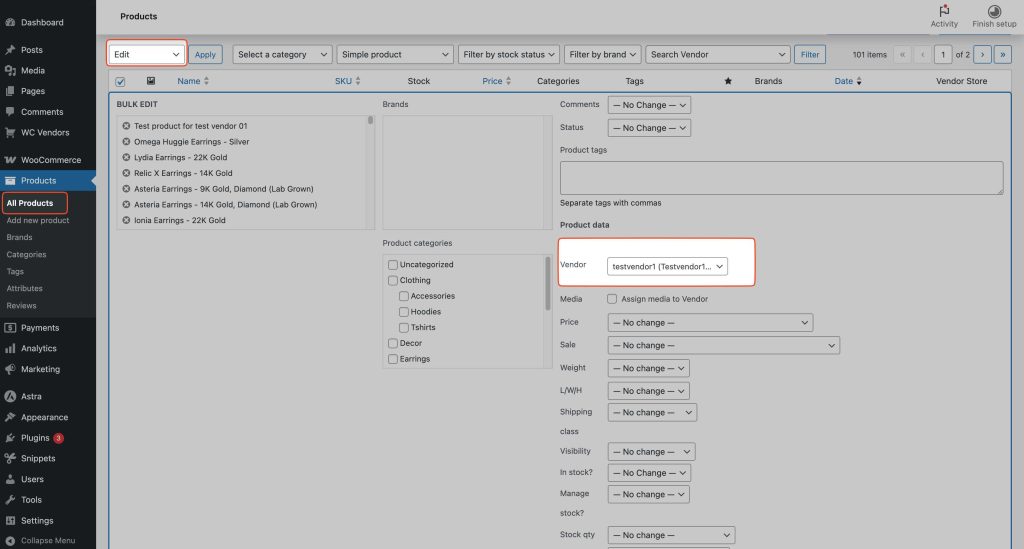
Bulk assign a vendor to a product
You can bulk assign vendors to multiple products from the bulk actions edit screen. product edit screen.
Assign a single product
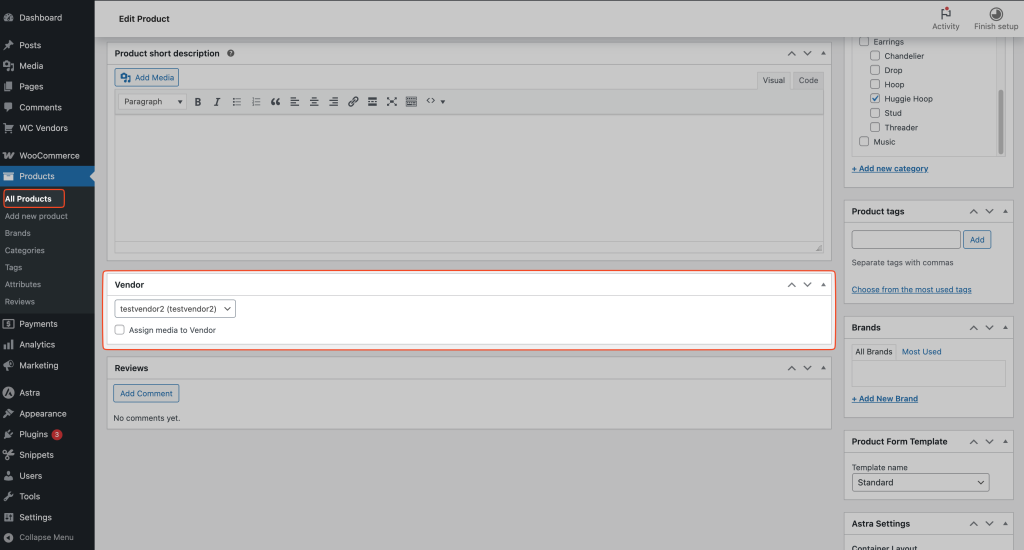
You can assign a single product to a vendor from the product edit screen. To do this, go to your WordPress admin panel and click on Products. Find the product you want to edit and click Edit.
On the product edit page, you will see a drop-down menu for Vendors. Select the vendor’s username from the list and click Save. The product will now belong to that vendor and will show up in their store.
Troubleshooting
The vendor field is not available
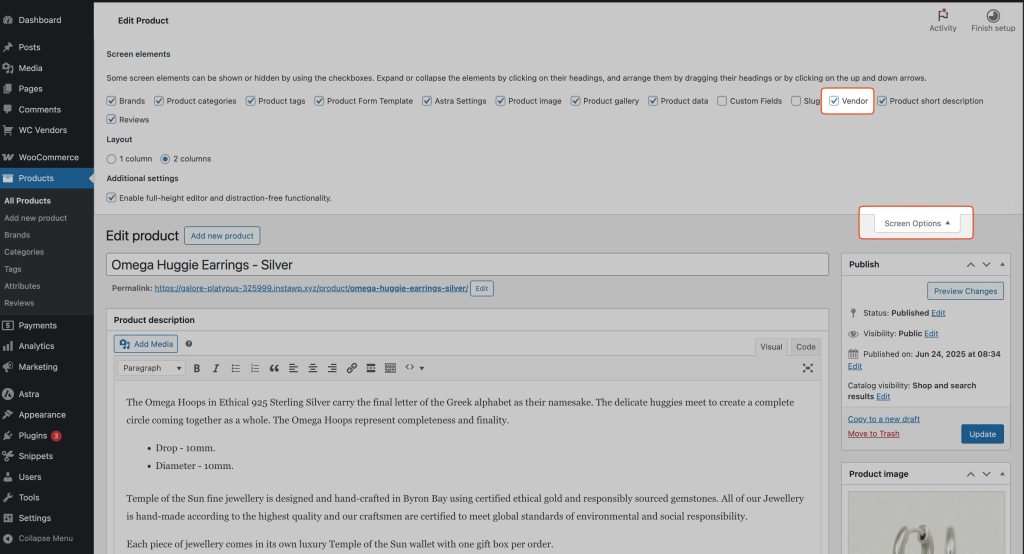
If you do not see the vendor drop-down on the product edit page, check the Screen Options at the top right corner of the page. Make sure the Vendor option is turned on there.
