
WC Vendors Stripe Connect is a payment gateway extension that integrates Stripe Connect with your WC Vendors-powered multi-vendor marketplace. It allows marketplace owners to automatically split payments between the marketplace and vendors, simplifying the payment process and managing commissions seamlessly. Stripe Connect handles the transfer of funds directly to vendors while taking care of fees and ensuring compliance with tax and legal requirements.
In summary, WC Vendors Stripe Connect serves two purposes: It allows customers to make payments using Stripe as the gateway, and it automates vendor payments or payouts.
What you get, and the Stripe account your vendors connect
Stripe Connect is a premium gateway extension. The free WC Vendors plugin adds basic marketplace features, but it does not split payments to vendors automatically. The automatic payment split, instant vendor payouts, and commission handling are part of the paid Stripe Connect gateway.
Your vendors connect a Standard Stripe account, not an Express account. During connection they either link an existing Stripe account or create a new one, and Stripe manages that account for them. The connection runs through Stripe’s secure OAuth flow, so each vendor keeps full access to their own Stripe dashboard.
Setup requirements
It’s important to note that you’ll need to have WC Vendors Pro installed along with WooCommerce.
Please note that you will need to have WC Vendors Pro installed alongside WooCommerce.
Activating the license
After installing Stripe Connect, the first step is to activate your license. This is crucial, as it ensures you receive important feature updates and security patches, as long as the license remains valid. You can activate the license on WC Vendors > License > Stripe Connect.
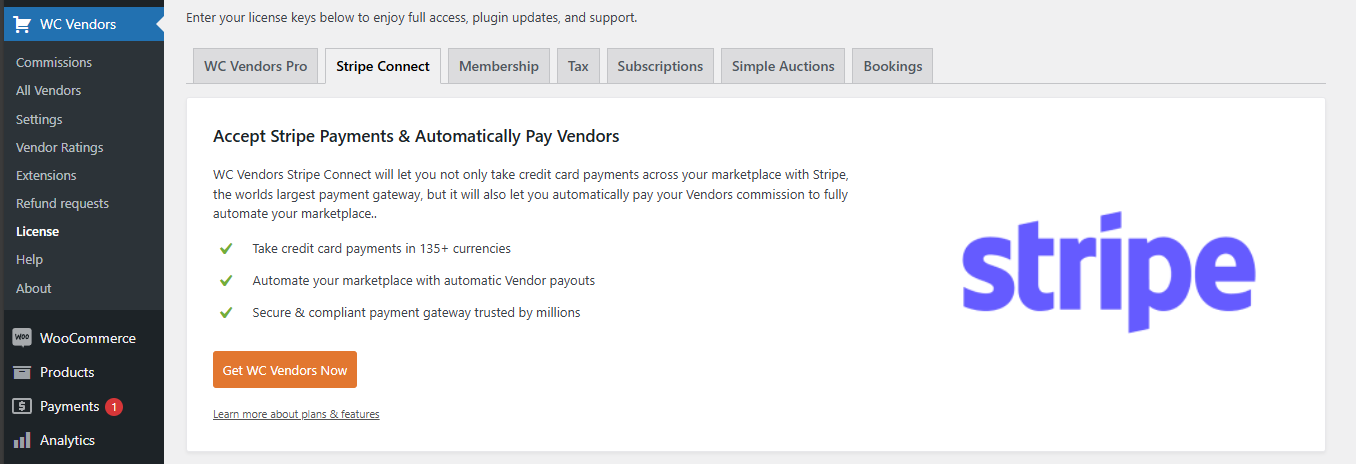
Enabling Stripe Connect in WooCommerce
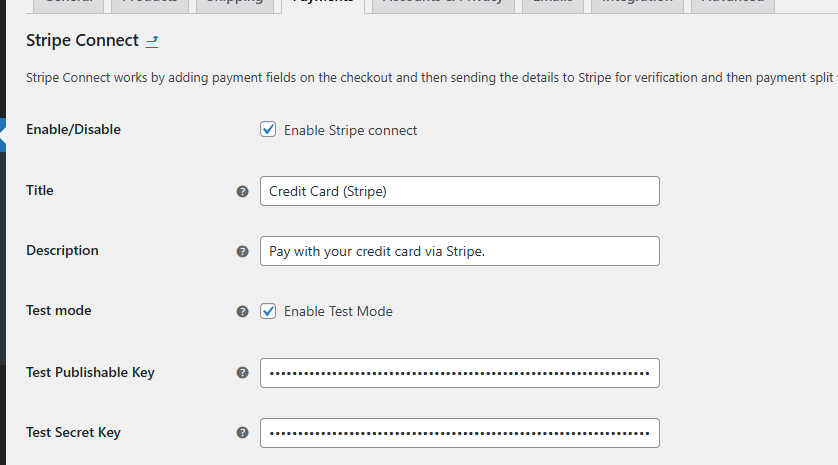
Great! Now that it’s set up, go to WooCommerce > Settings > Payments and enable Stripe Connect. Then, click the Finish Setup button, which will take you to the Stripe Connect settings page.
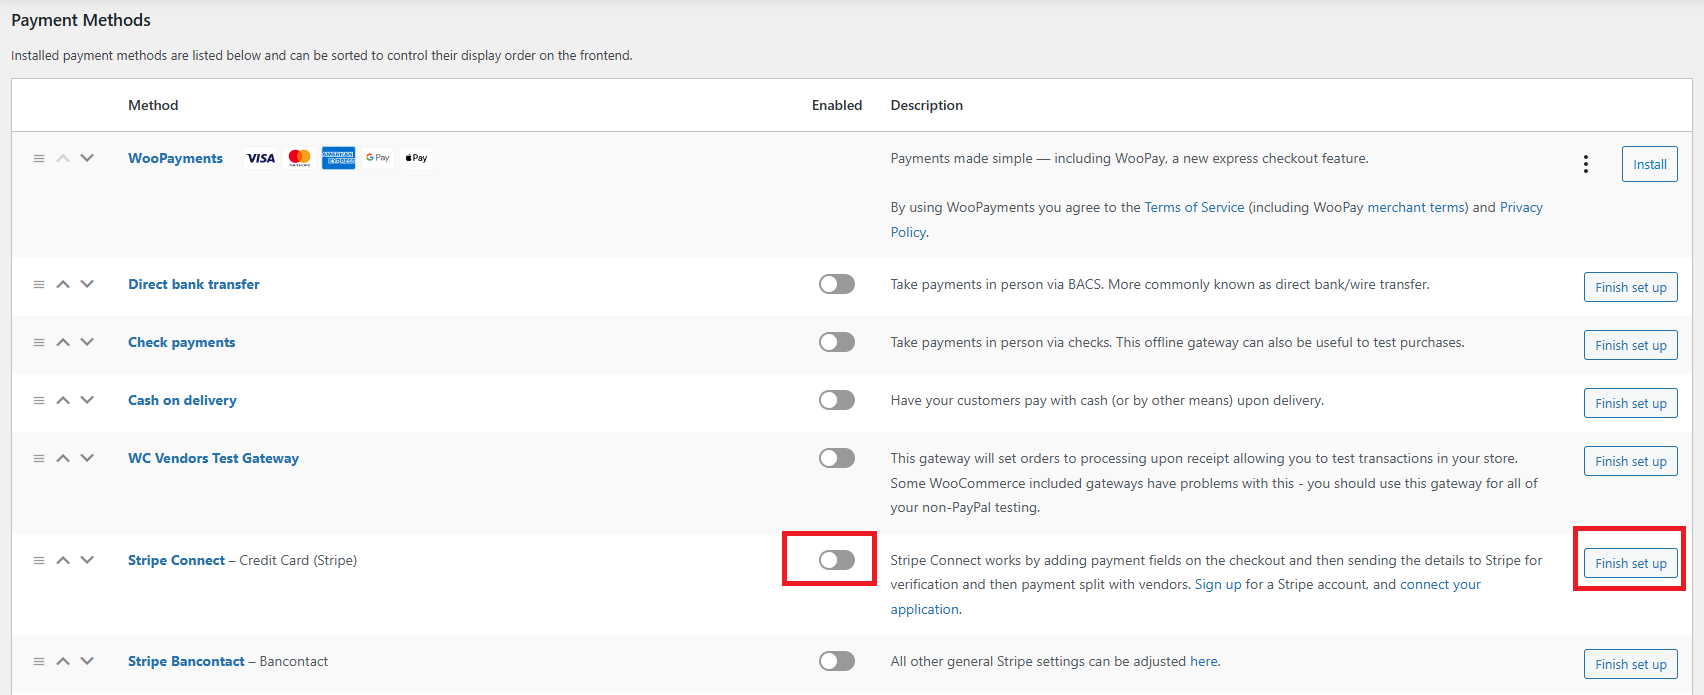
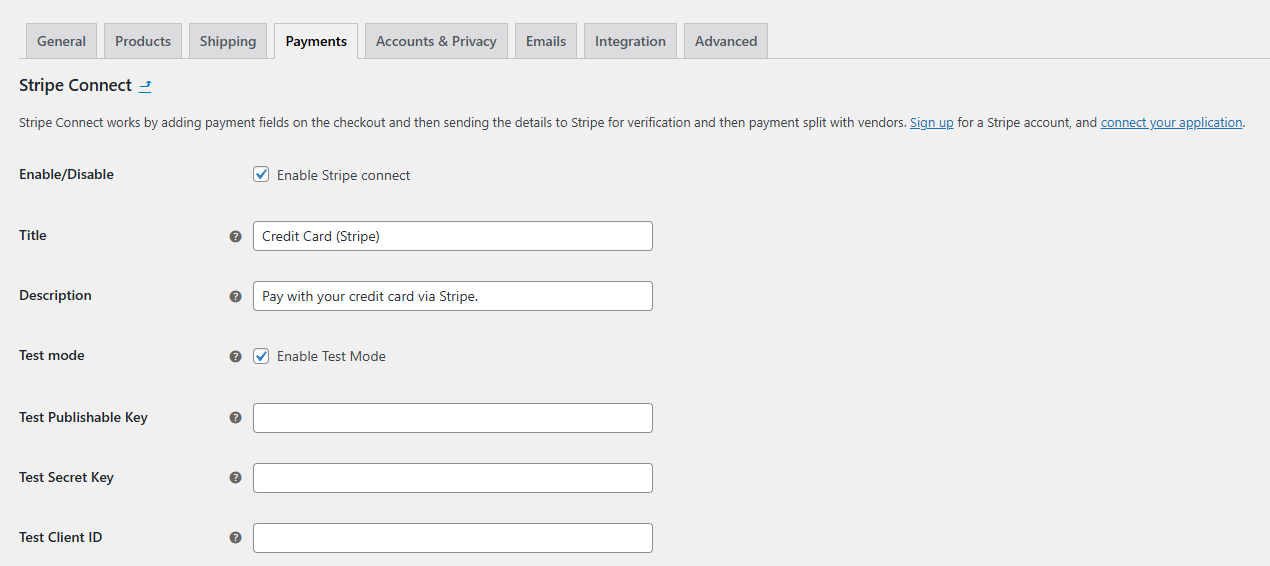
From here you’ll want to either set it to test mode or live mode. Live mode basically means that all At this point, you’ll need to choose between test mode or live mode. In live mode, all payments are real, and it’s automatically enabled when you uncheck the test mode box.
Obtaining your API keys and Client ID
There are three required keys to set up Stripe Connect:
- Publishable Key
- Secret Key
- Client ID
For this guide, we’ll walk through the setup in test mode. Don’t worry, the steps are the same for live mode. You just need to toggle between test mode and live mode as needed.

Additionally, if you haven’t done so yet, make sure to create a Stripe account. If you don’t have one, you can register here: Stripe Login | Sign in to the Stripe Dashboard.
Now, to get your Publishable key & Secret Key head over to Developers > API Keys copy the contents and paste it on your site
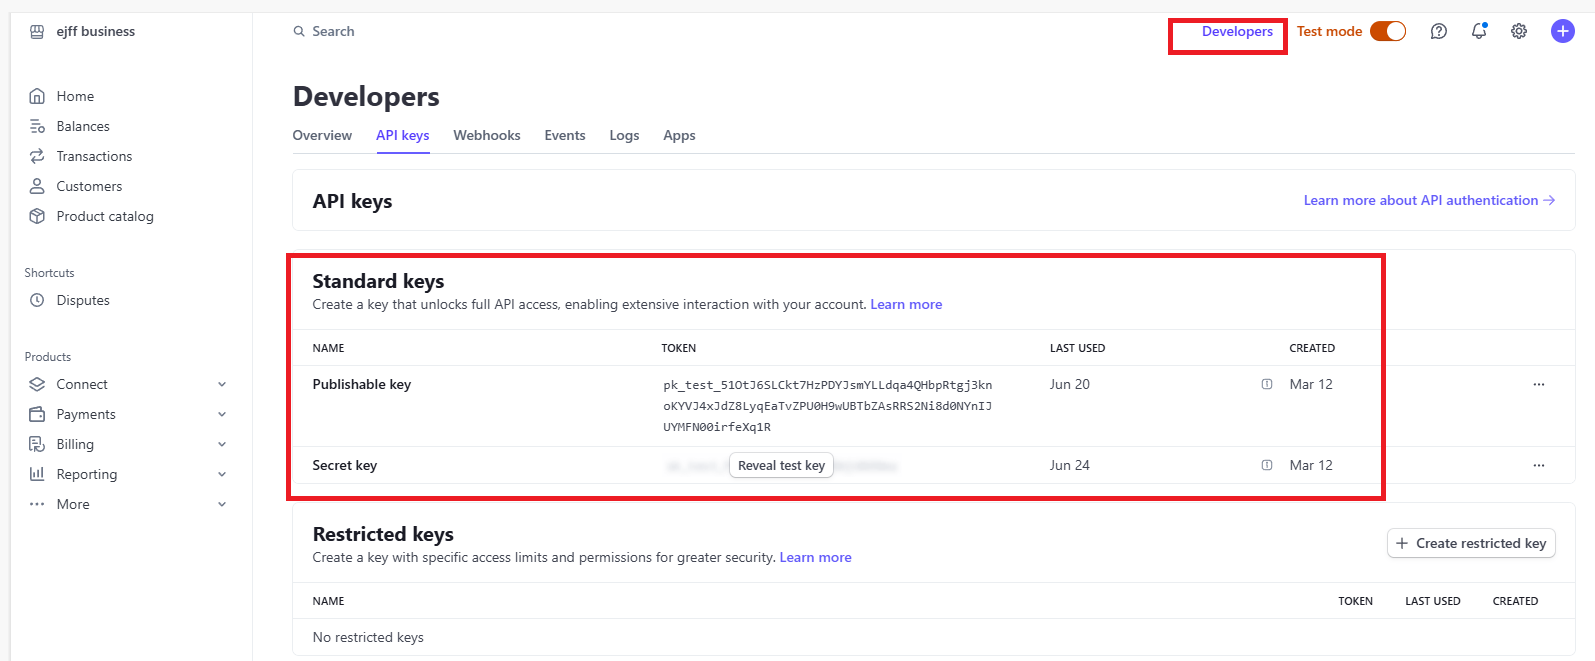
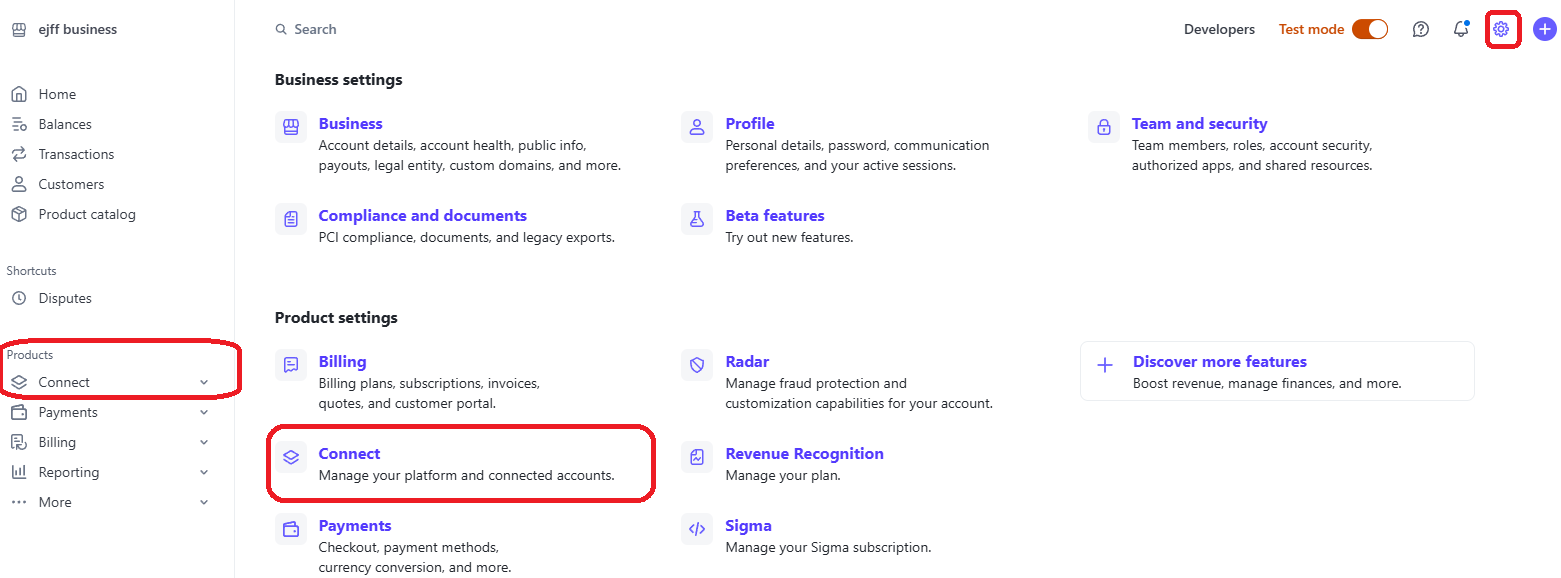
For the client ID, you can get them on the Connect settings.
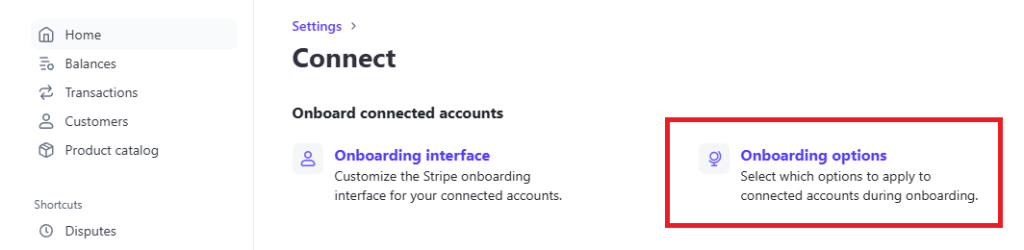
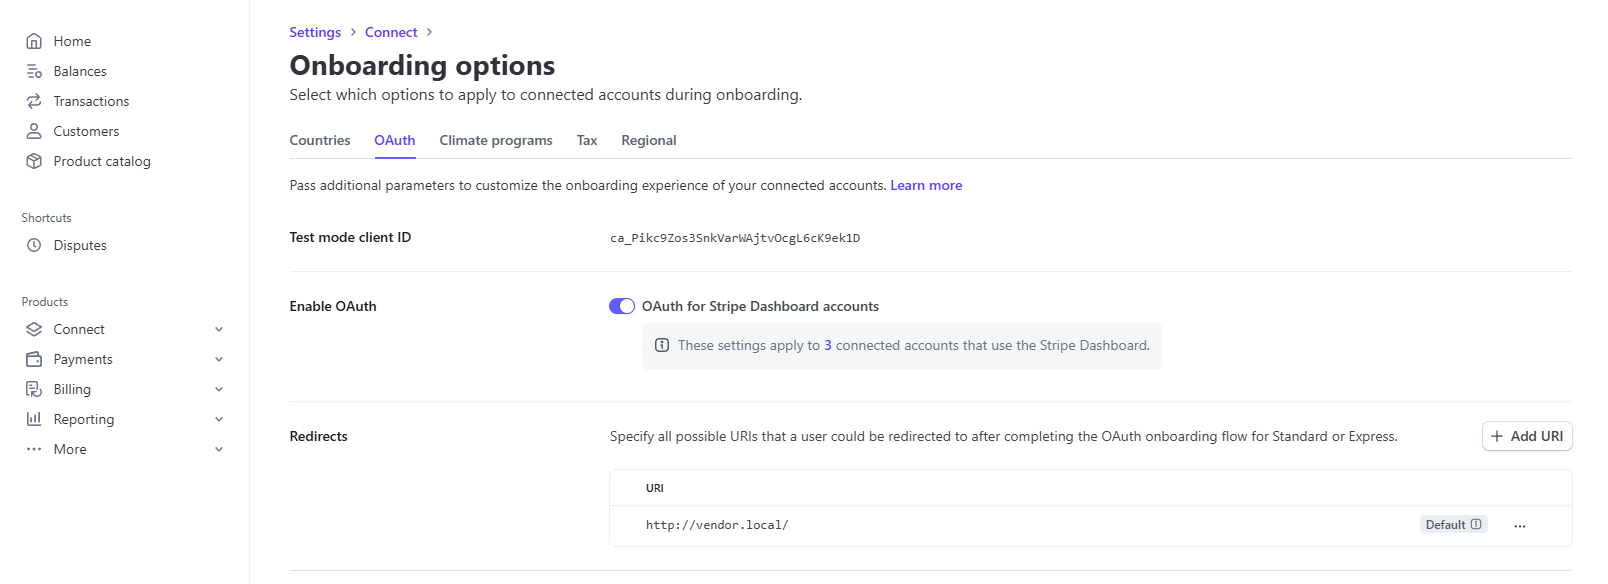
In the onboarding options, click on the OAuth tab, where you’ll find your Client ID. Once you’ve entered it, just save the changes on your multi-vendor website, and you’re all set!
Set up the webhook
Stripe uses webhooks to tell your store about payments, refunds, and other events in real time. You register your store’s webhook URL in your Stripe account.
- Go to WooCommerce → Settings → Payments → Stripe Connect.
- Find your webhook URL in the Webhook Signing Secret field. It follows this format:
https://yourdomain.com/wc-api/wcv_stripe_connect. - In your Stripe Webhooks dashboard, click Add endpoint.
- Paste your webhook URL into the Endpoint URL field. Replace yourdomain.com with your real domain, then click Add endpoint.
- On the endpoint summary page, click Reveal next to Signing secret and copy the value.
- Back in your WooCommerce settings, paste it into the Webhook Signing Secret field.
- Click Save changes.
To test the setup first, enable Test mode and use the Test Webhook Signing Secret field with a test-mode endpoint instead.
Configure payout settings
Choose how and when vendor commissions are paid out. These options are on the same Stripe Connect settings screen.
| Setting | Description | Default |
|---|---|---|
| Payout Method | Automatic pays vendors on Stripe’s default schedule. Manually means you trigger each payout yourself. Automatic Schedule lets you set a custom schedule. | Automatic |
| Automatic Schedule Payout | Applies when Payout Method is set to Automatic Schedule. Choose Daily, Weekly, Every 2 Weeks, or Monthly. | Not set |
| Weekly Day | The day of the week to pay out on the Weekly schedule. | Monday |
| Payout Monthly Date | The day of the month (1 to 31) to pay out on the Monthly schedule. | Not set |
Connecting vendor Stripe accounts
On the vendors’ page, they will have the option to link their Stripe accounts. This allows vendors to manage their payouts by connecting their personal Stripe account, ensuring they receive payments automatically from the marketplace once connected.
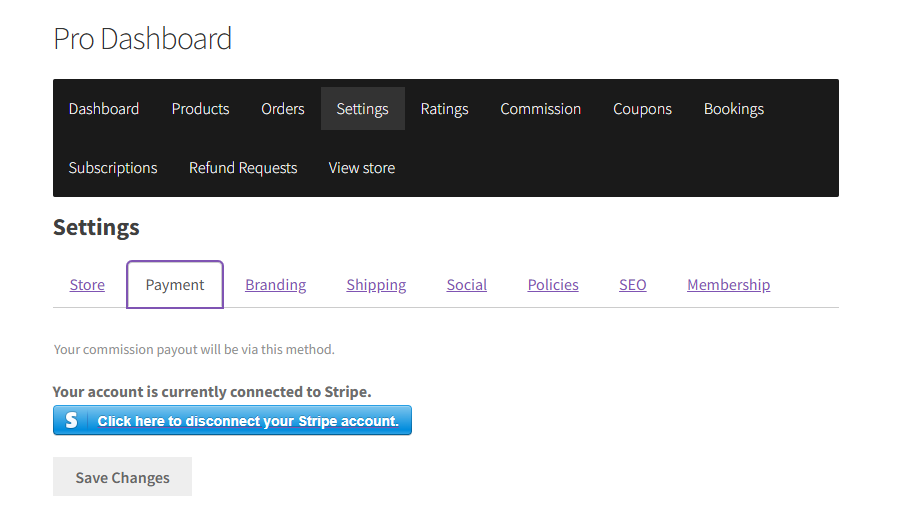
And that’s it, now it’ll depend on how you’ve set the payouts for your marketplace and what settings are enabled:
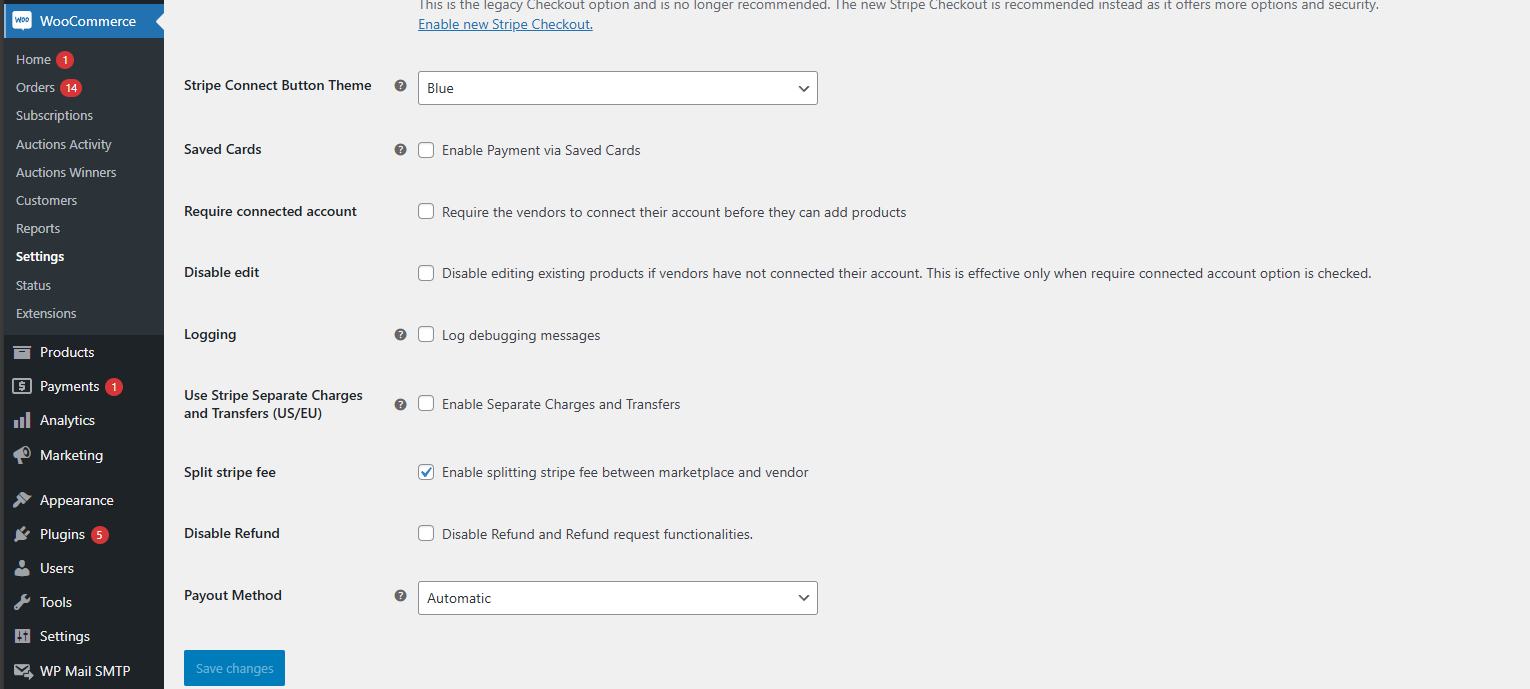
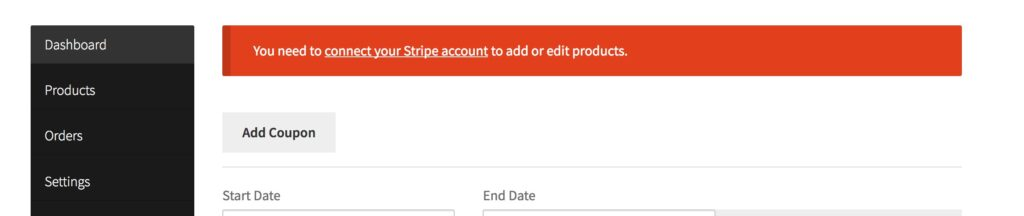
Require connected account – Tick this option if you want your vendors to first have a connected Stripe Connect Account to your marketplace before they are able to add any products.
Split Stripe fee – This allows the marketplace to split the stripe fees between the marketplace and the vendor. By default, direct charges all fees are charged to the vendor.
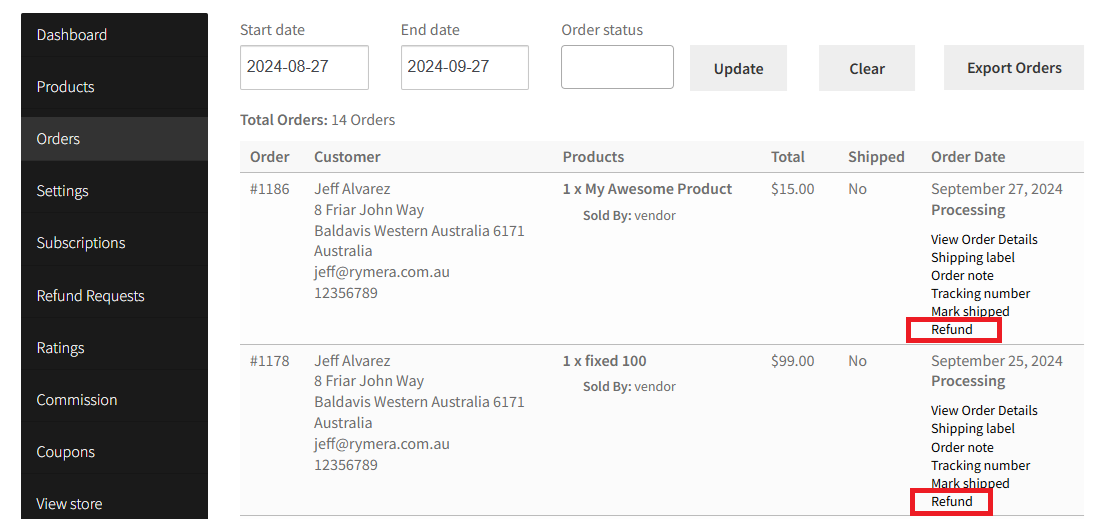
Disable Refund – This removes or stops the vendor from managing refunds
Stripe Separate Charges and Transfer (US/EU) – This simply means that the default charge method from Direct Charge to Separate Charges and Transfers: Create a charge | Stripe Documentation
On their dashboard, each vendor sees a Connect with Stripe button with the message “Your account is not yet connected with Stripe.” When they click it, Stripe walks them through a short authorisation flow and then returns them to your store with the account connected.
To stop vendors who have not connected from listing products, enable Require connected account in your Stripe Connect settings. You can also enable Disable edit to stop them editing existing products until they connect. Disable edit works only when Require connected account is on.
What’s next
With Stripe Connect set up, these guides help you run day-to-day payouts:
- How to set vendor payout schedules
- How Stripe processing fees work in WC Vendors
- How to enable cross-border payouts for international vendors
- How refund requests work on WC Vendors Stripe Connect
Frequently asked questions
Do my vendors need their own Stripe accounts?
Yes. Each vendor creates a Stripe account and connects it from their vendor dashboard. Stripe uses that account to send their commission payouts directly to them.
Can I test the setup before going live?
Yes. Enable Test mode in the Stripe Connect settings and enter your Stripe test API keys (the ones starting with pk_test_, sk_test_, and a test Client ID). Vendors can connect test accounts too. When you are ready, switch to your live keys and turn off test mode.
Need help?
If you have a question or run into any issues, we’re here to help.
- Premium users: Open a support ticket
- Free users: Visit our community forum