
Every marketplace has customers who keep coming back to the same vendor. WC Vendors Engage gives those customers a way to make that relationship official. It also gives vendors a tool to reward it. This guide covers what’s included, how each side of the experience works, and where to go next.
What you’ll need
- WooCommerce and WC Vendors (free or Pro) installed and configured
- WC Vendors Engage installed and active
What customers get
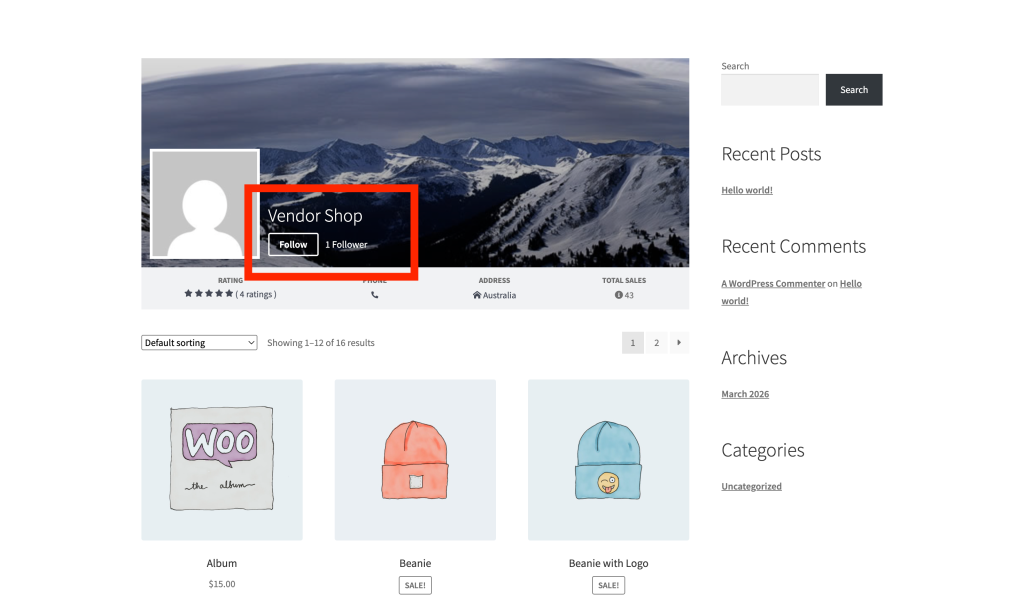
Follow button
A Follow / Following button appears on vendor store pages and inside vendor list shortcodes. Customers click it to start or stop following a store. The button also shows the vendor’s total follower count. The store-page button and the vendor-list button can be enabled independently from the admin settings.
Following page
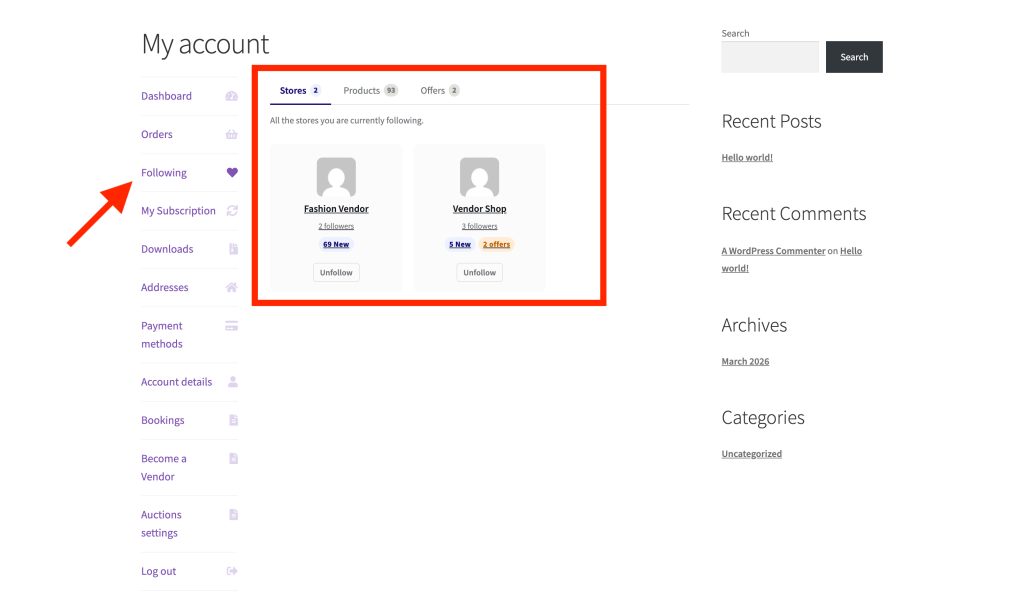
A Following tab appears in the customer’s My Account area. The page is split into three tabs: Stores, Products, and Offers. The Stores tab shows a card for each followed vendor, with the store logo, name, follower count, and how many new products that vendor has added recently. The Products tab lists recent products from those stores, and the Offers tab shows available discounts from each store they follow when Follower Offers is enabled. This Offers tab only appears here when Offers Placement is set to “Tab within Following” (the default). If it’s set to “Top-level My Account menu item” instead, Offers shows as its own separate My Account menu item.
Follower Offers
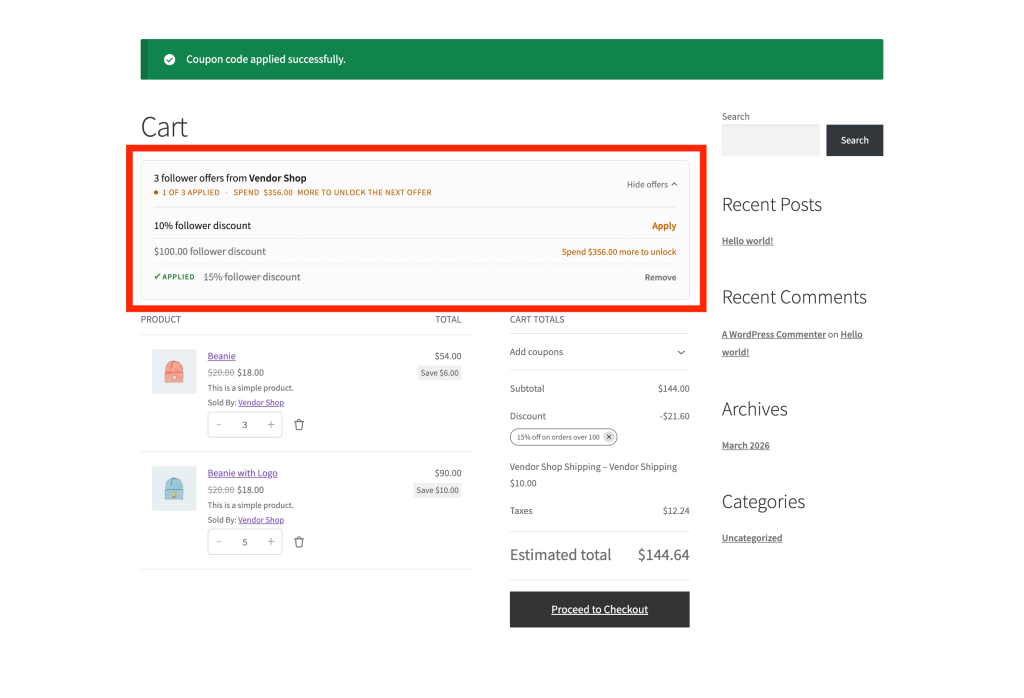
When a vendor has an active Follower Offer, eligible followers see a discount banner at the cart and checkout pages. Eligibility is automatic because they’re following that store, so there is no code to search for. With Auto-apply Follower Offers on (the default), the best eligible offer per vendor applies automatically without requiring the customer to click anything. They can still remove it or manually apply a different eligible offer by clicking Apply on that offer instead.
The offers can also be gated by a minimum spend. Until the vendor subtotal reaches that amount, the banner shows a message asking the customer to spend a bit more to unlock the discount, instead of applying it.
What vendors get
Engage tab
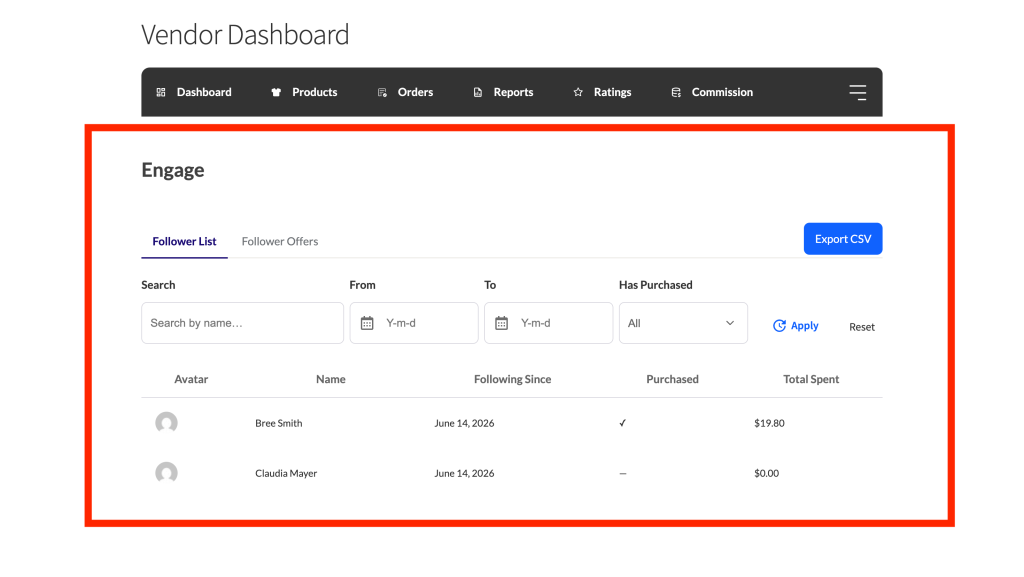
WC Vendors Engage adds an Engage tab to the vendor dashboard. Inside the tab, vendors see two sections.
The Follower List is a paginated table of every customer following that store. Vendors can search and filter the list, and export it as a CSV.
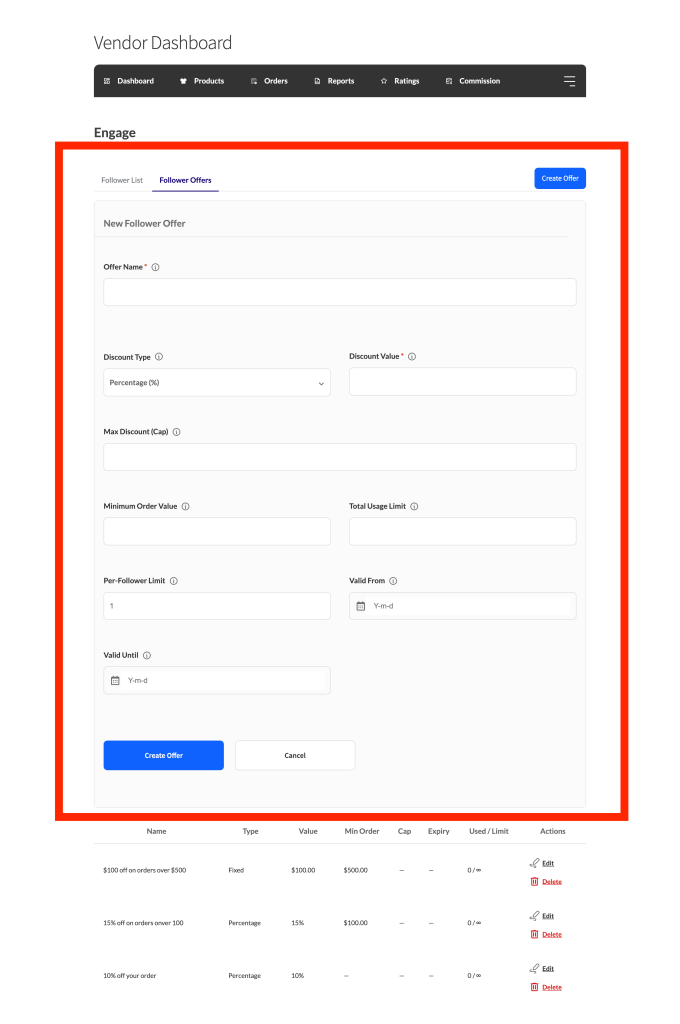
The Follower Offers section is where vendors create and manage follower-only coupons. Vendors set the discount type, amount, and expiry. The plugin handles eligibility automatically, so only logged-in followers qualify. This section only appears when Follower Offers is enabled in the admin settings.
Where to configure it
All features are configured from WC Vendors → Settings → Engage. The tab has four sections.
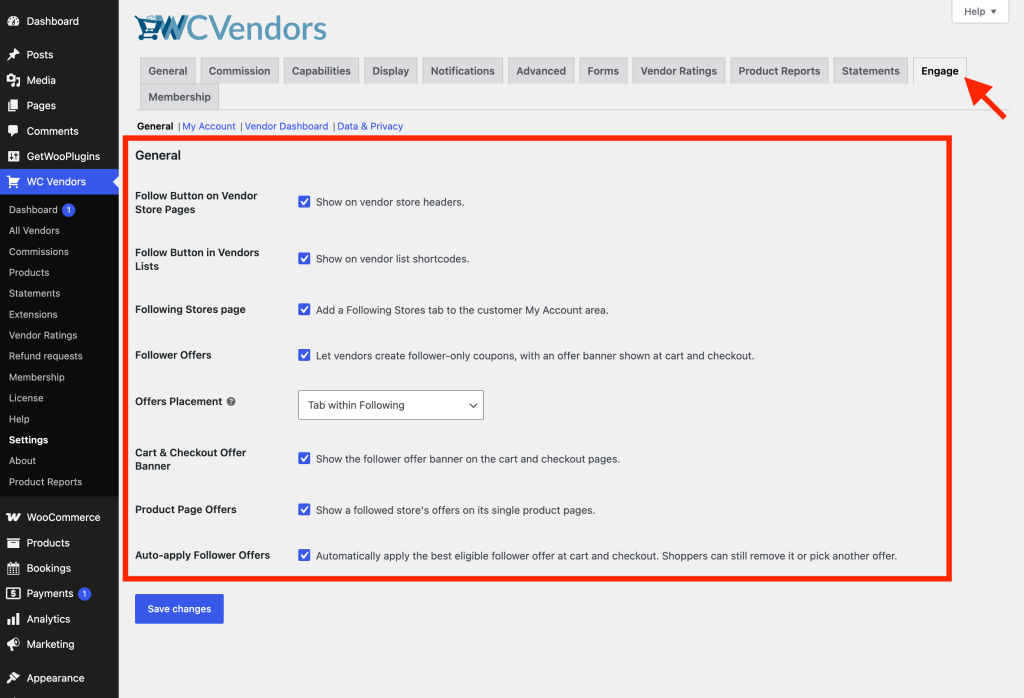
General: toggles and options for each main feature: Follow Button on Vendor Store Pages, Follow Button in Vendors Lists, Following Stores page, Follower Offers, Cart & Checkout Offer Banner, Product Page Offers, and Auto-apply Follower Offers. All feature toggles are on by default. There’s also an Offers Placement dropdown, which controls whether Offers shows as a tab within Following (the default) or as its own top-level My Account menu item.
My Account: configures what’s highlighted in the Following page. You can set the New Product Age (days) field, which controls how many days a product counts as “new” (default: 30). There’s also Products Per Page option that limit how many products appear per page in the feed (default: 12), and the Offers Per Page option that set how many offers appear per page in the Offers tab (default: 12).
Vendor Dashboard: lets you choose how many followers appear per page in the vendor’s Follower List via the Followers Per Page option (default: 20).
Data & Privacy: includes the Allow Follower CSV Export option to let vendors export their follower list to CSV, the Show Total Spent to Vendors option to show each follower’s total spend to vendors, and the Delete Data on Uninstall option to remove all plugin data when you uninstall. All three are off by default.
What’s next
Once WC Vendors Engage is active, here’s where to go next:
- Activate your WC Vendors Engage license
- WC Vendors Engage admin settings
- How to create a Follower Offer as a vendor
- How customers follow stores and access Follower Offers
Frequently asked questions
Do customers need to be logged in to follow a vendor?
Yes. Following is tied to a customer’s WooCommerce account. Guests can see the Follow button but need to be logged in to use it.
Do I need WC Vendors Pro, or does the free version work?
The free version of WC Vendors is all that’s required. WC Vendors Pro isn’t needed to run WC Vendors Engage.
If I turn off Follower Offers in settings, do existing vendor offers get deleted?
No. Disabling the setting hides the feature from the frontend and the vendor dashboard, but the underlying coupon data stays intact. Re-enabling Follower Offers restores full access.
Need help?
If you have a question or run into any issues, we’re here to help.
- Premium users: Open a support ticket
- Free users: Visit our community forum