
Want to run a discount on just your own products in the marketplace? With WC Vendors Pro, vendors can create and manage their own WooCommerce coupons right from their dashboard, without asking the marketplace admin. Here’s how to create a coupon, what each option controls, and how the “Apply to all my products” setting keeps itself current as your catalog changes.
Before you begin
- WC Vendors Pro must be active. Coupon management is a Pro feature; it isn’t available with the free WC Vendors plugin alone.
- Coupons must be turned on for the whole store. Your marketplace admin does this in WooCommerce > Settings > General by checking Enable coupons. If it’s off, the Coupons tab doesn’t appear in your vendor dashboard.
- Your marketplace admin must not have disabled coupon management for vendors (see “Turning coupon management on or off for vendors” below).
- You’ll want at least one product in your store first. There’s little point creating a coupon before you have something to apply it to, and the quick-add shortcut on your dashboard home won’t appear until you do. If you haven’t added one yet, see Vendor Product Management: How To Add & Manage Products In WC Vendors.
Open the Coupons tab
Log in to your vendor dashboard and click Coupons in the dashboard menu. If you don’t have any products yet, you’ll see a message telling you to add one first instead of the coupon list.
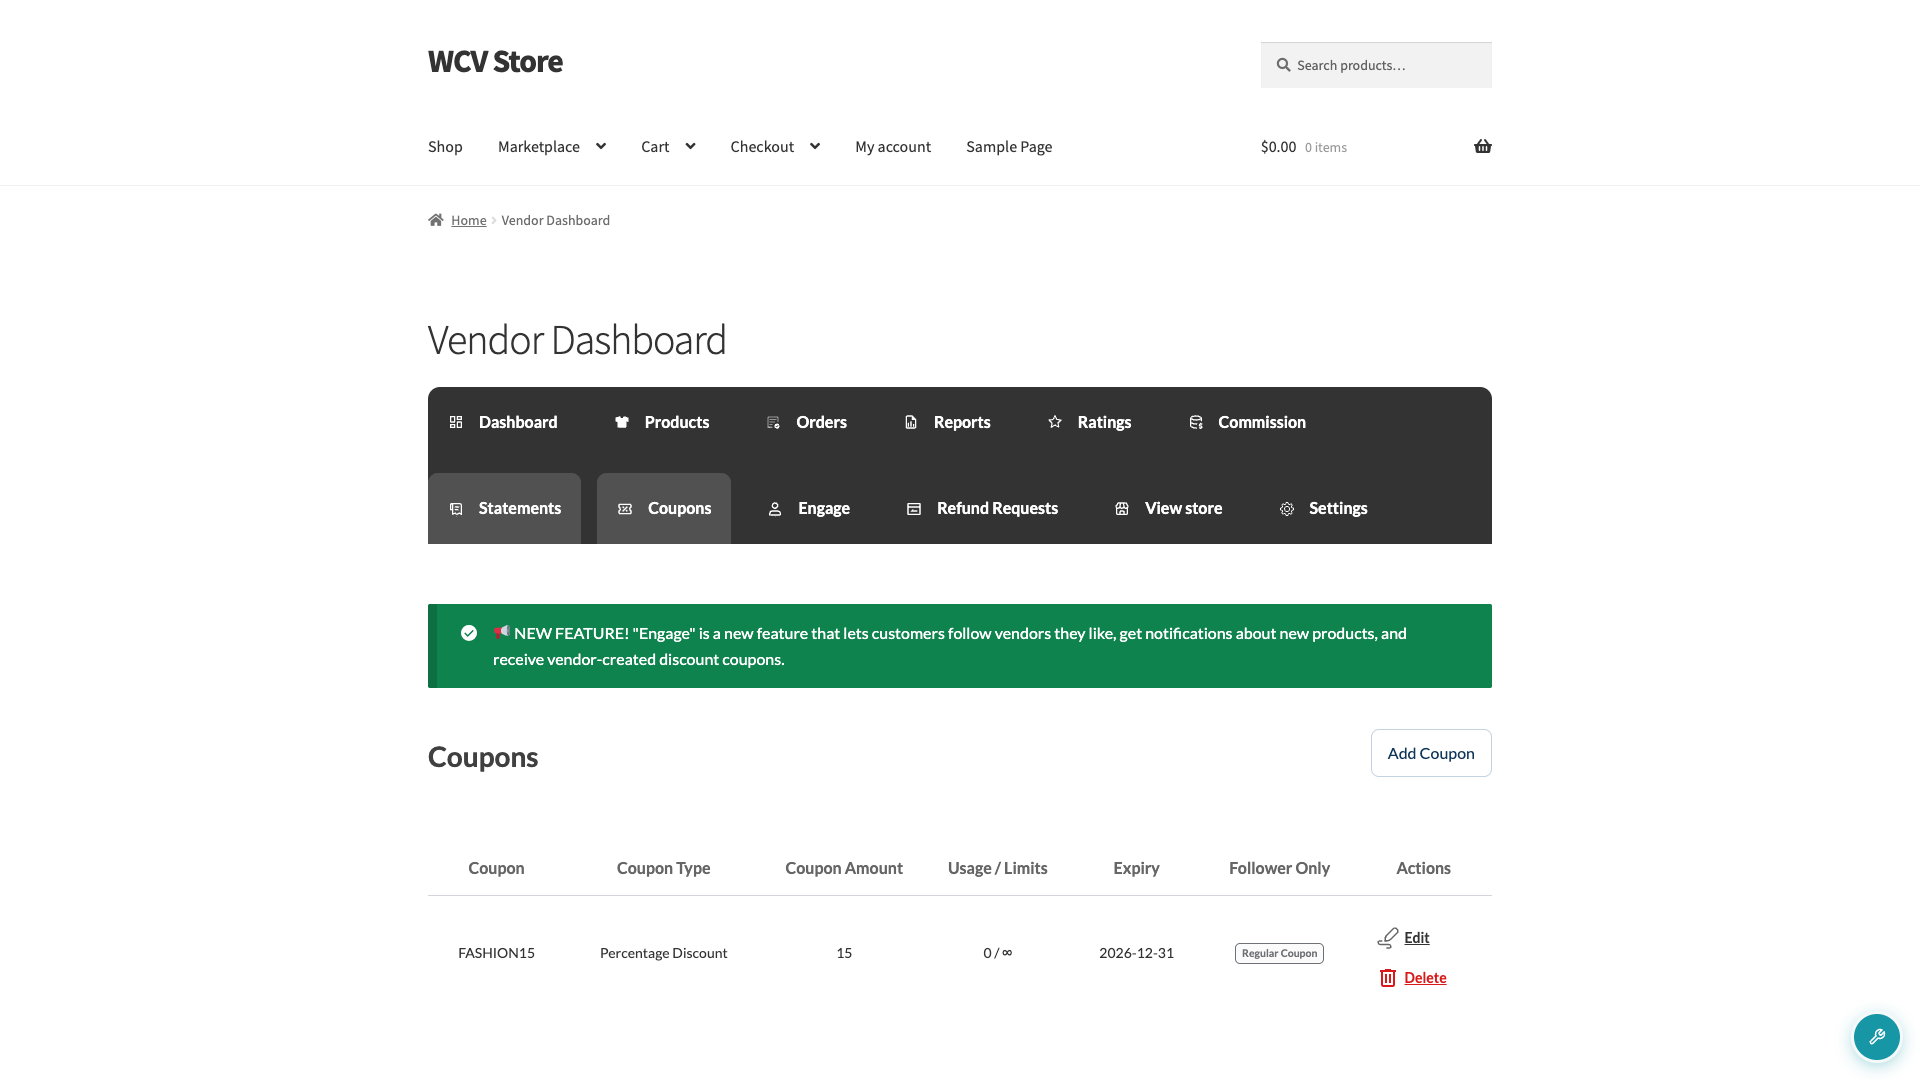
If your marketplace uses WC Vendors Engage, the list also has a Follower Only column. It shows Follower Only or Regular Coupon for each coupon. To create coupons that only your followers can use, see How to create follower offers in your vendor dashboard.
Create a coupon
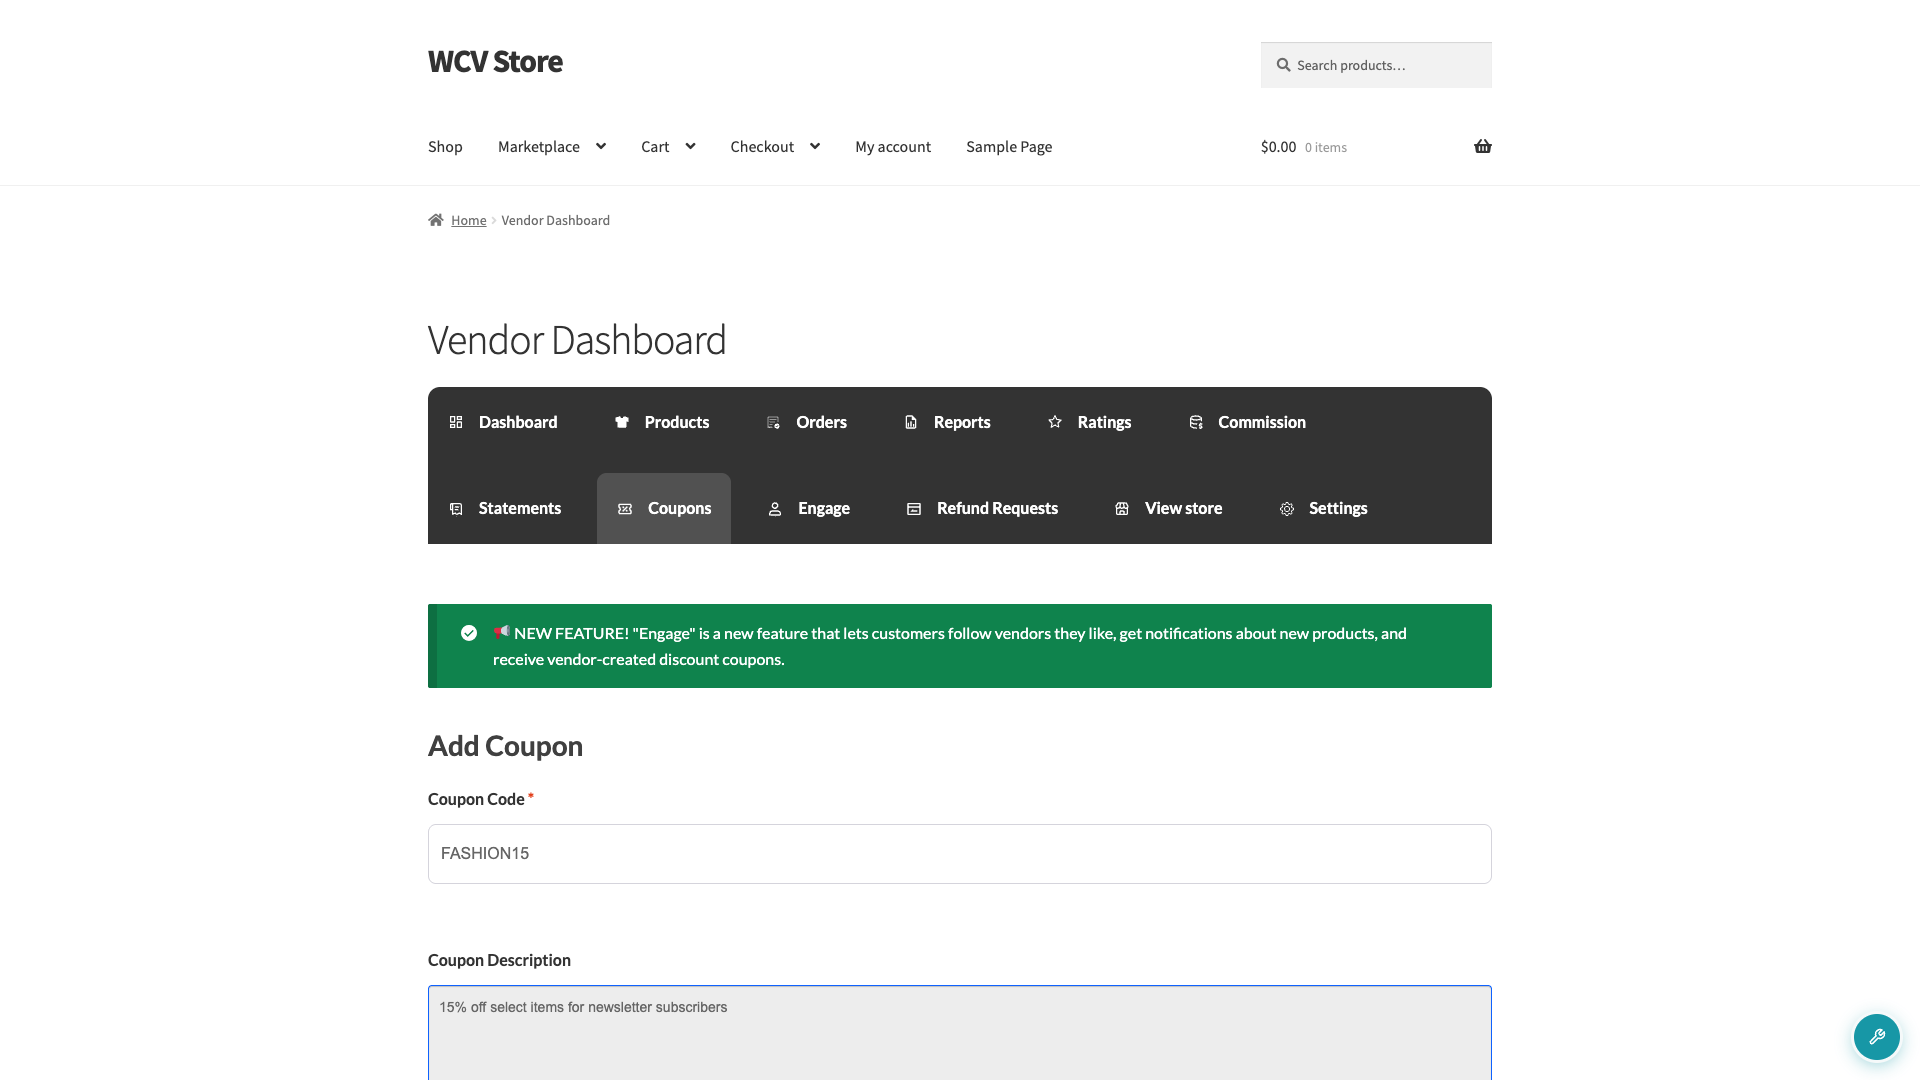
- Click Add Coupon at the top of the Coupons tab (or the Add coupon quick link on your dashboard home).
- Enter a Coupon code. This is what the customer types at checkout.
- Optionally add a Coupon description for your own reference.
Set the discount
On the General tab:
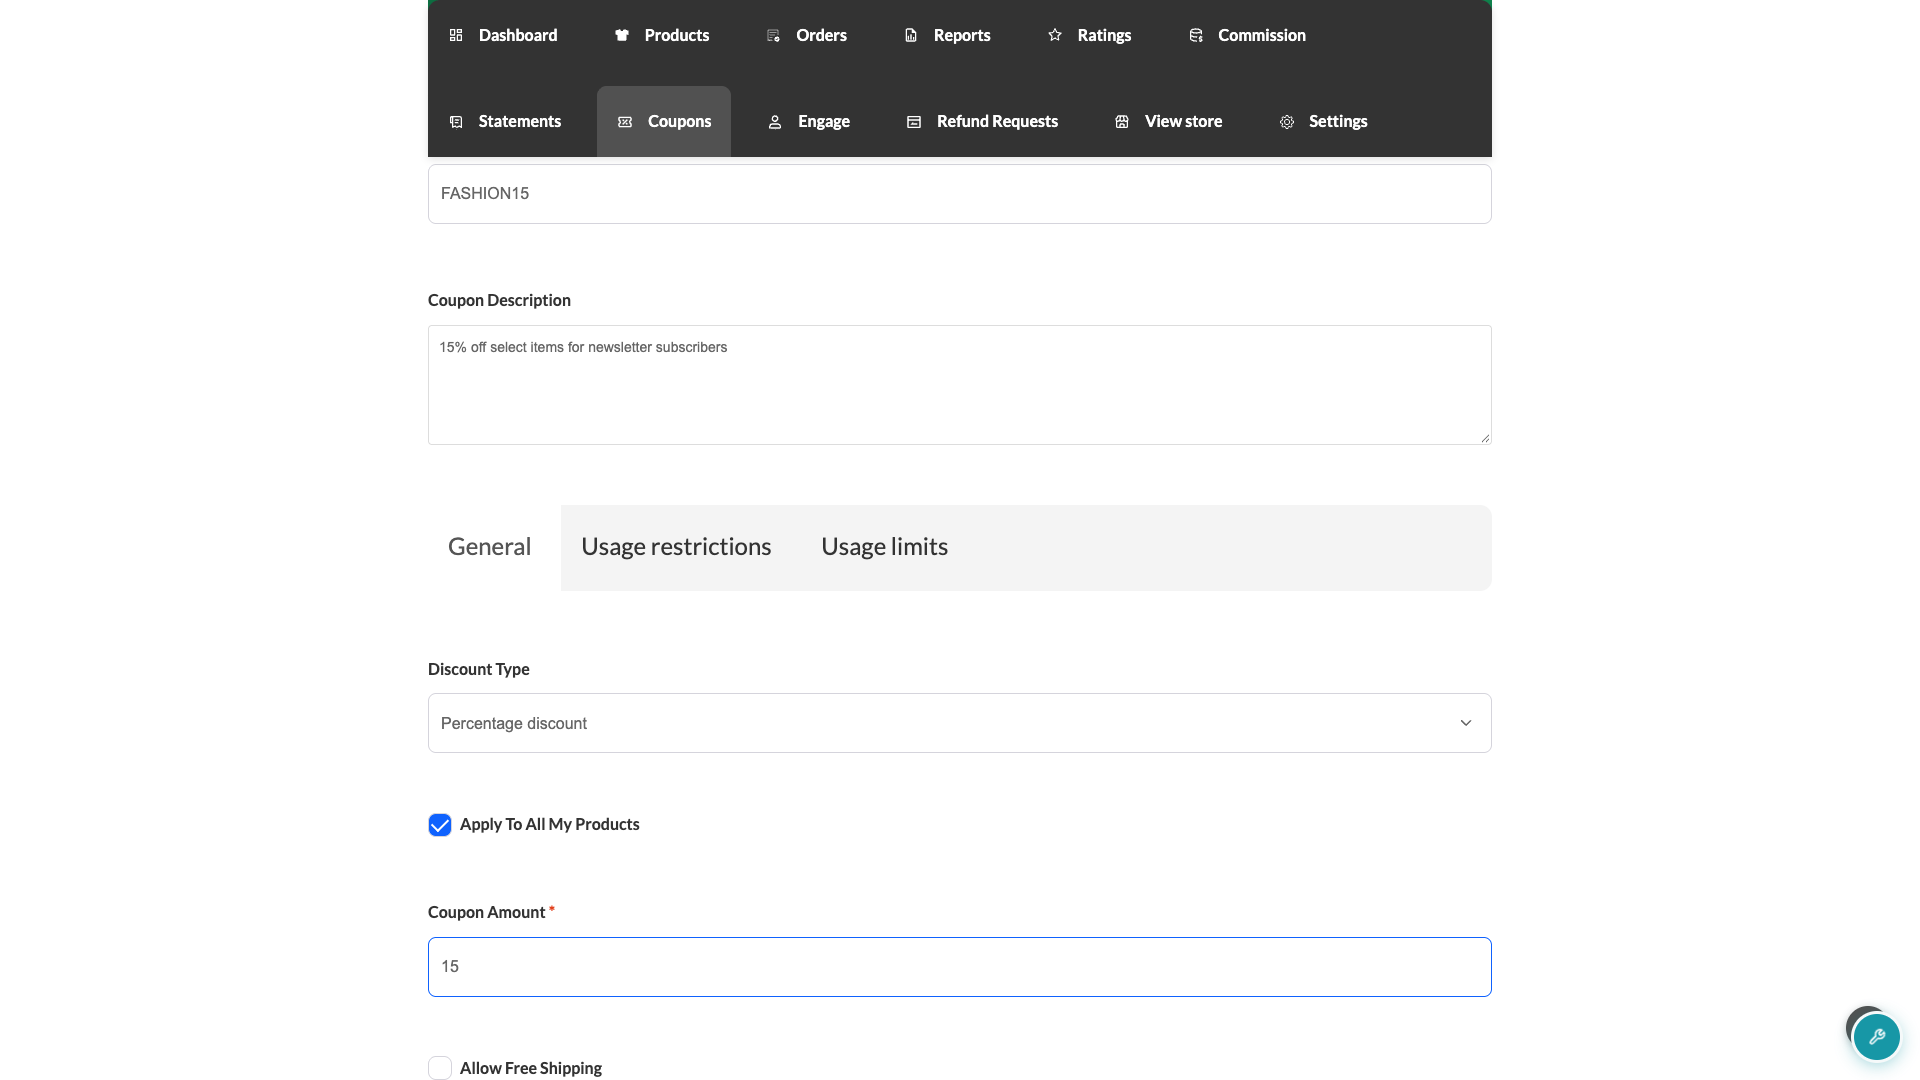
- Choose a Discount type. Fixed discount takes a set amount off each eligible product in the cart, for every unit. Percentage discount takes a percentage off each eligible product.
- Enter the Coupon amount to match.
For example, a Fixed discount coupon of 5.00 takes 5.00 off each eligible item. If a customer buys 3 of them, they get 15.00 off in total, not 5.00.
Check Apply to all my products if you want the coupon to work on everything you sell. Leave it unchecked if you’d rather pick specific products yourself, which you’ll do in the next tab. If your marketplace admin has vendor shipping enabled, you’ll also see an Allow free shipping checkbox here. Set a Coupon expiry date if the coupon shouldn’t run indefinitely.
Restrict how the coupon can be used
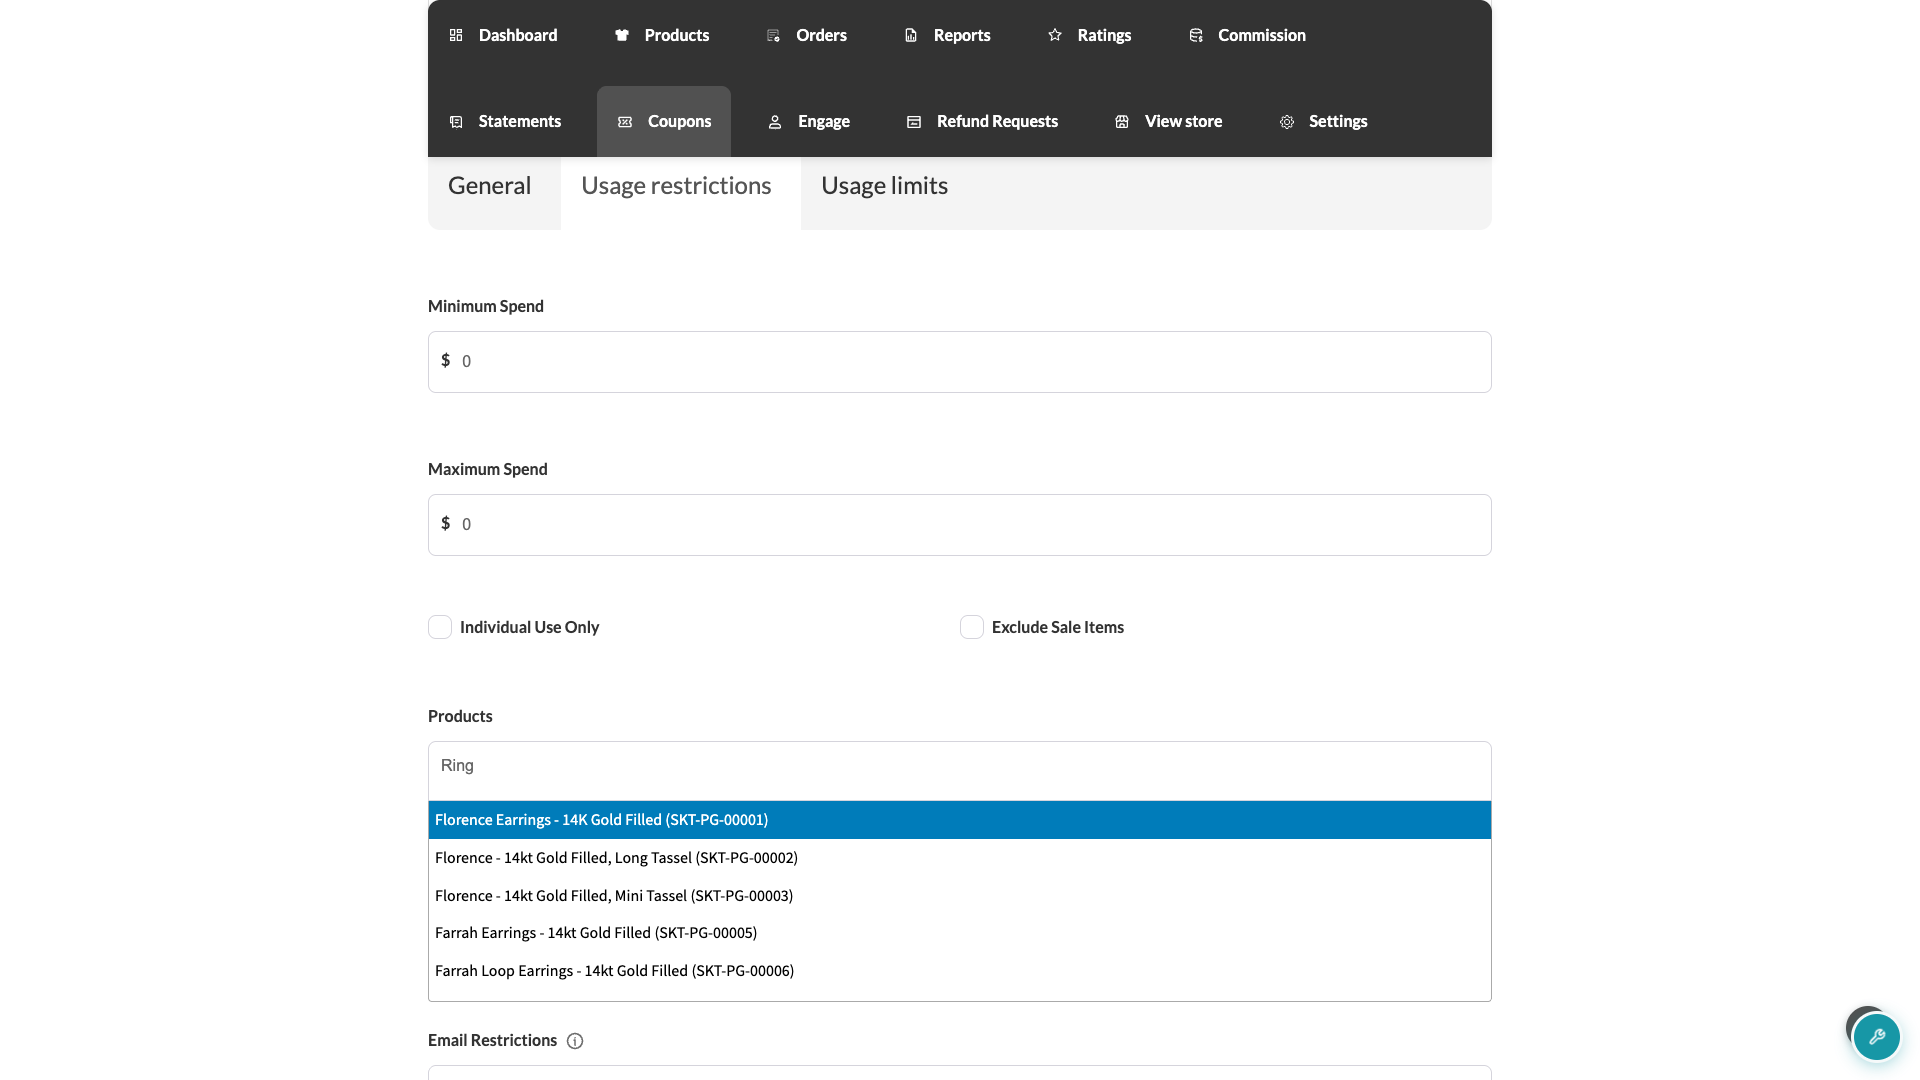
Switch to the Usage restrictions tab to fine-tune when the coupon applies. Set a Minimum spend or Maximum spend to require a certain cart total. Check Individual use only to stop customers from combining it with other coupons, or Exclude sale items to keep it from applying to products already on sale.
If you left Apply to all my products unchecked, use the Products field to search for and select which of your products the coupon applies to. If you leave Apply to all my products unchecked and don’t select any products, WC Vendors applies the coupon to all your products and treats it as an “apply to all” coupon from then on. You can also use Exclude products to rule specific products out, and Email Restrictions to limit the coupon to specific customer email addresses.
Set usage limits
On the Usage limits tab, set a Usage limit per coupon to cap how many times customers can use it in total, a Usage limit to x items to cap how many products in a single order it discounts, and a Usage limit per user to cap how many times one customer can use it. Leave any of these blank for unlimited use.
Save the coupon
Click Save Changes. Your coupon is active as soon as it saves; there’s no separate publish step.
Keeping “Apply to all my products” up to date
A coupon with Apply to all my products checked isn’t a one-time snapshot of your catalog. Every time you save a product from your dashboard, whether you’re adding a new one or editing an existing one, WC Vendors refreshes the product list on any of your “apply to all” coupons to match your current catalog. That means those coupons automatically cover the new product the next time you save any product, without you having to edit the coupon yourself.
Edit or delete a coupon
From the Coupons tab, click Edit next to any coupon to change its settings, or Delete to remove it. Deleting a coupon moves it to the trash rather than deleting it permanently, unless your marketplace admin has turned on Coupon Delete in WC Vendors > Settings > Capabilities > Trash. If you need a coupon back, ask your marketplace admin to check the Coupons trash in wp-admin.
Turning coupon management on or off for vendors
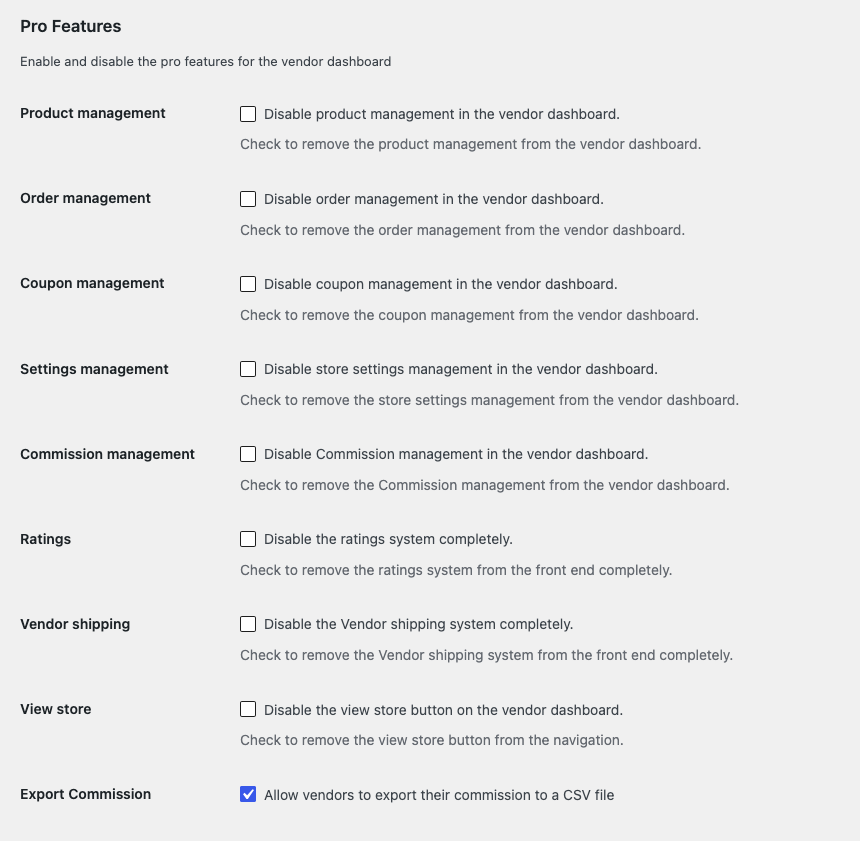
Marketplace admins control whether vendors can manage coupons at all. In WordPress Dashboard > WC Vendors > Settings > Capabilities, check Coupon management to hide the Coupons tab from every vendor’s dashboard. Leave it unchecked (the default) to keep coupon management available.
Troubleshooting
I don’t see a Coupons tab in my dashboard
This usually means one of two things: your marketplace admin has disabled coupon management for vendors, or your marketplace has turned off Enable coupons in WooCommerce > Settings > General. Having no products yet doesn’t hide the tab. You’ll still see Coupons in your dashboard menu, just with a message telling you to add a product first. Check with your marketplace admin if you believe coupons should be available to you.
WC Vendors says my coupon code already exists
Coupon codes are unique across the entire marketplace, not just your own products. If another vendor, or the marketplace admin, is already using that code, you’ll need to pick a different one.
A product I just added isn’t covered by my “apply to all” coupon yet
The product list on an “apply to all my products” coupon only refreshes when you save a product. If you added the product through an import or another route that didn’t trigger a normal save, edit and re-save any one of your products to bring the coupon’s product list up to date.
Frequently asked questions
What discount types can I use for a vendor coupon?
Fixed discount and percentage discount. A fixed discount takes the amount off each eligible product, for every unit in the cart, so 5.00 off on 3 items is 15.00 off in total. There’s no store-wide cart discount option, since a vendor coupon can only ever apply to your own products.
Does minimum or maximum spend look at the whole order or just my products?
Just your own products. WC Vendors checks the spend requirement against the subtotal of your products in the customer’s cart, not their full order total.
What happens when I delete a coupon?
Your marketplace moves it to the trash instead of deleting it right away, unless your admin has turned on Coupon Delete in WC Vendors > Settings > Capabilities > Trash. Ask your admin if you need one restored.
Need help?
If you have a question or run into any issues, we’re here to help.
- Premium users: Open a support ticket
- Free users: Visit our community forum